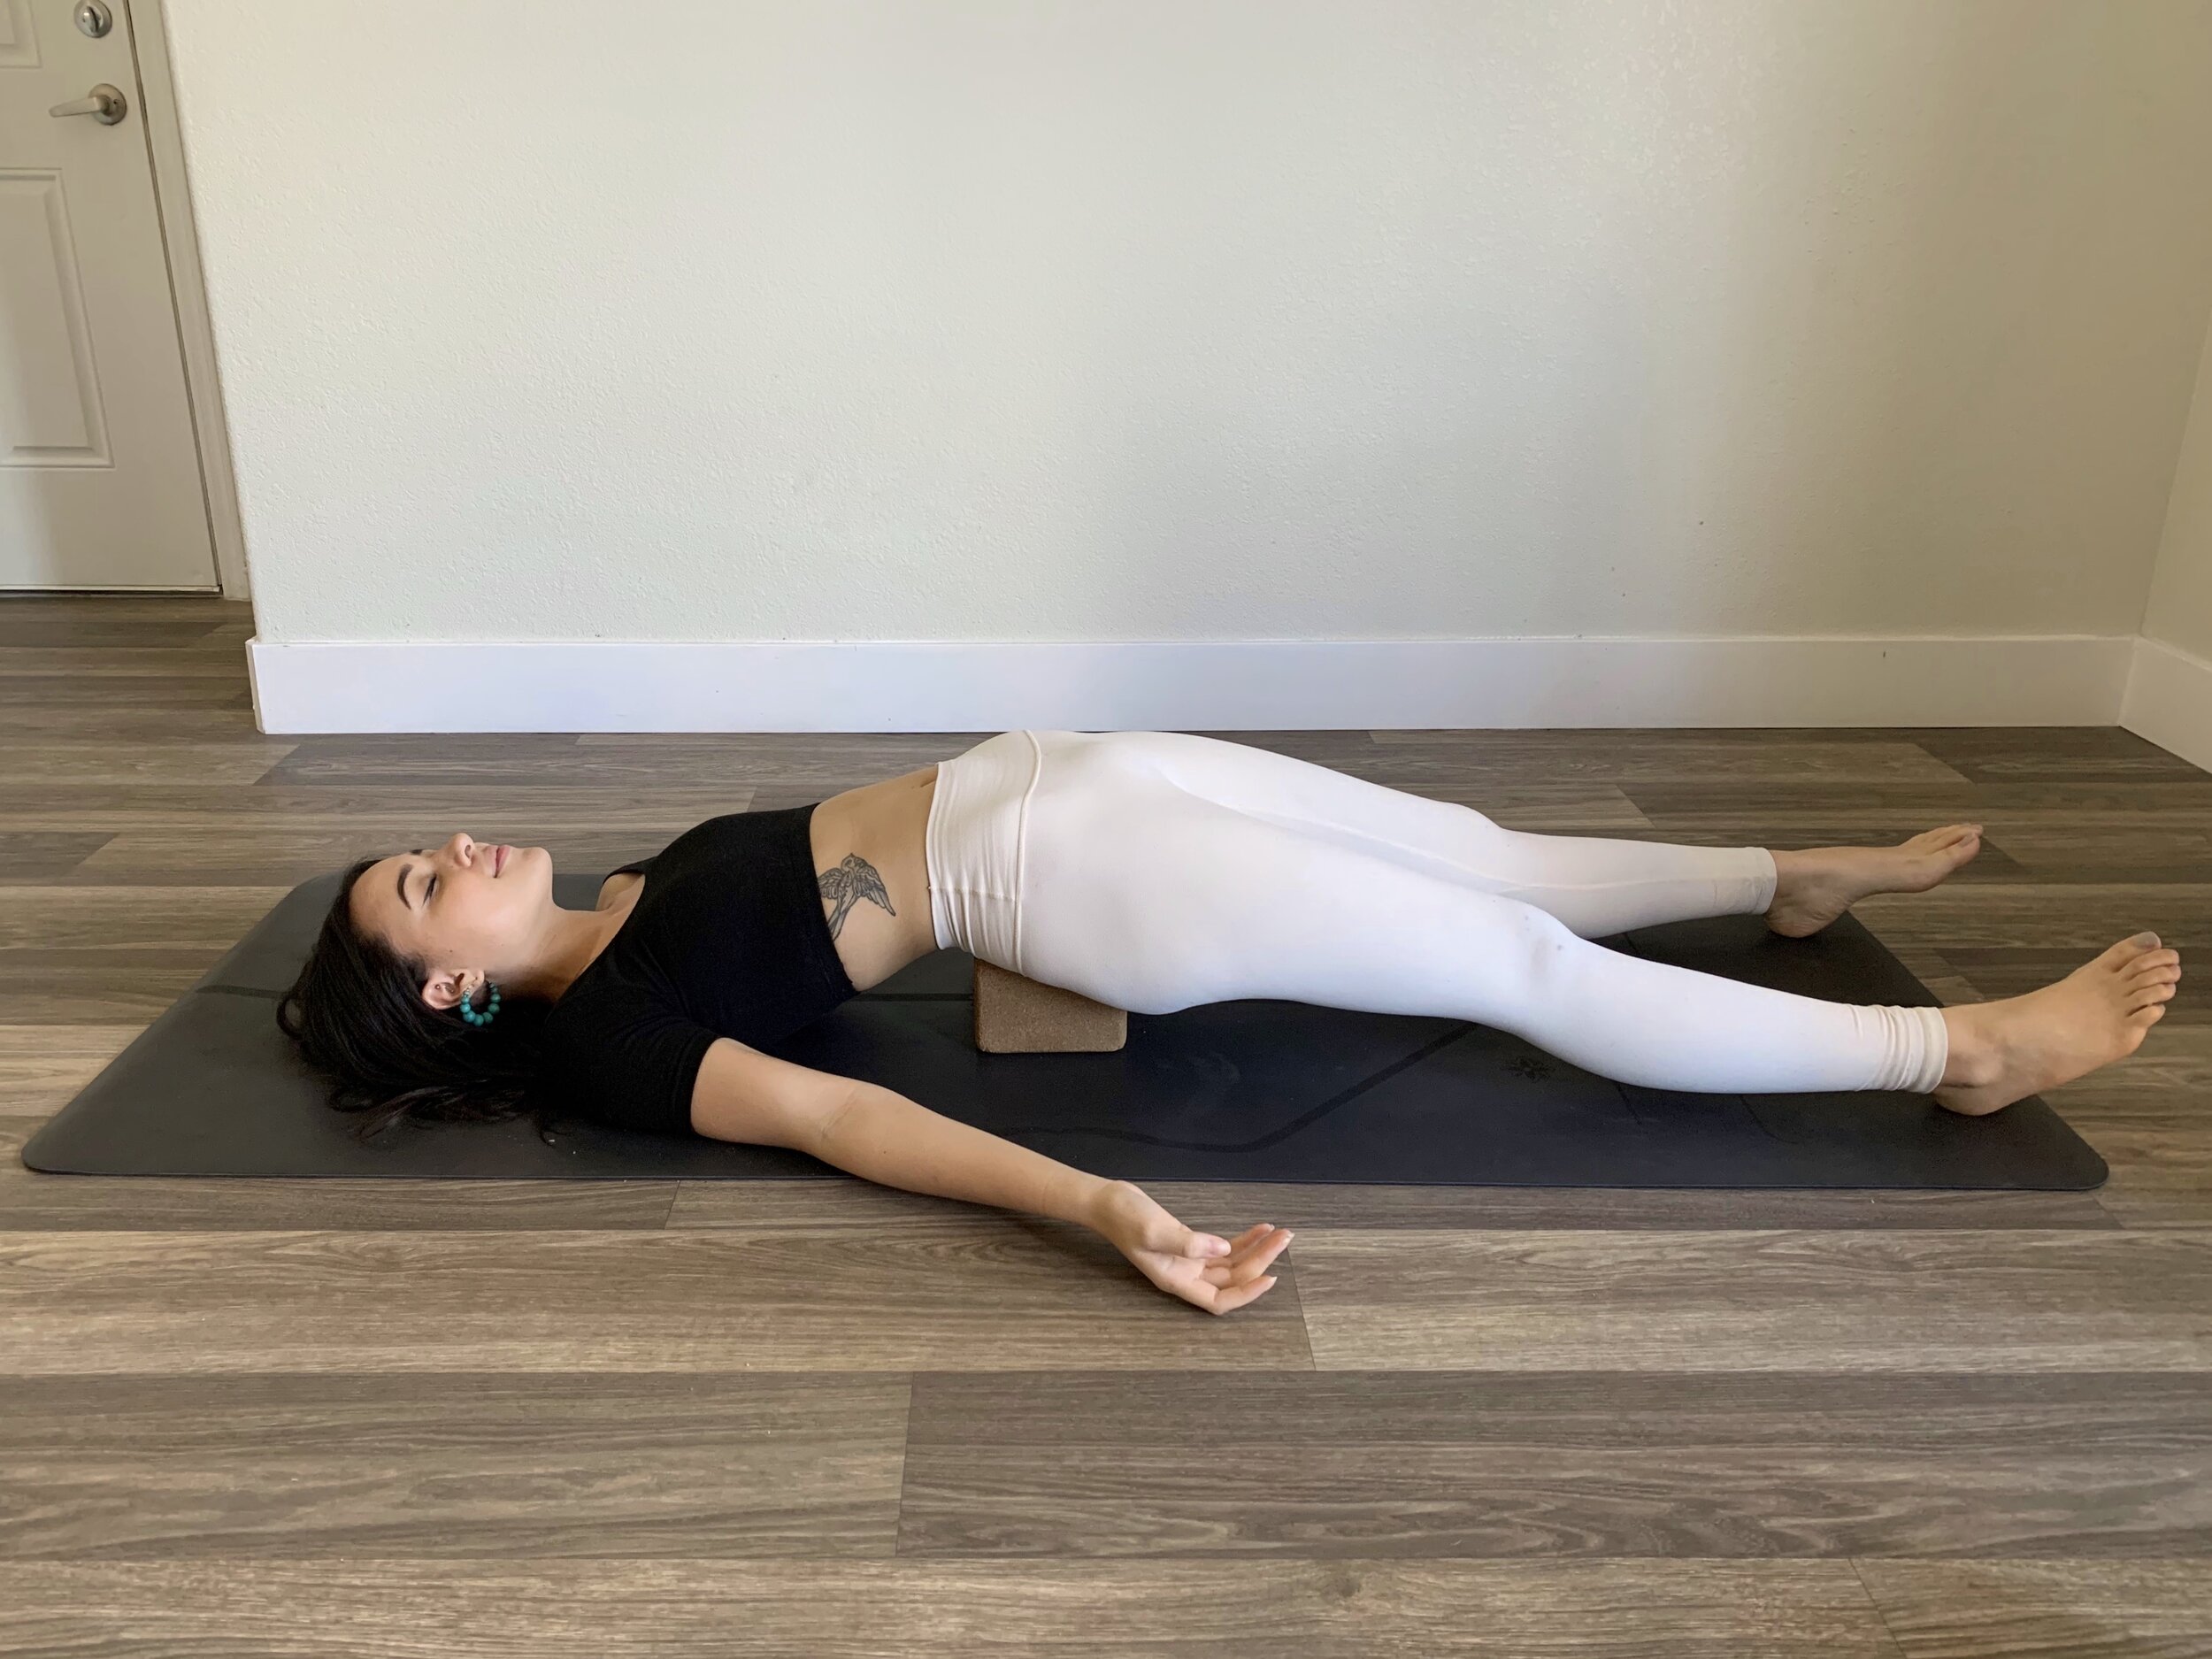
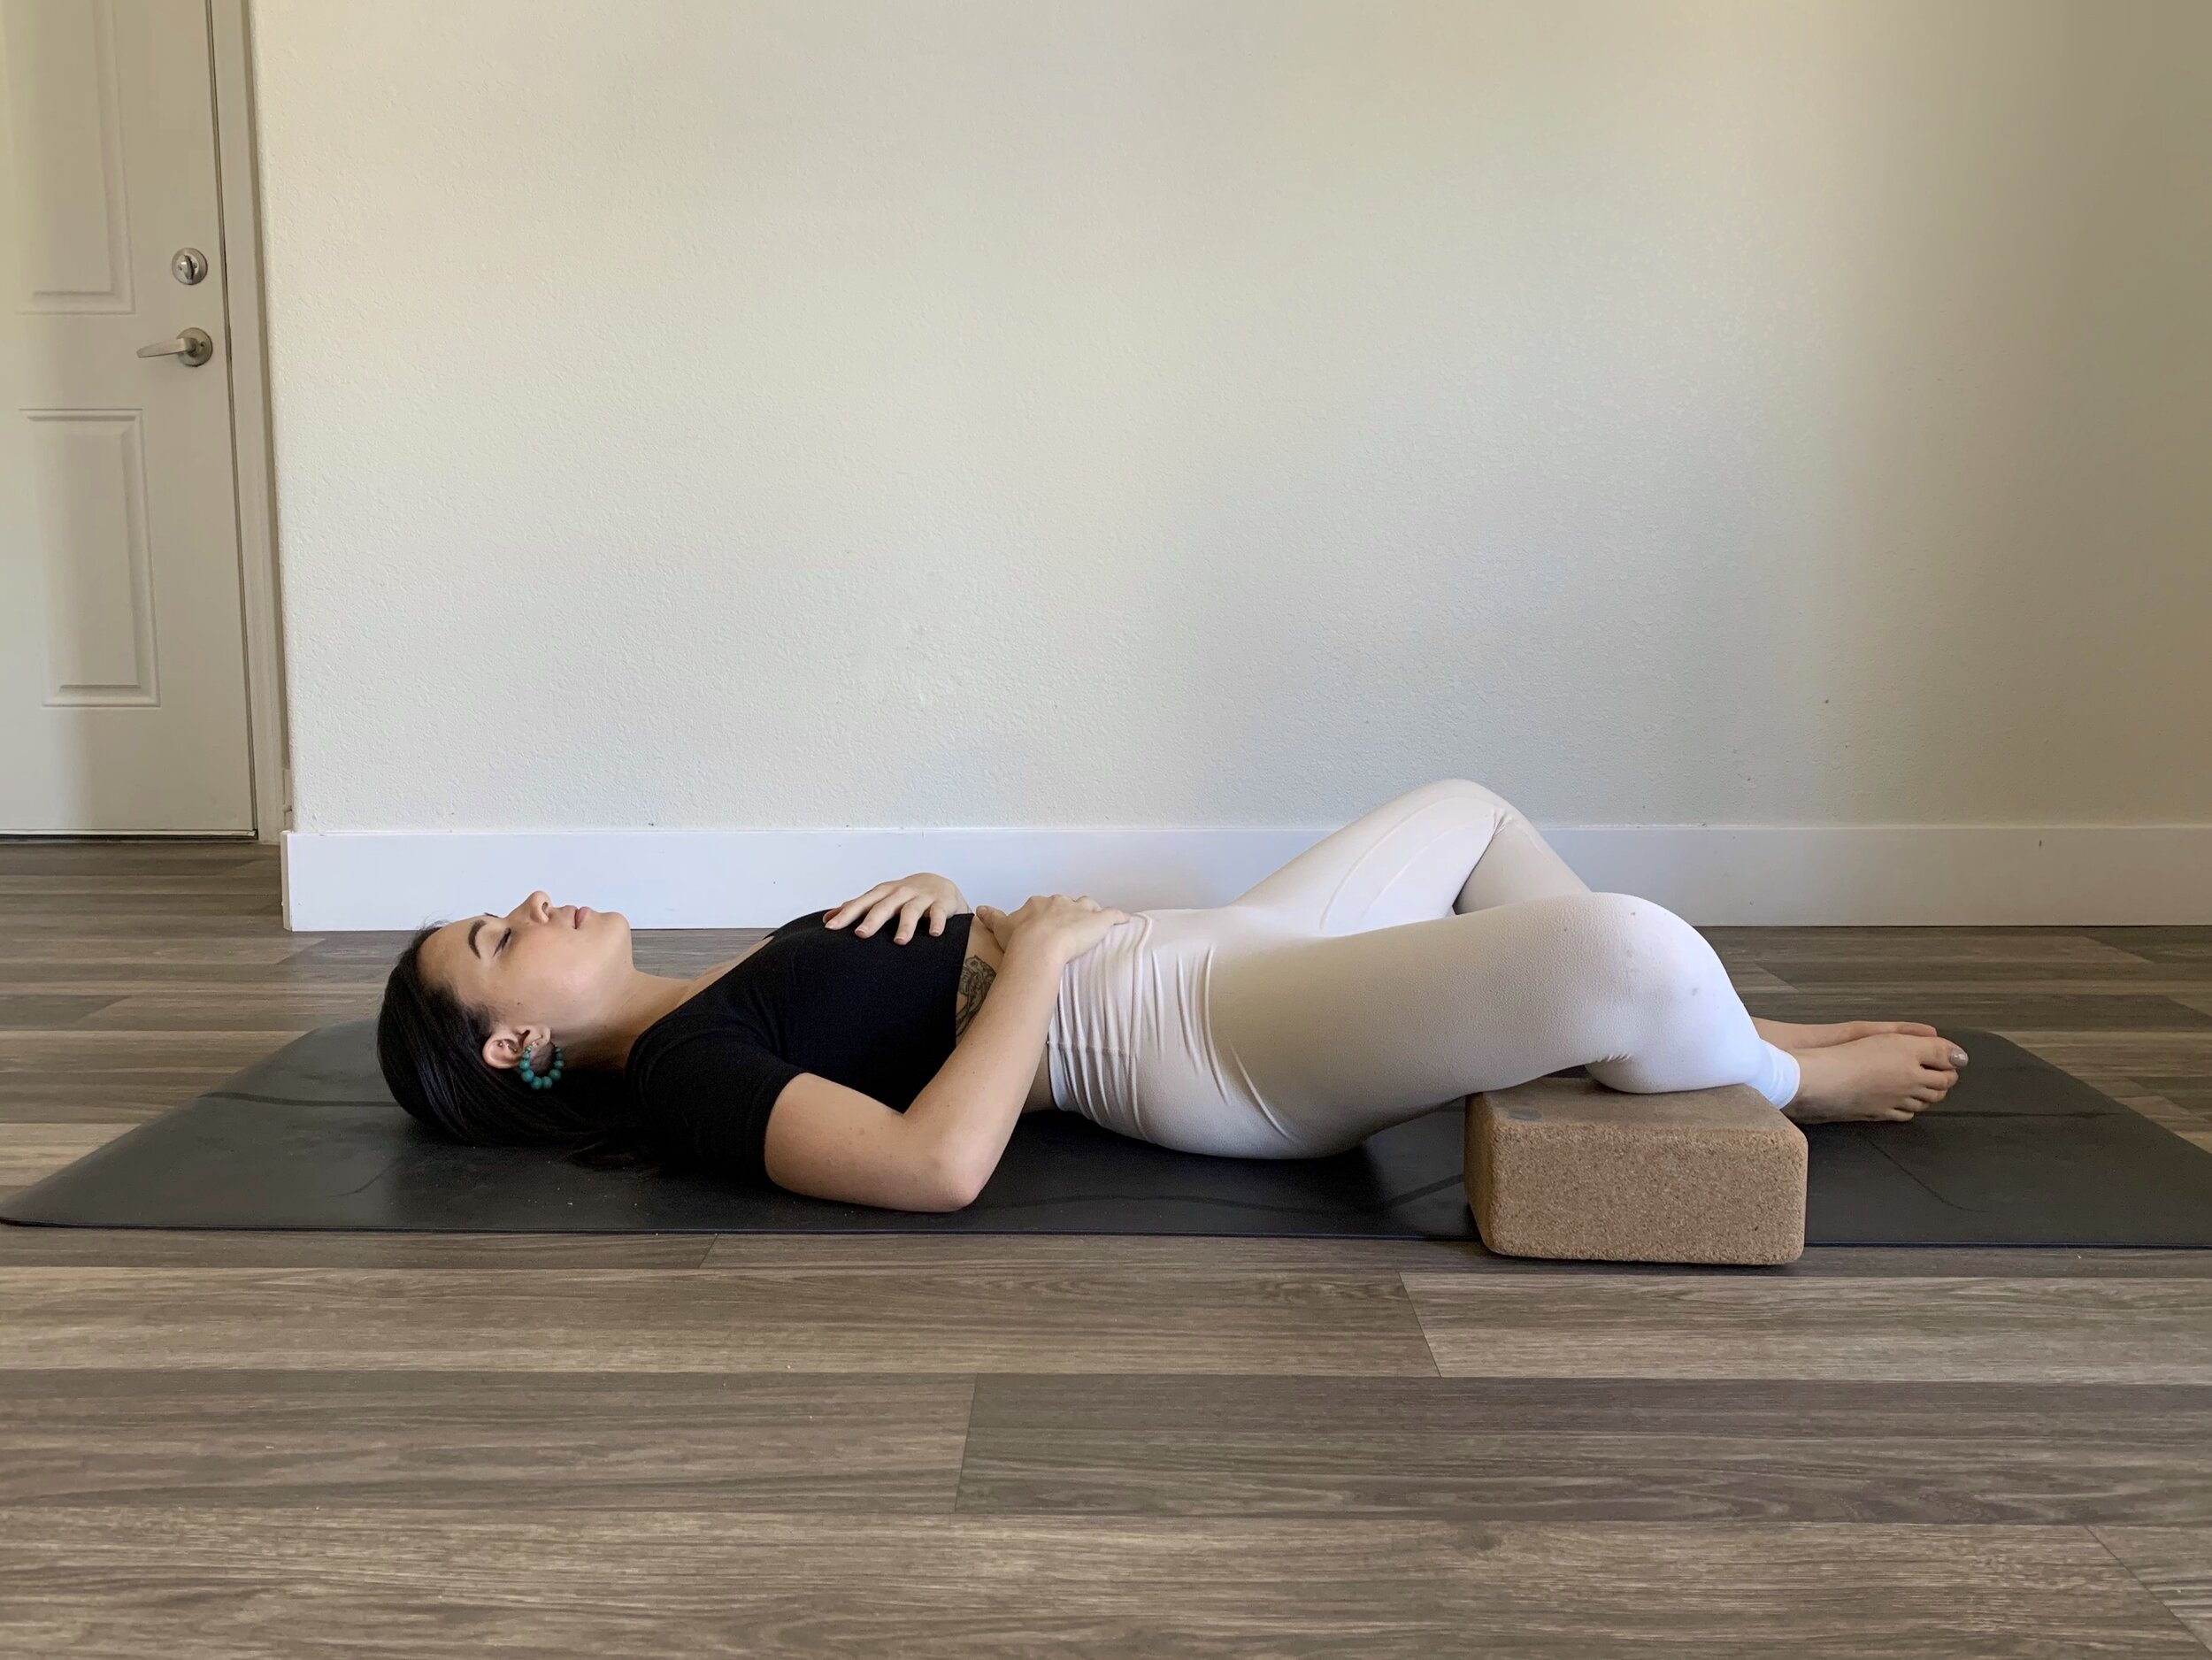
Hip-Focused Yoga Sequence

Before I became a full-time yoga instructor, I worked at a chiropractic clinic as a massage therapist. I went to a bodywork school and studied neuromuscular therapy, structural integration and myofascial release. Although I was only in the field for less than two years, I’m grateful for the knowledge that I learned because I’m still able to weave it into my yoga teachings today!

Anatomy and the technical exploration of asana is something I’m really passionate about. For instance, we often talk about poses that open or stretch the hips in yoga, but what does that really mean? The hips are a complicated area, anatomically speaking. Generally, when we talk about opening the hips we're referring to the muscles around the pelvis, legs, lower spine and sacrum. These include big muscle groups like the hip flexors, hamstrings, glutes, adductors (inner thighs) and abductors (outer thighs), as well as many smaller, deeper muscles including the piriformis and the psoas.

Many people find that their "hips" are tight due to spending a lot of time sitting, both at work and in cars. This tightness, which can cause back pain and sciatica and affect mobility, is really in all the muscles surrounding the pelvis. People think hip openers are limited to poses like pigeon, where the femur is externally rotated, but something like eagle, where the leg is internally rotated is also a hip stretch.

So what does this mean? Essentially, almost any yoga pose can be thought of as a hip opener since we are using the muscles around the hips in many different ways.

The sequence below offers a variety of poses to improve hip flexibility and mobility. We’ll take a look at three stretches for each compartment of your hip (Hip Flexors, Adductors, Hamstrings, External Rotators, Abductors). This is my go-to hip routine that is safe to practice several times a week. I love the feeling of space and strength it gives me. I hope it helps you feel good in your body, too!

15 Hip Opening Yoga Poses

Hip Compartment #1: Hip Flexors

IMG_0650.jpg

Pose 1: Anjaneyasana (active)

Keep your back thigh vertical in this low lunge. Why? Because keeping your back thigh vertical and stacking your pelvis and spine directly over your thigh helps stretch your quadriceps and hip flexors. Keep the core engaged and legs squeezing in towards each other.

IMG_0660.jpg

Pose 2: Anjaneyasana (passive)
Lower your hips forward and down to isolate and stretch your hip flexors, especially your rectus femoris. The pelvis is anteriorly tilted to provide lumbar and hip extension.

Pose 3: Anjaneyasana with side bend
Leaning into the side bend from Anjaneyasana helps stretch your obliques and quadratus lumborum along with your hip flexors. Use a block for added support.

Hip Compartment #2: Adductors

Pose 1: Malasana
Malasana provides a thorough, inner leg stretch while also flexing the knees and hips deeply.

IMG_0721.jpg

Pose 2: Utthan Pristhasana
This is a variation on Lizard pose that stretches the outer hip (adductor) muscles, including the gluteus medius.

Pose 3: Bound Side Angle
The action of binding in this posture provides you with a shoulder opener in addition to the adductor stretch.

Hip Compartment #3: Hamstrings

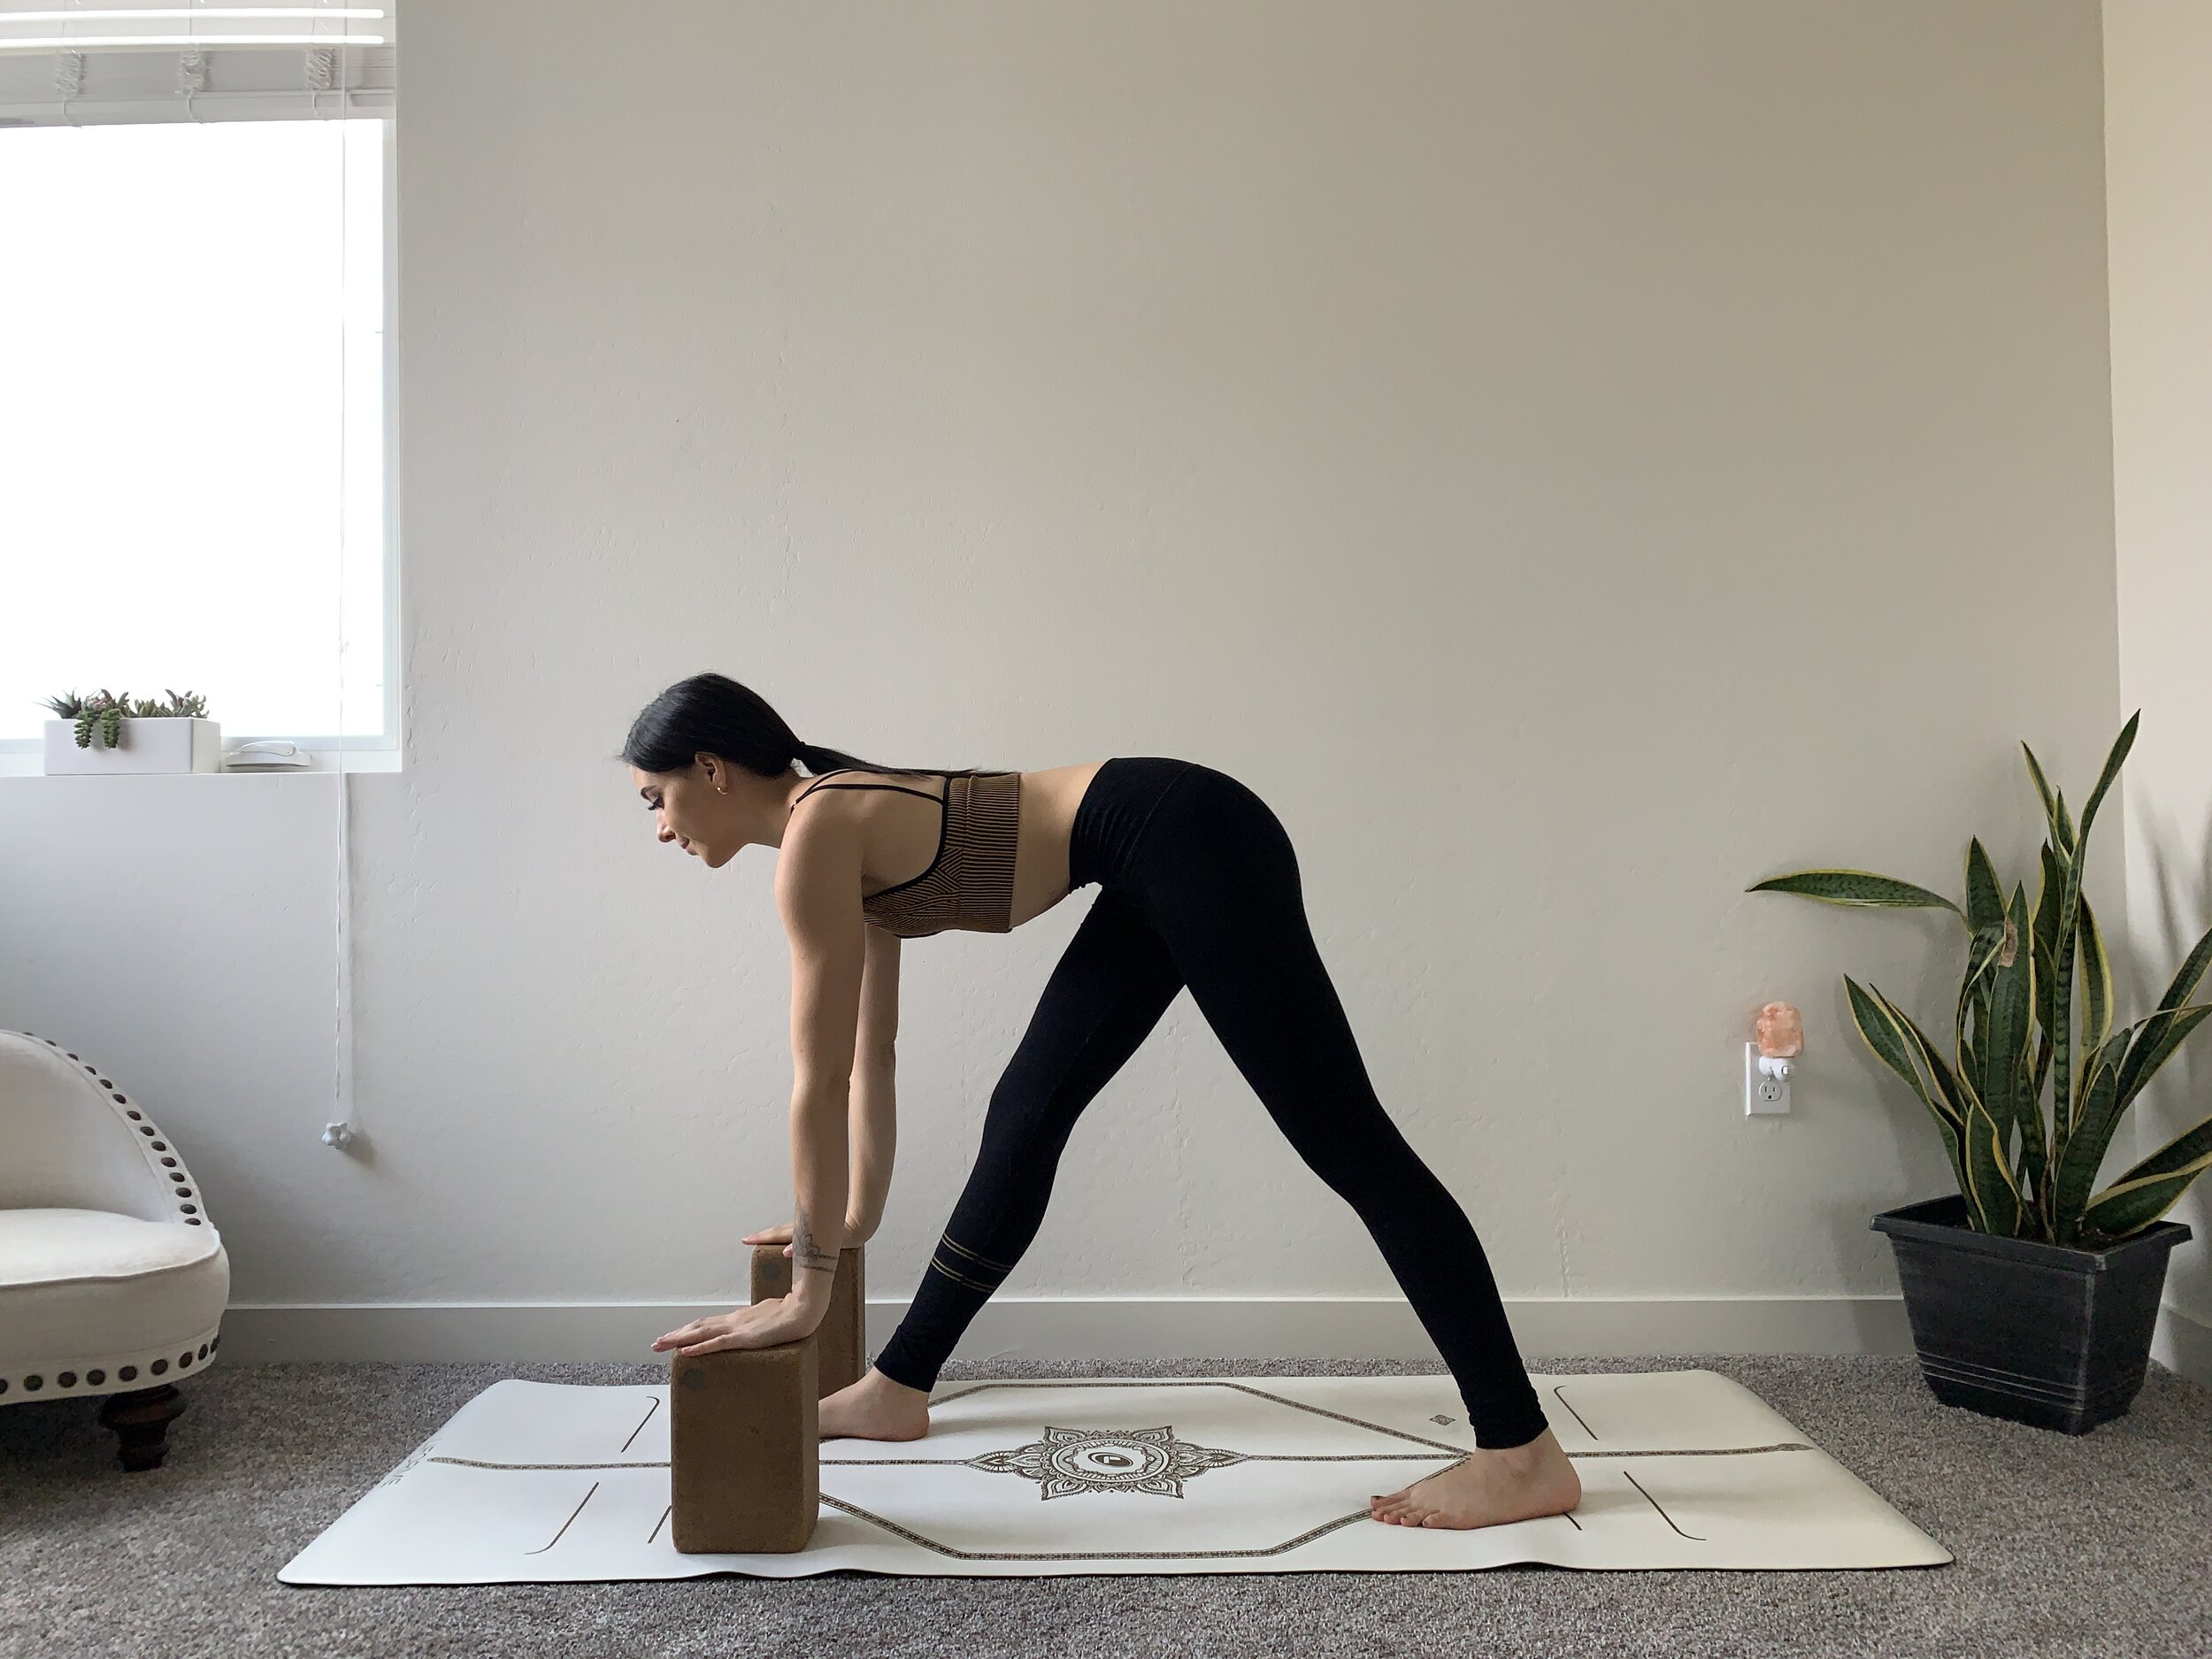
Pose 1: Parsvottanasana
This foundational standing pose allows you to focus on stretching one set of hamstrings at a time. This may be more effective for students with tight hamstrings than stretching both sets of hamstrings at a time like you do in Uttanasana.

IMG_0850.jpg

Pose 2: Prasarita Padottanasana
In addition to stretching your hamstrings, this wide-legged forward fold pose also stretches your adductors.

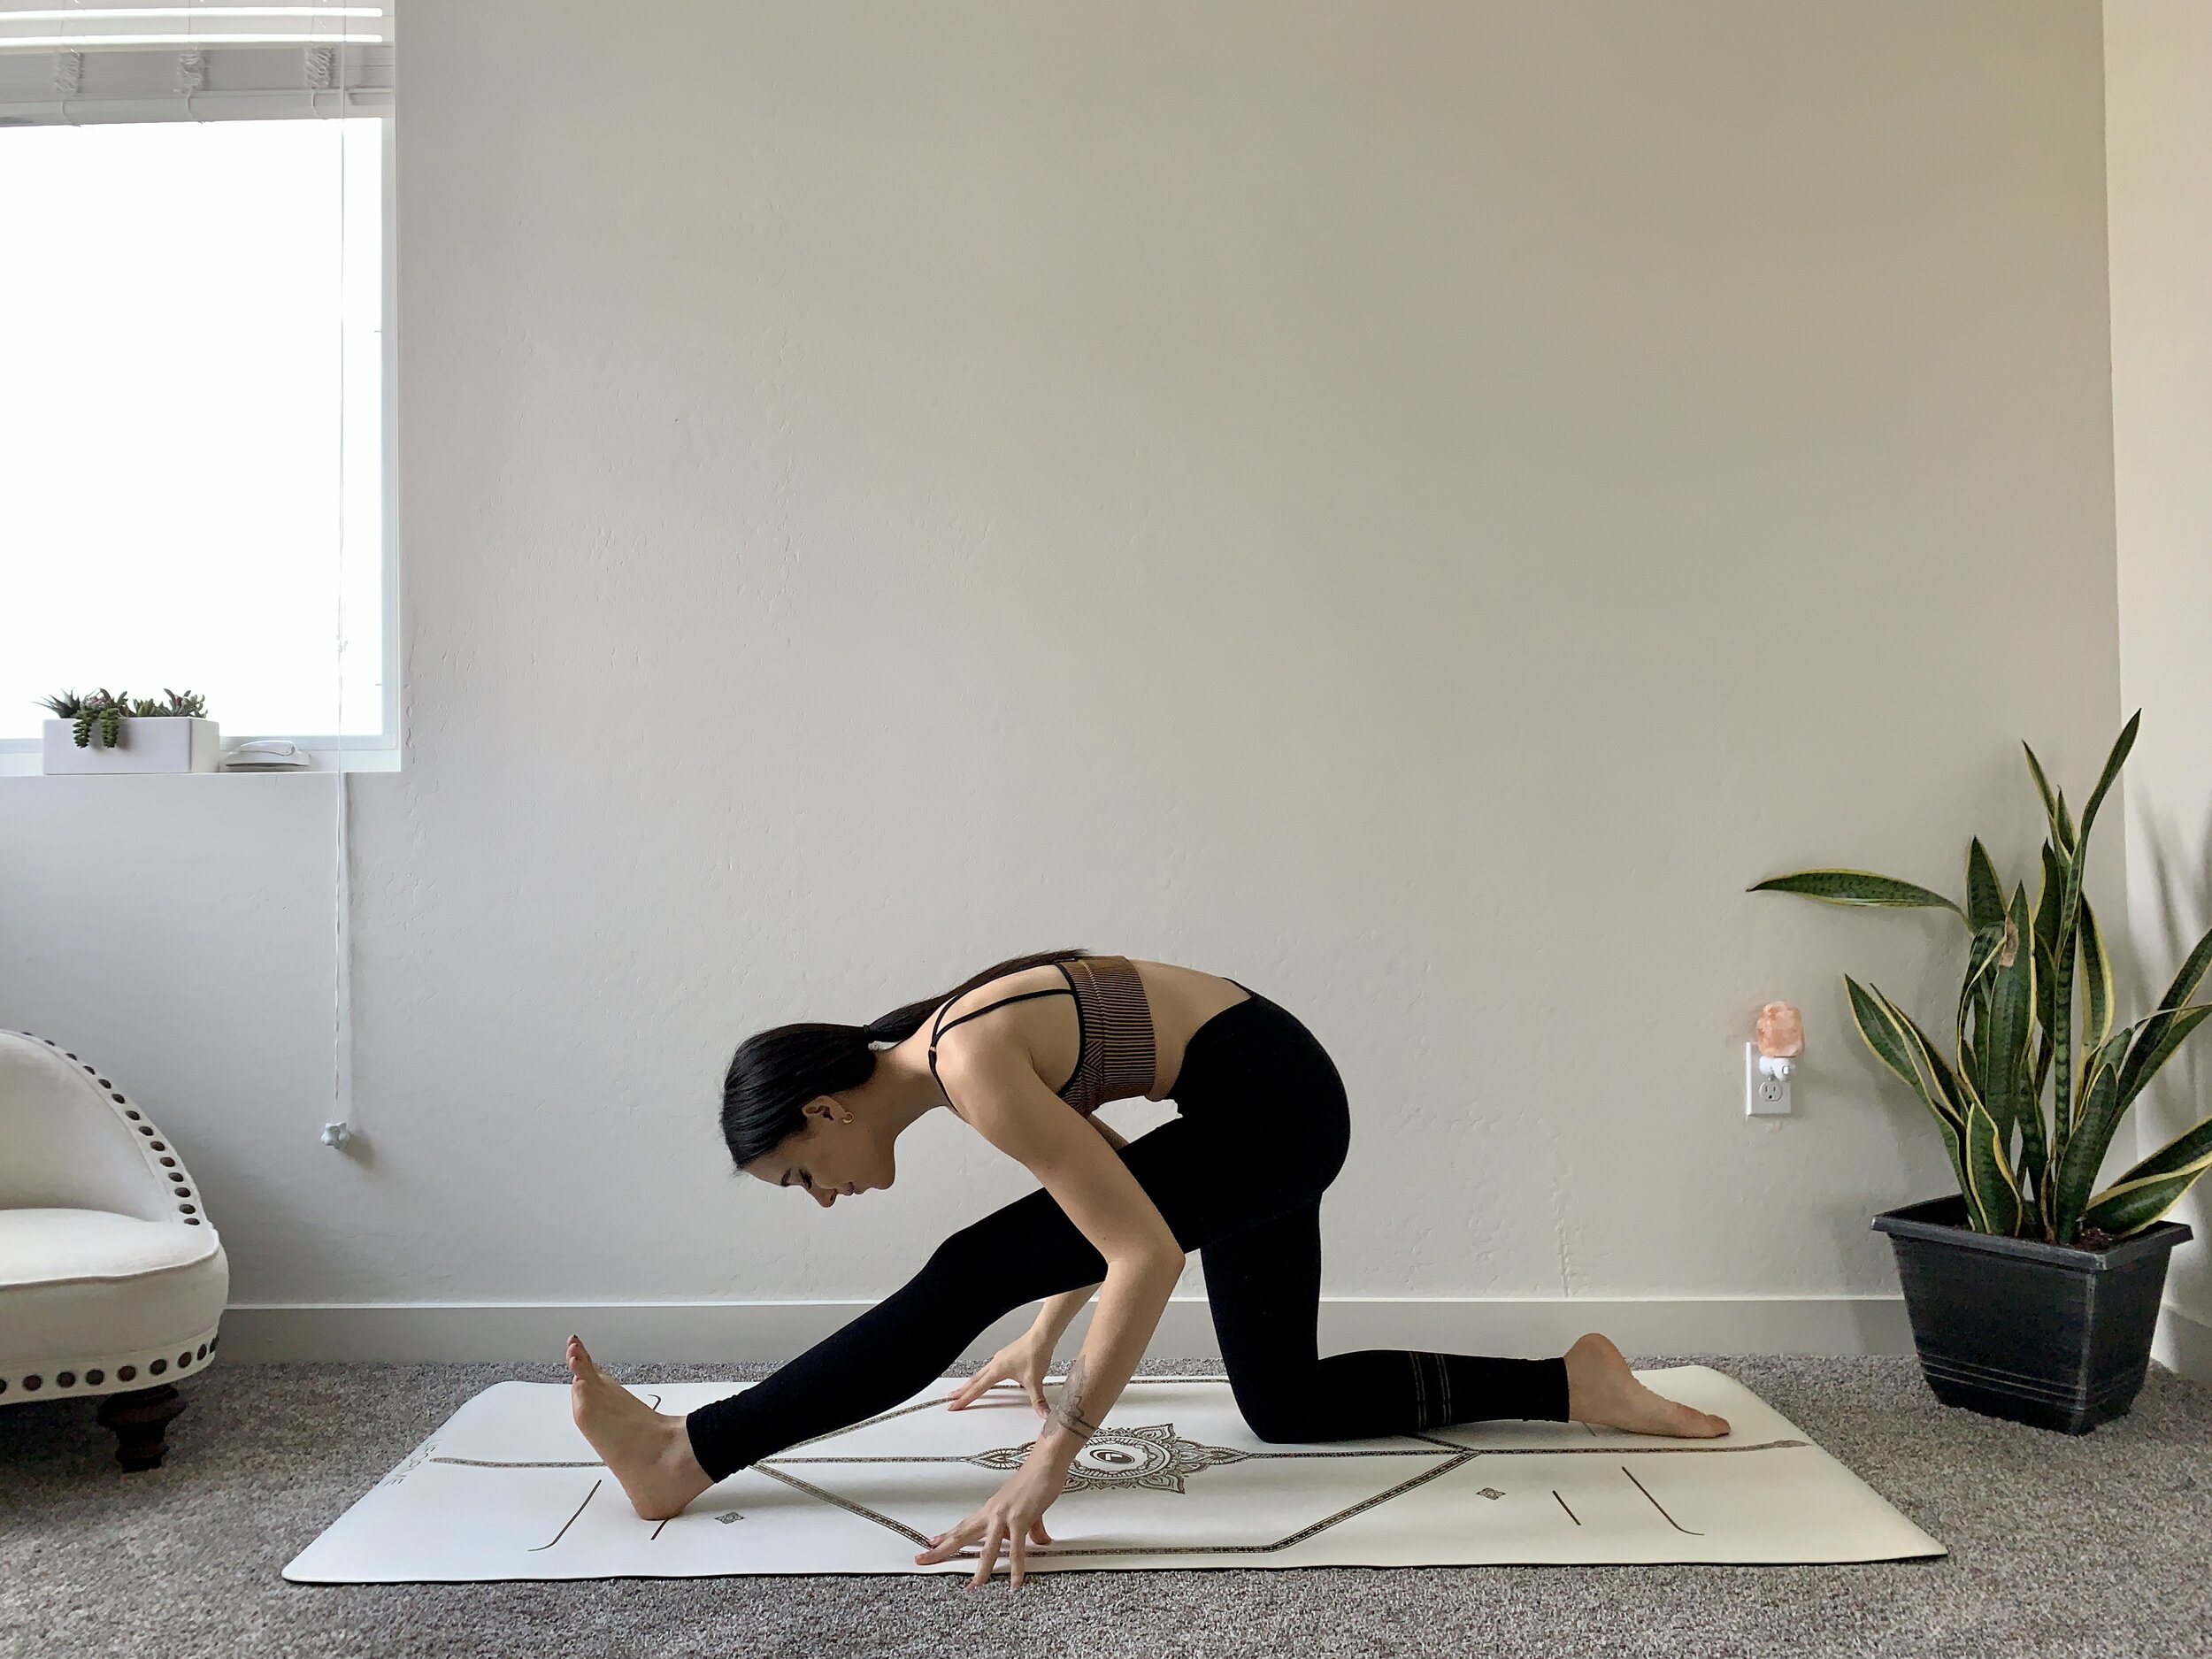
Pose 3: Half Split or Standing Split
Half Split is a great stretch for beginners working on their hamstrings. Beginners should keep the chest lifted and spine extended long. For a deeper stretch, fold forward without compromising a straight spine.

Standing Split, while similar to Parsvottanasana, is a more advanced one-legged standing posture which provides a deep, isolated hamstring stretch. Use blocks for more support.

Hip Compartment #4: External Rotators

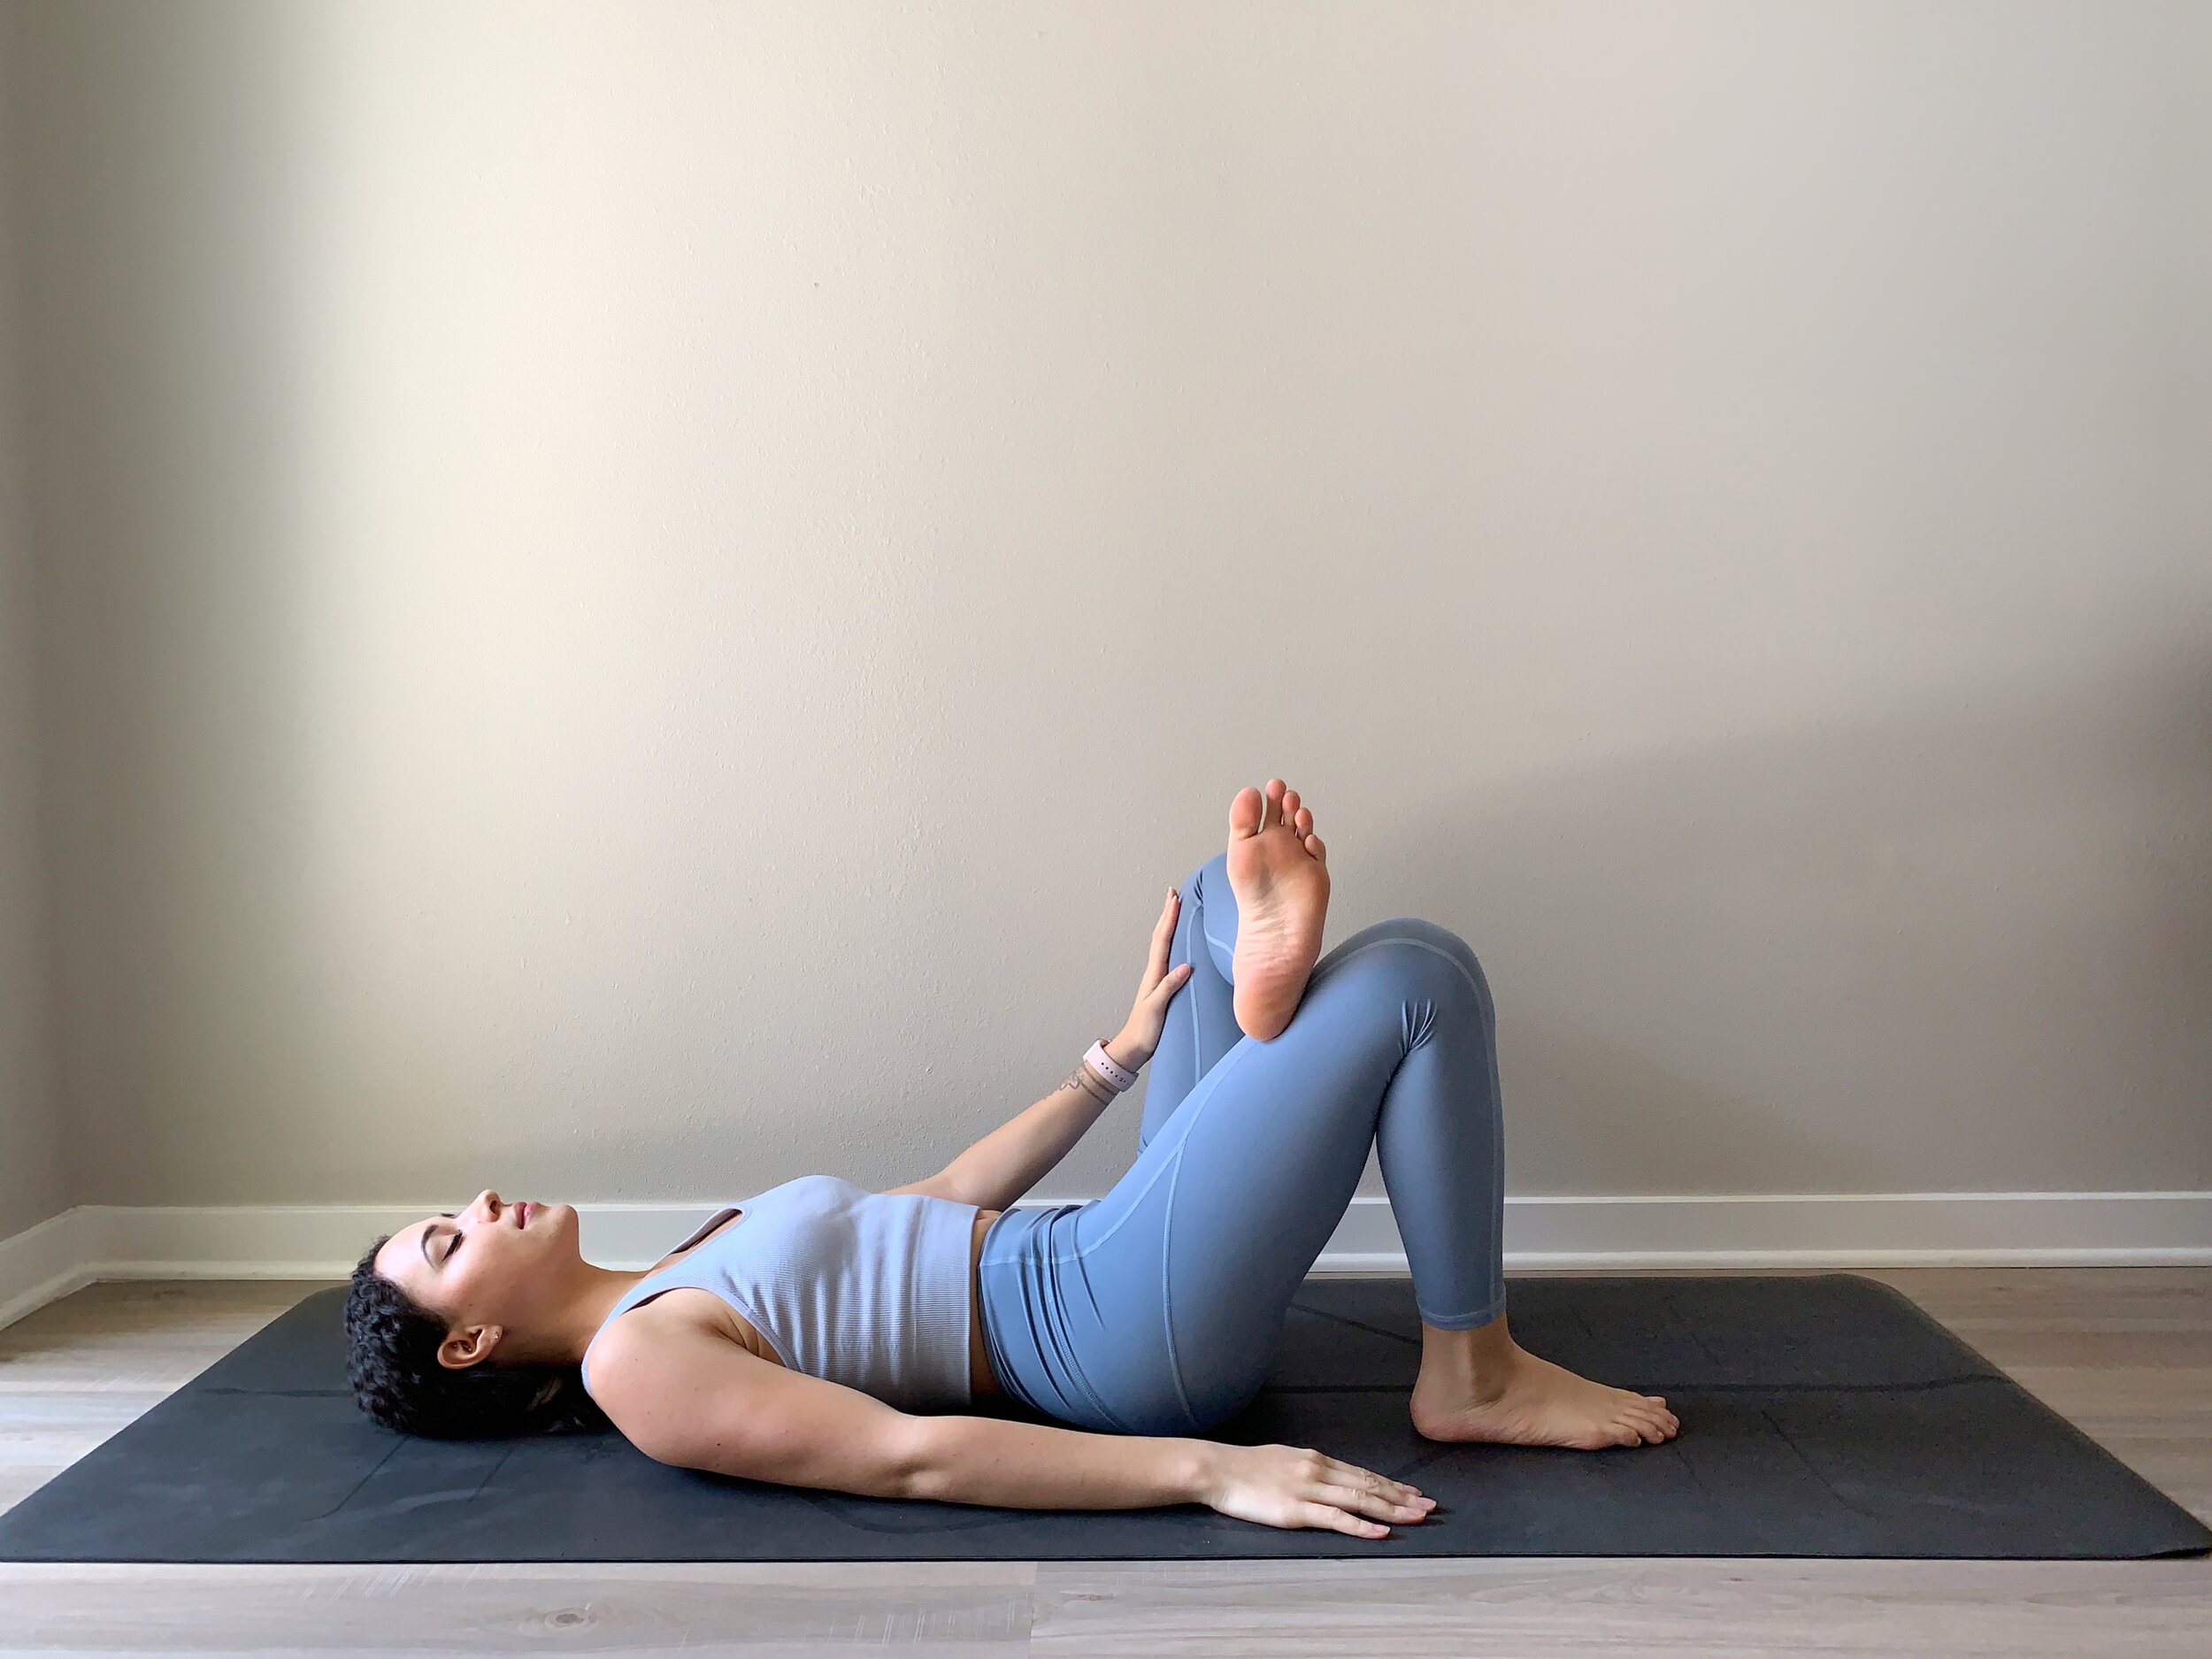
Pose 1: Pigeon and Reclined Pigeon Pose
This intermediate posture uses the weight of your entire body to stretch your external rotators. Stay upright or fold forward in this variation.

For a more restorative stretch, recline on your back and clasp your leg to stretch your glutes, external rotators and abductors.

Pose 2: Ankle-to-Knee
Placing one ankle on the opposite inner knee externally rotates your thighs even more deeply than Pigeon Pose. For more support add a pillow or block underneath the top knee. To deepen the stretch lean forward.

IMG_0950.jpg

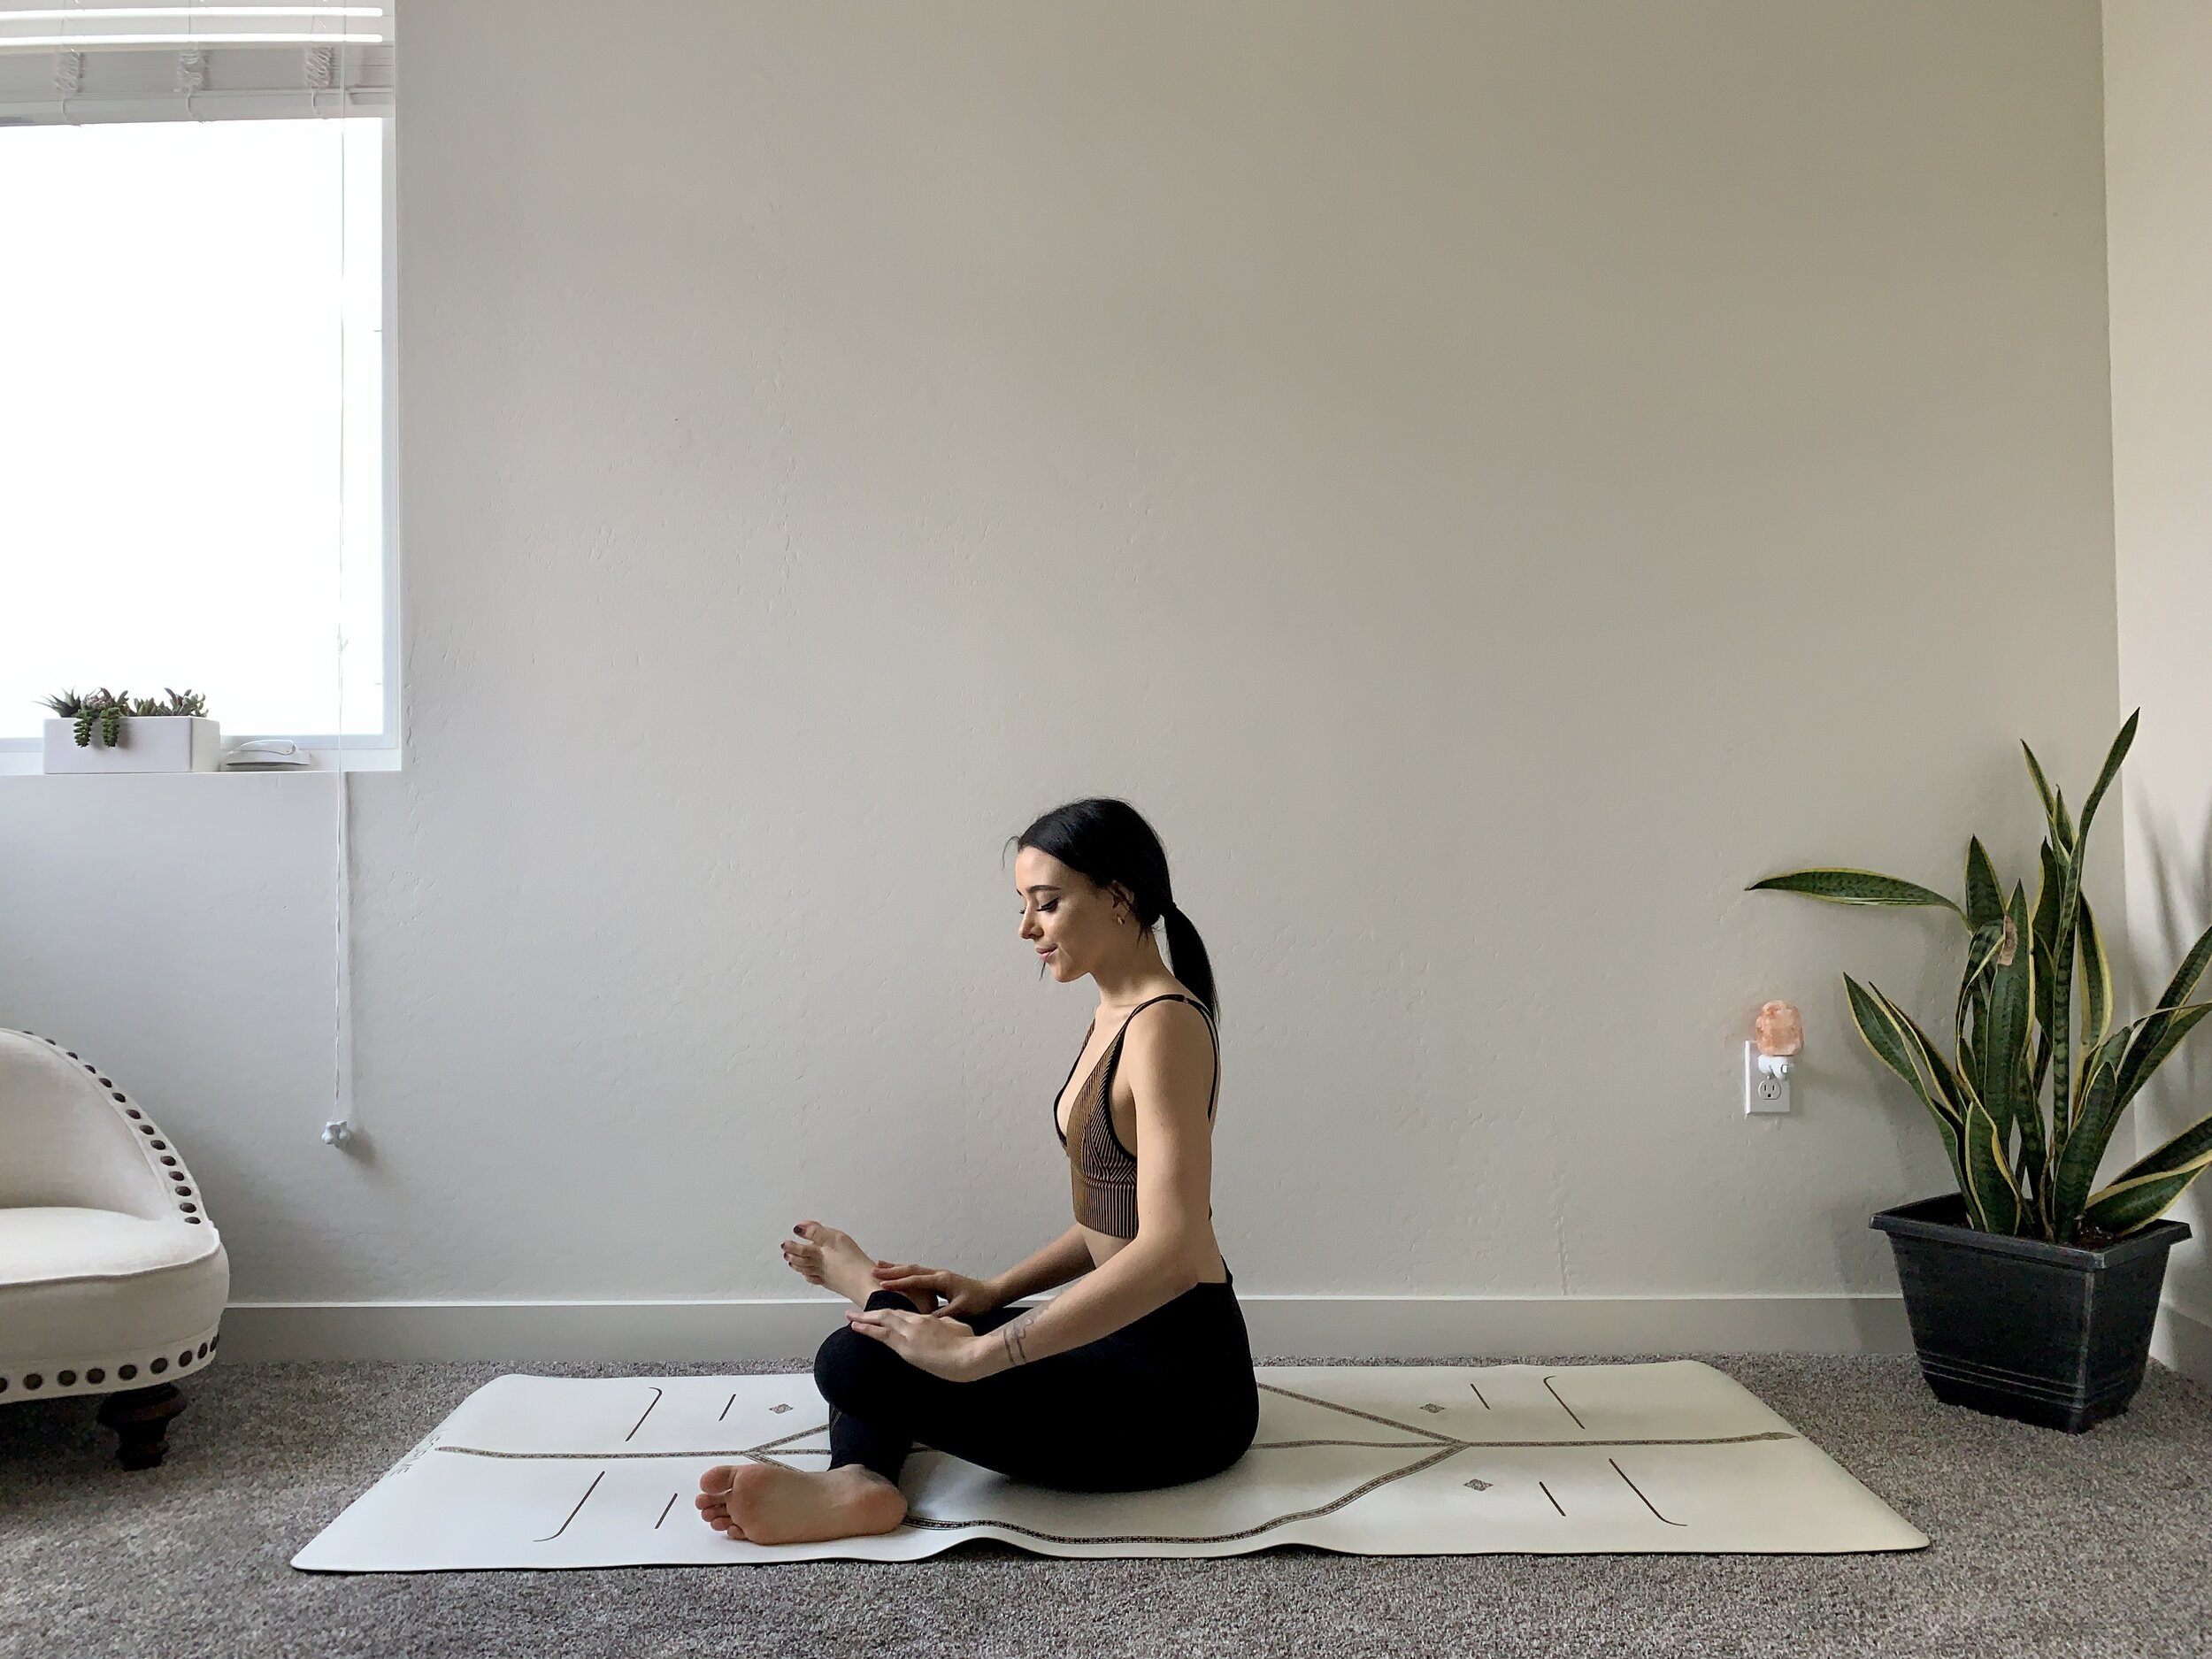
Pose 3: Baddha Konasana
Along with providing external rotation, this butterfly stretch also creates space in the inner-thigh adductors. Stay upright with a straight spine, or lean forward to increase the sensation of the stretch.

Hip Compartment #5: Abductors

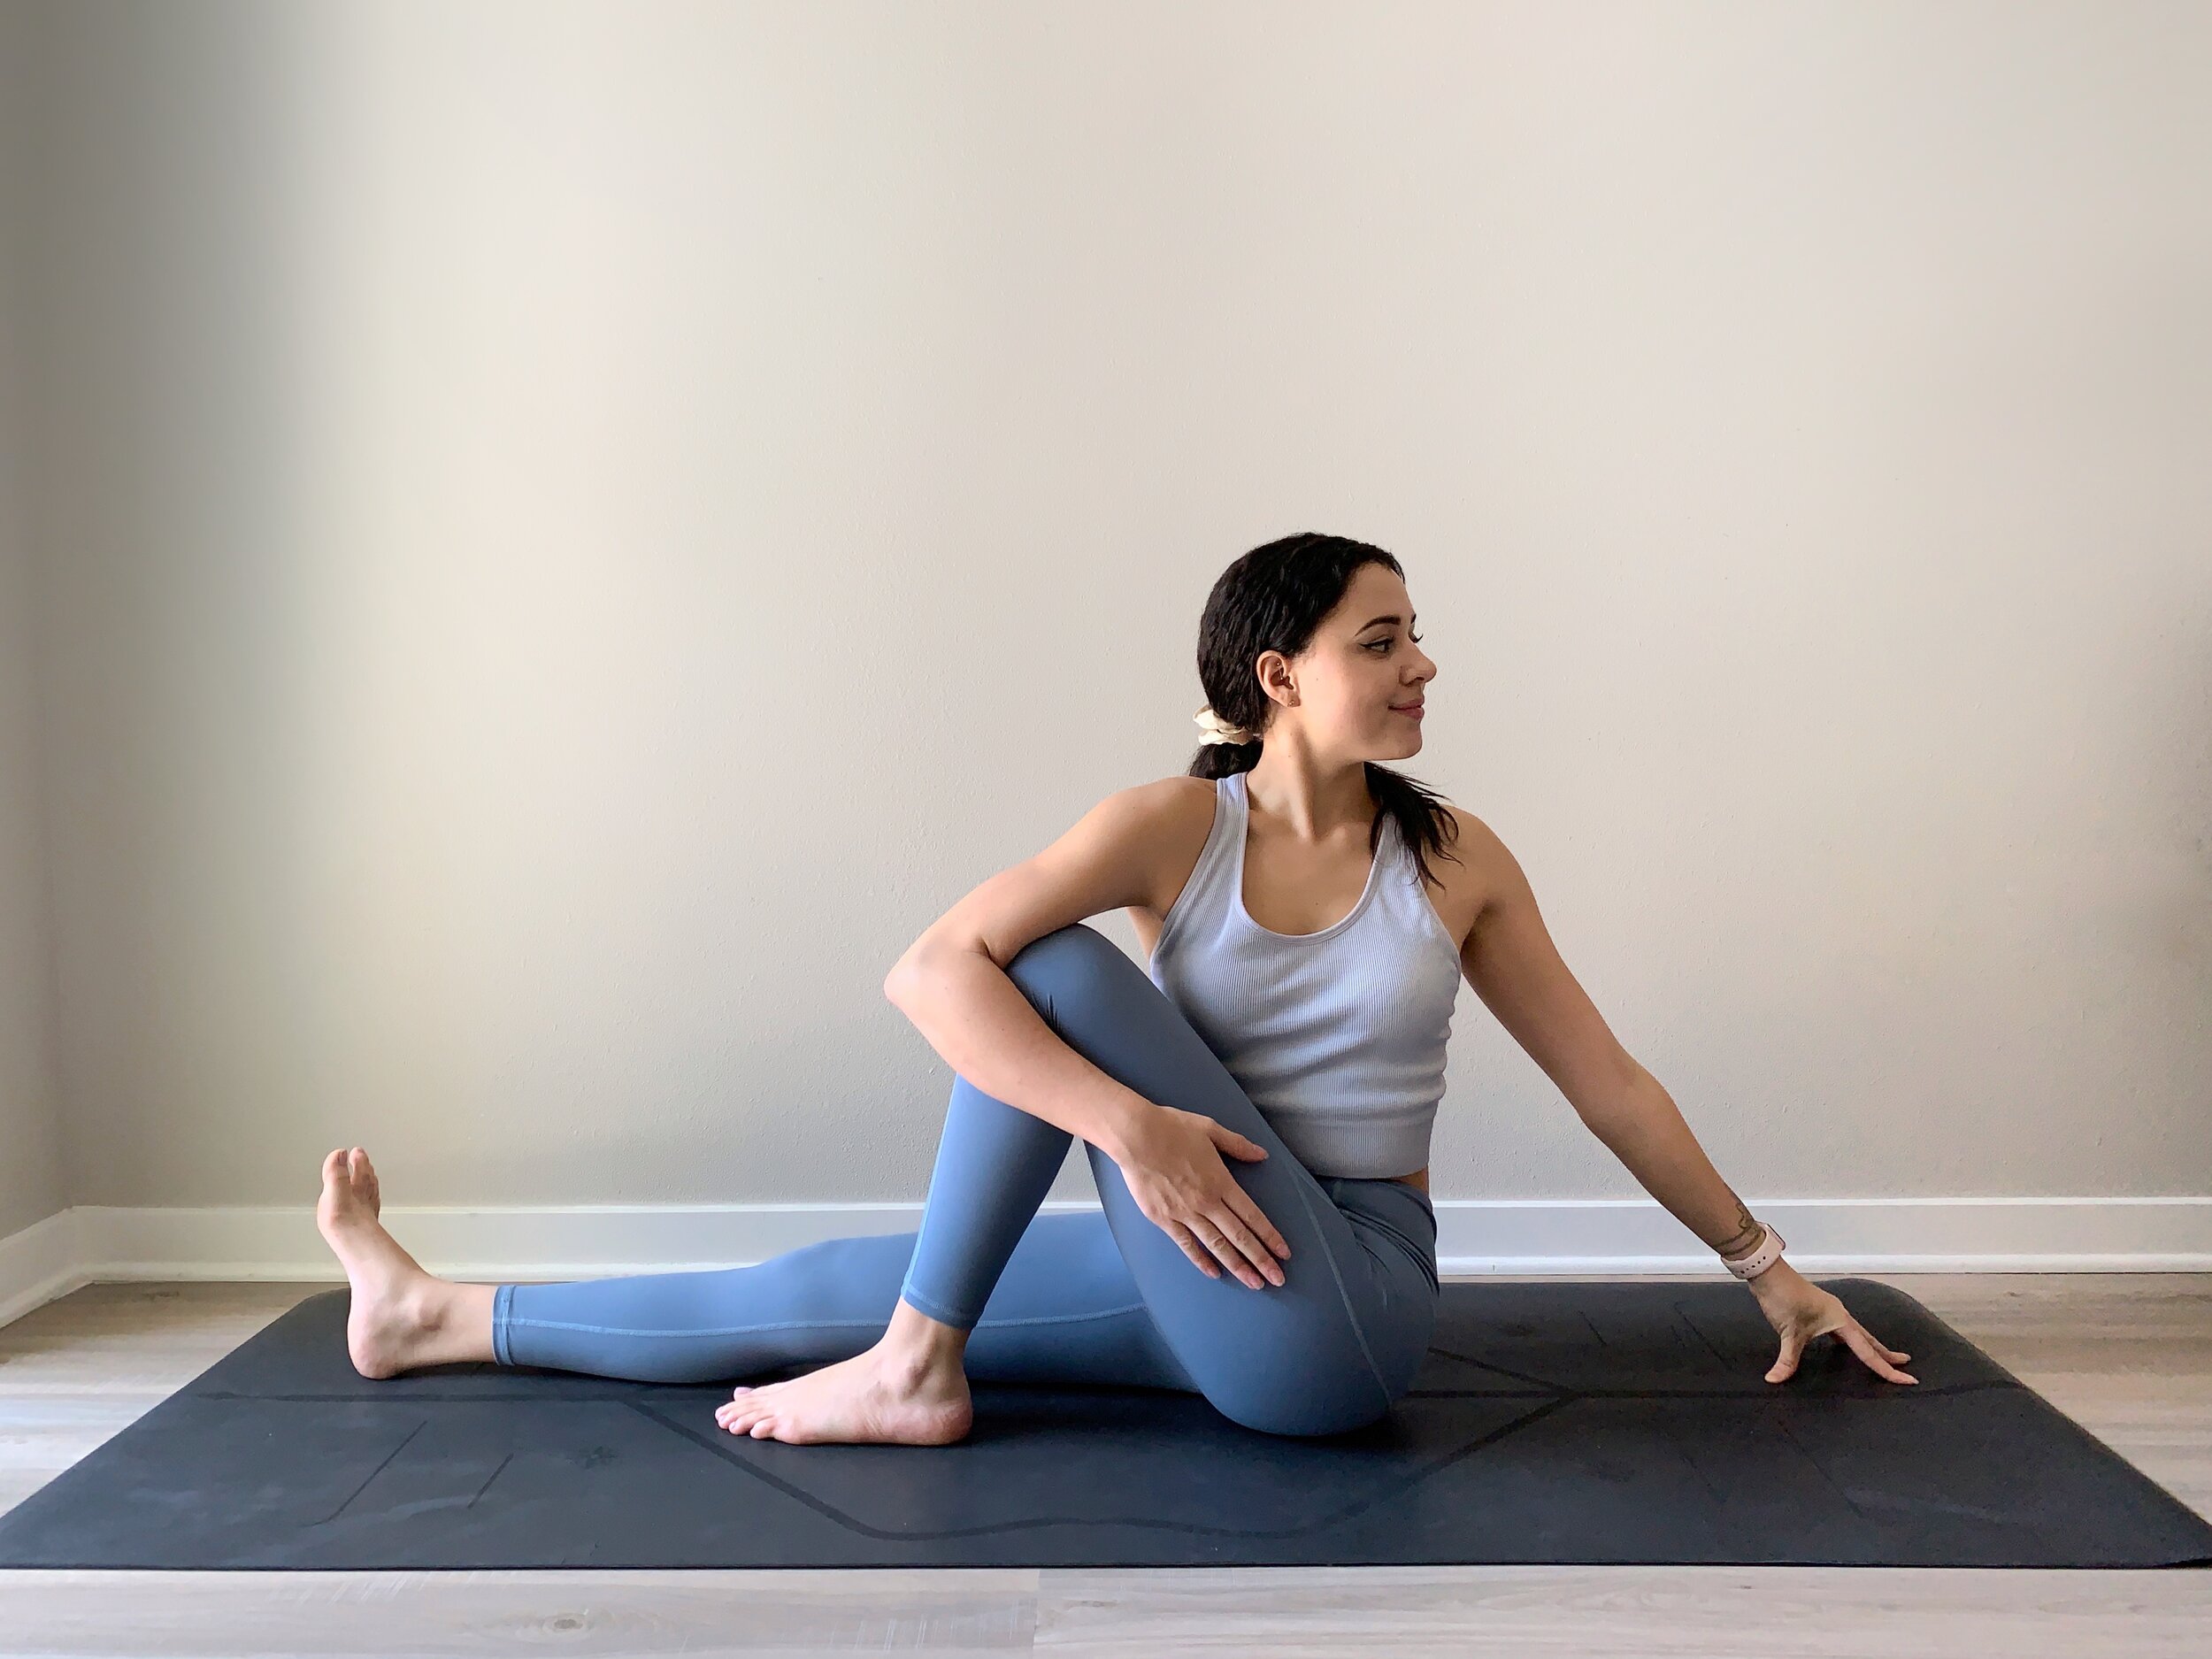
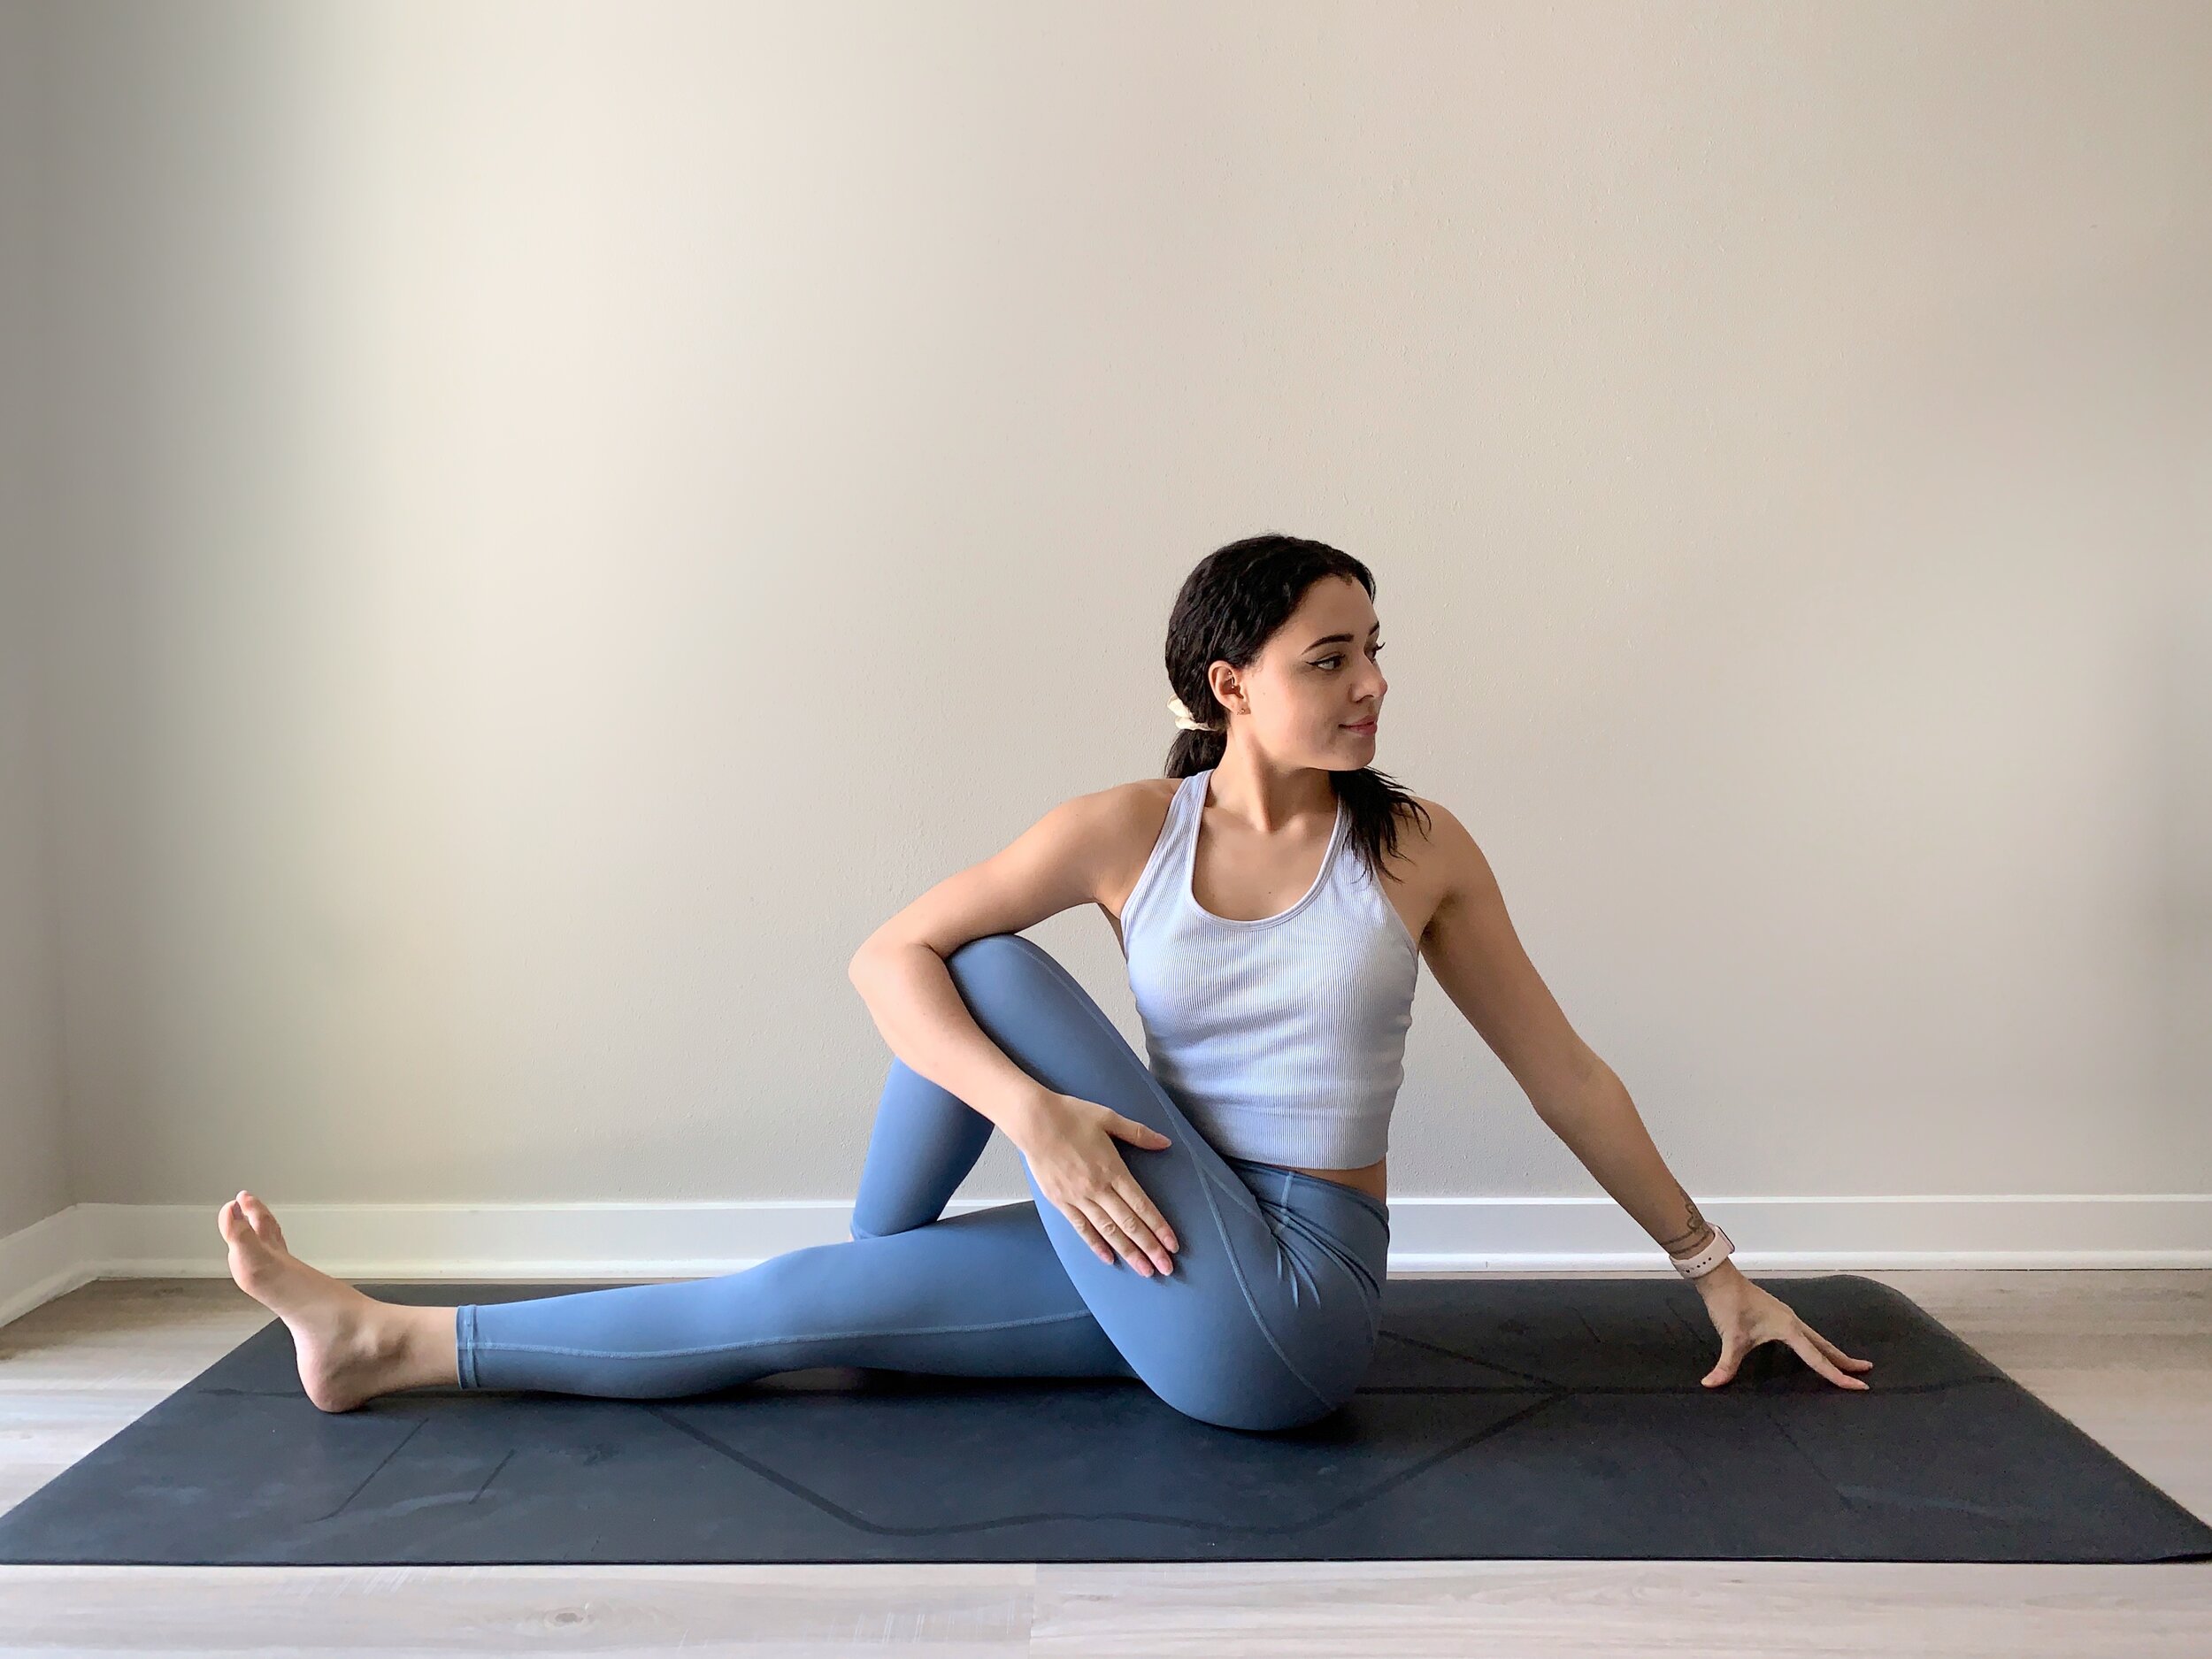
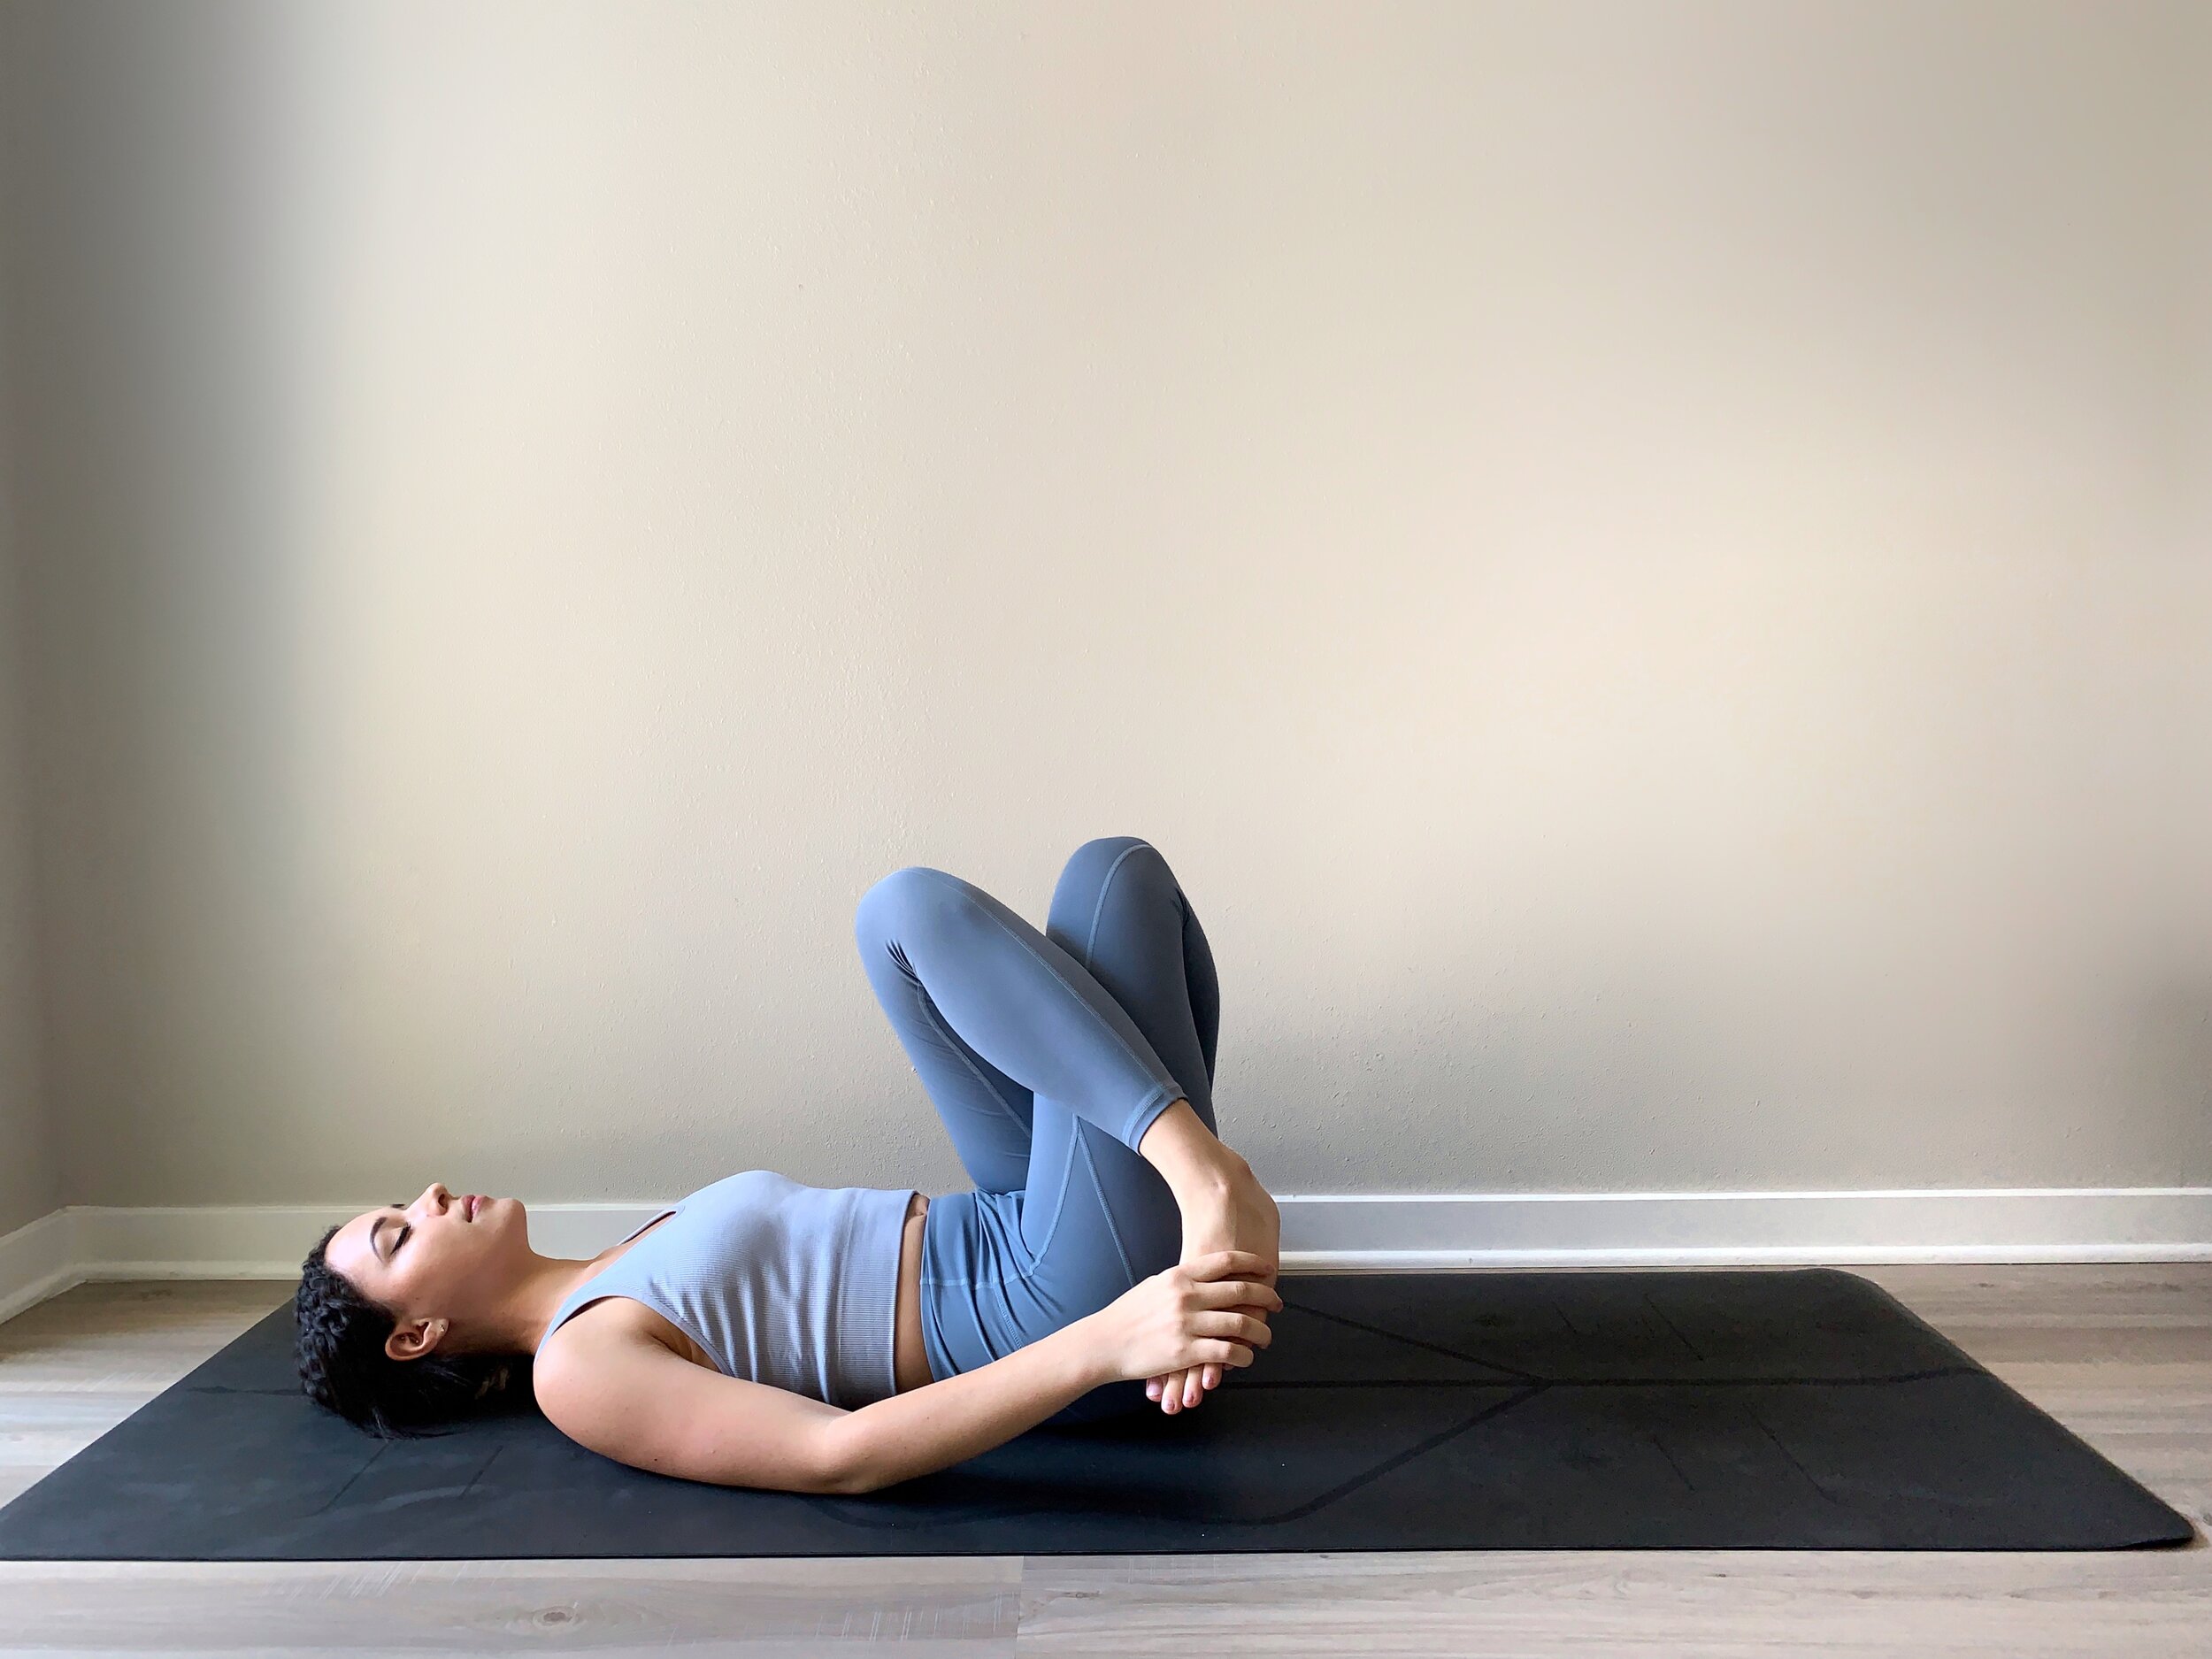
Pose 1: Gomukhasana or Reclined Gomukhasana
This classic seated posture provides efficient leverage for opening your abductors. For a more beginner-friendly variation, extend your bottom leg straight.

Reclining in Gomukhasana allows your entire body to relax and settle, while providing you with a deep abductor stretch.

IMG_1035.jpg

Pose 2: Gomukhasana with sidebend
Including a sidebend in this posture gives you a deep abductor stretch while also releasing tension in your obliques and quadratus lumborum.

Pose 3: Clamshell
Although this isn’t a traditional yoga pose, this hip exercise is great for improving flexibility, strength and mobility in the hips. It incorporates both external rotation of the hip, as well as internal rotation. It also helps strengthen the abductors, upper glutes and inner thighs.

Nourish: Joshua Tree Retreat Recap

page0 29.jpg

This past fall we ventured off into the deserts of Joshua Tree for our 4-day, 3-night ‘Nourish’ yoga retreat. It was time to escape the hustle of the city buzz and embrace ourselves, each other and our practice, with the intention of cultivating a deep sense of nourishment and wellbeing.

Day 1 — Ground

Around 4pm we arrived at our retreat sanctuary, a magical desert oasis tucked near the dreamy landscape of Joshua Tree. Our home for the weekend was located at a modern day, boho-style haven that sat on 5 acres of land. I honestly couldn’t have asked for a more beautiful setting for our retreat.

page0 5.jpg

We spent the evening exploring the property and eagerly awaiting everyone’s arrival. The group slowly trickled in, some arriving from solo-travels, others with family. Our group incidentally ended up being all woman from different parts of the country. It was amazing to have such a connected group of people come together for an experience like this. After we had all settled in, we watched the sunset and enjoyed our first dinner together.

Later that evening we gathered around inside for a cozy, grounding slow flow to give our bodies some well-needed love after a long day of travel. After our yoga class, we all sleepily headed off to bed. We had a big day planned ahead of us!

page0 21.jpg

Day 2 — Balance

We started our first morning off with vinyasa yoga at 8am. The class focused on strong standing and balancing postures in order to help us feel energized and ready to take on the day ahead. We gratefully welcomed the morning sun and fresh air as we moved and connected with our breath under the wide open sky. After yoga, we enjoyed breakfast with a beautiful view of the mountains beyond the horizon.

page0 24.jpg

After morning yoga and breakfast, we set out towards Joshua Tree Park for our adventure hike. It was a beautiful afternoon with a high of 85 degrees. We came across High View Nature Trail, a 1.3 mile loop trail that gave us a beautiful 360 degree view of the mountains and valleys.

page0 16.jpg

We came back to our retreat space to have lunch and some free time before our pranayama + yin yoga class on the elements. I introduced the group to the passive practice of yin, which encourages a softening + surrendering and an observation of present moment awareness. I explained the relevance of traditional chinese medicine, and how there are 5 elements that are integral to all life — wood, fire, earth, metal and water. These elements are fundamental to the cycles of nature and are reflected in the cycles of our own bodies. Each element is associated with its own particular season, emotion and organ system. After our yoga session, we ended the day with dinner, a beautiful view of the sunset and s’mores by the fire.

page0 23.jpg

Day 3 — Nourish

The next morning we woke up to soft autumn light illuminating the grounds. It was time for our energizing vinyasa flow to cultivate power. The class focused on postures that tested our strength and balance. We worked on core and arm strengthening, twists and inversions. After our morning yoga class, we had breakfast outside.

Today was the day our group had extra free time. A few people in the group decided on a hike in the national park, and some of us went to town to thrift and check out some local shops. It was an eventful and fun afternoon all in all.

page0 15.jpg

After our free time, we had lunch. Our final practice for the evening was a myofascial release workshop with yoga nidra. We used therapy balls to target trigger points in the body and release tension to achieve a form of self-myofascial massage. I shared common stretches and a full-body restorative style practice to target the deeper connective tissues. To close the class, I shared a powerful relaxation meditation of yoga nidra or ‘yogic sleep’, which is a conscious relaxation practice intended to induce total physical mental and emotional relaxation. We ended the evening with our final group dinner and stargazing in the hot tub.

page0 7.jpg
page0 17.jpg

Day 4 — Connect

We greeted the early morning sun at 7am. Our final yoga class together was a vinyasa flow and meditation centered around connection. I wanted everyone to set an intention for their final practice and to remember to cultivate this guiding principle or feeling back home.

Following our class, I was able to meet-up with the people who catered our retreat, Caity’s Catering. Their entire team was amazing at providing us with the cleanest, most delicious food. All of the meals were made with the finest local and organic ingredients… you could really tell it was cooked with love. I highly recommend checking them out if you are in the area, they offer cooking for home deliveries and special events!

page0 25.jpg

We enjoyed our last breakfast together as a group, took more photos for memories and finished some last minute packing. By noon we had all said our final good-byes and parted ways.

The ending of a retreat is always so sad, but also filled with a deep sense of gratitude and love. After spending the past few days cultivating nourishment + wellbeing and fostering a sense of community, we left Joshua Tree ultimately feeling inspired and connected. This was a special experience that I will treasure forever, and I am incredibly grateful for the beautiful souls who were a part of it.

Until next time, x

Jess

P.S. — are you interested in coming on a retreat? Click here to be notified when my next retreats launch!

7 Yoga Poses To Improve Your Focus & Concentration


With all the daily distractions we are constantly faced with, it can be hard to stay focused and productive. Thankfully, yoga can help! According to yoga philosophy, dharana, which is a Sanskrit word that translates to ‘concentration’, is the sixth limb of yoga, which can be described as a state of focused attention used during asana, pranayama and meditation.

Working on dharana can increase your brain power, bring you into the present moment and reduce mental distractions. In theory, these yoga practices can possibly prevent or reduce the effects of dementia, ADHD, Alzheimer’s disease and other memory/mental issues.

Below are 7 yoga poses and a simple, yet effective yoga class you can practice to help stay present and better focused all around.

FullSizeRender 43.jpg

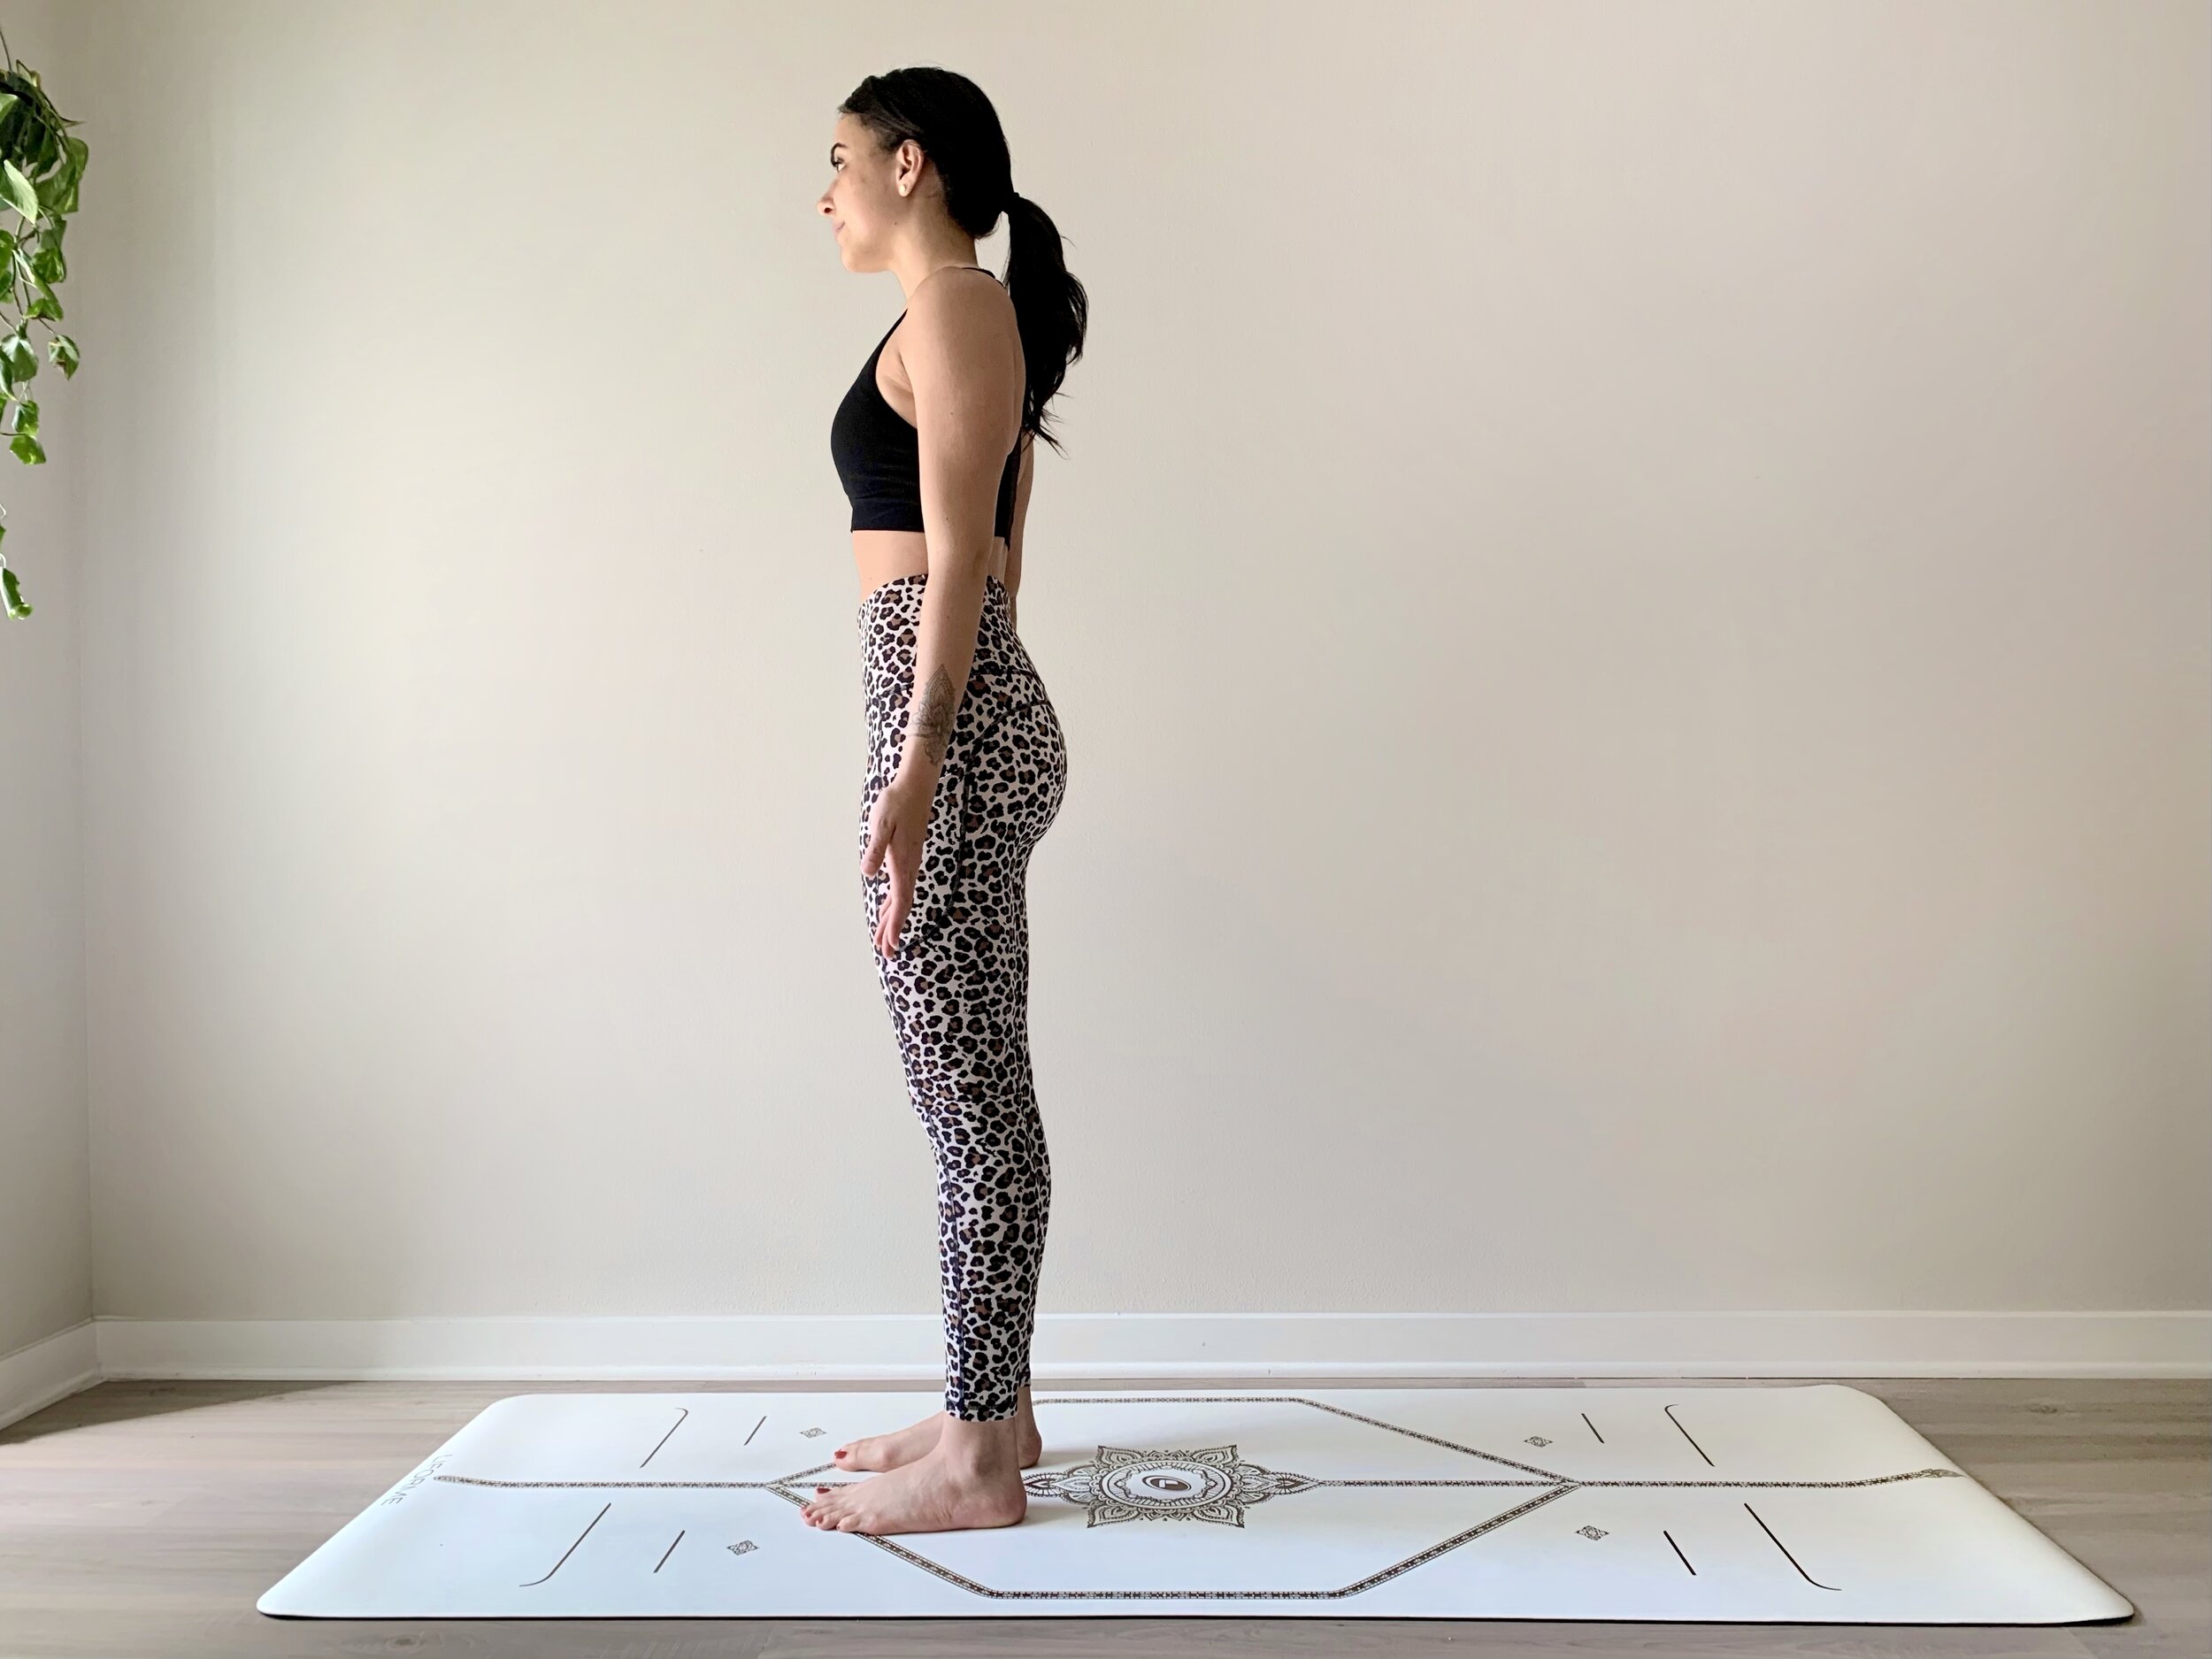
1. Tadasana (Mountain Pose)

This introductory balance pose is considered the ‘mother of all asanas’ as it’s the base from which all other yoga poses emerge. Mountain pose enables you to bring your full awareness to your breath as you begin to strengthen your nervous system and center your focus. It will improve your posture, steady your breathing and strengthen your ankles, knees and thighs.

How To Do It: Stand on your mat with your big toes touching and heels slightly apart. Next, lift your toes with control and slowly place them back on the mat. Firm your thighs, lift your kneecaps, tuck your tailbone slightly and keep your hips directly in line with your ankles. Keep the core slightly engaged by drawing the lower belly into the spine. Focus on pressing the crown of your head toward the ceiling while you inhale and then drop your shoulders and reach your fingers toward your mat as you exhale.  
IMG_6769.jpg

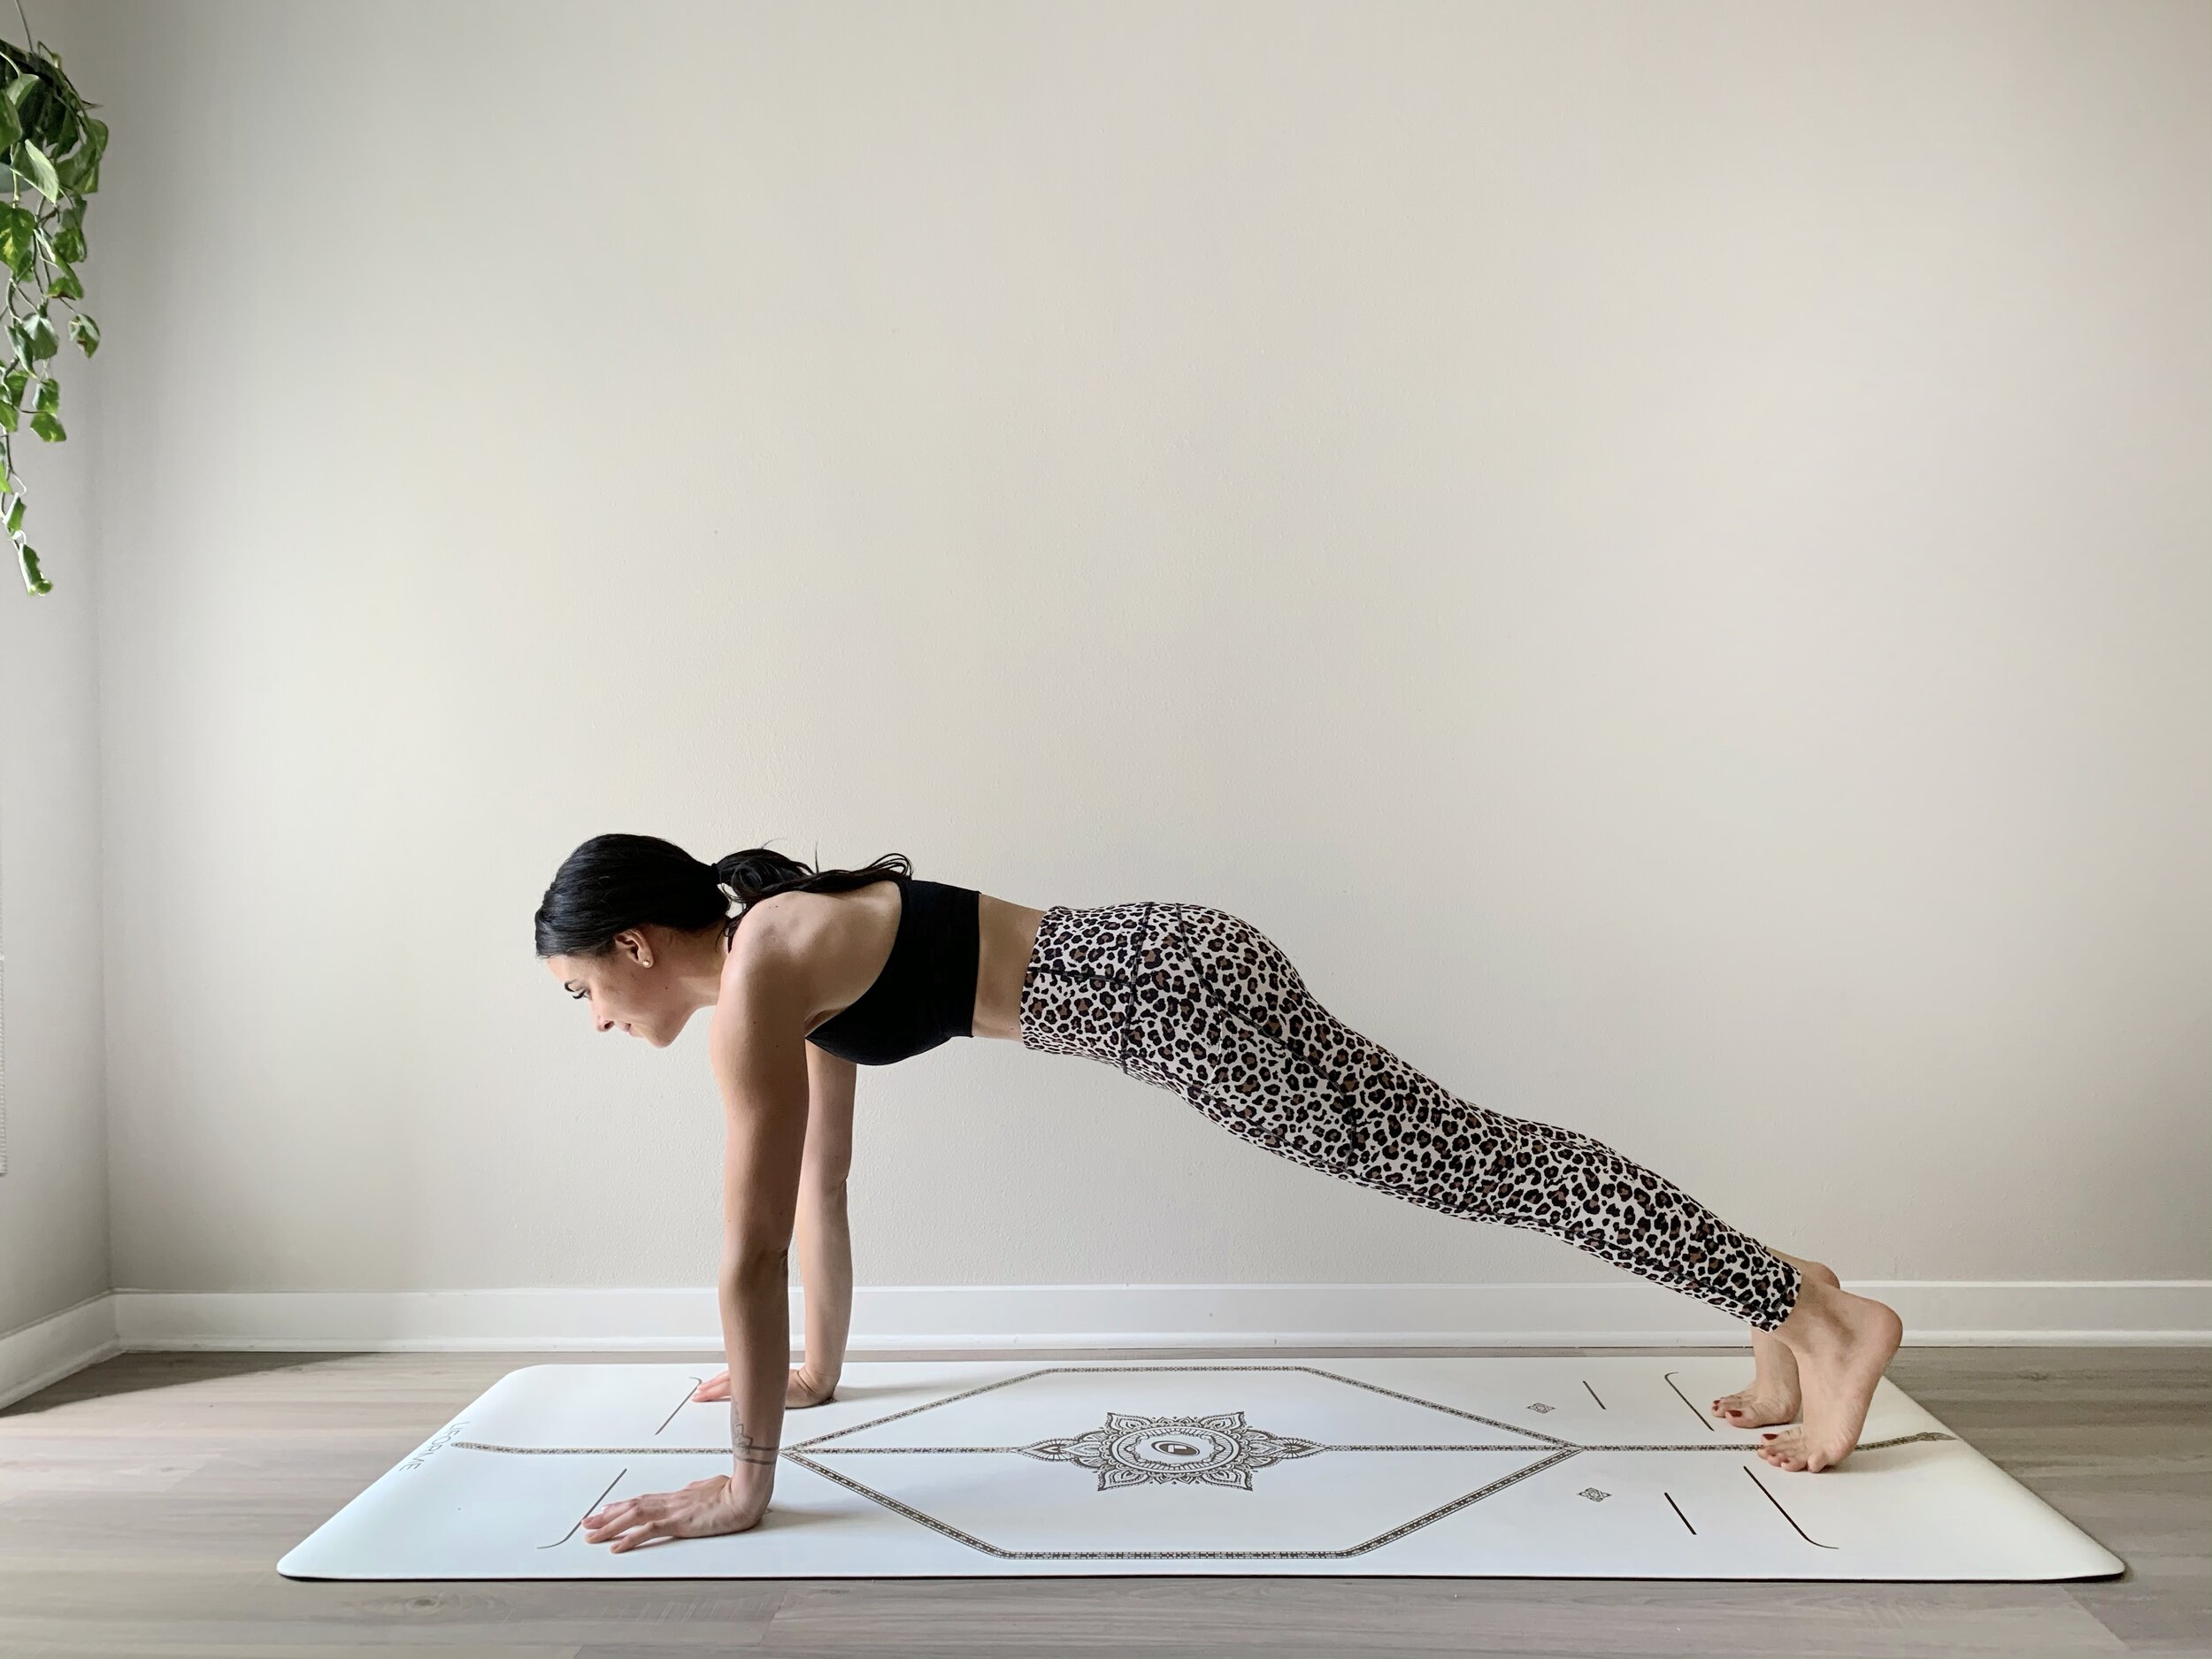
2. Phalakasana (Plank)

This common transitional pose increases strength in your core, arms and shoulder muscles. It tones your entire body and generates heat. It is the perfect pose for beginners and helps you develop focus and endurance.

How To Do It: Begin on all fours with your shoulders in line with your wrists and fingers active and spread. Engage your belly upwards as you extend one leg back at a time with your toes tucked and your thighs nice and flexed. Your spine is long and there should be a straight line from the head to your heels. Keep your arms engaged as you push up from the mat. Roll your shoulder blades down your back and lengthen your tailbone towards your heels.

FullSizeRender 47.jpg

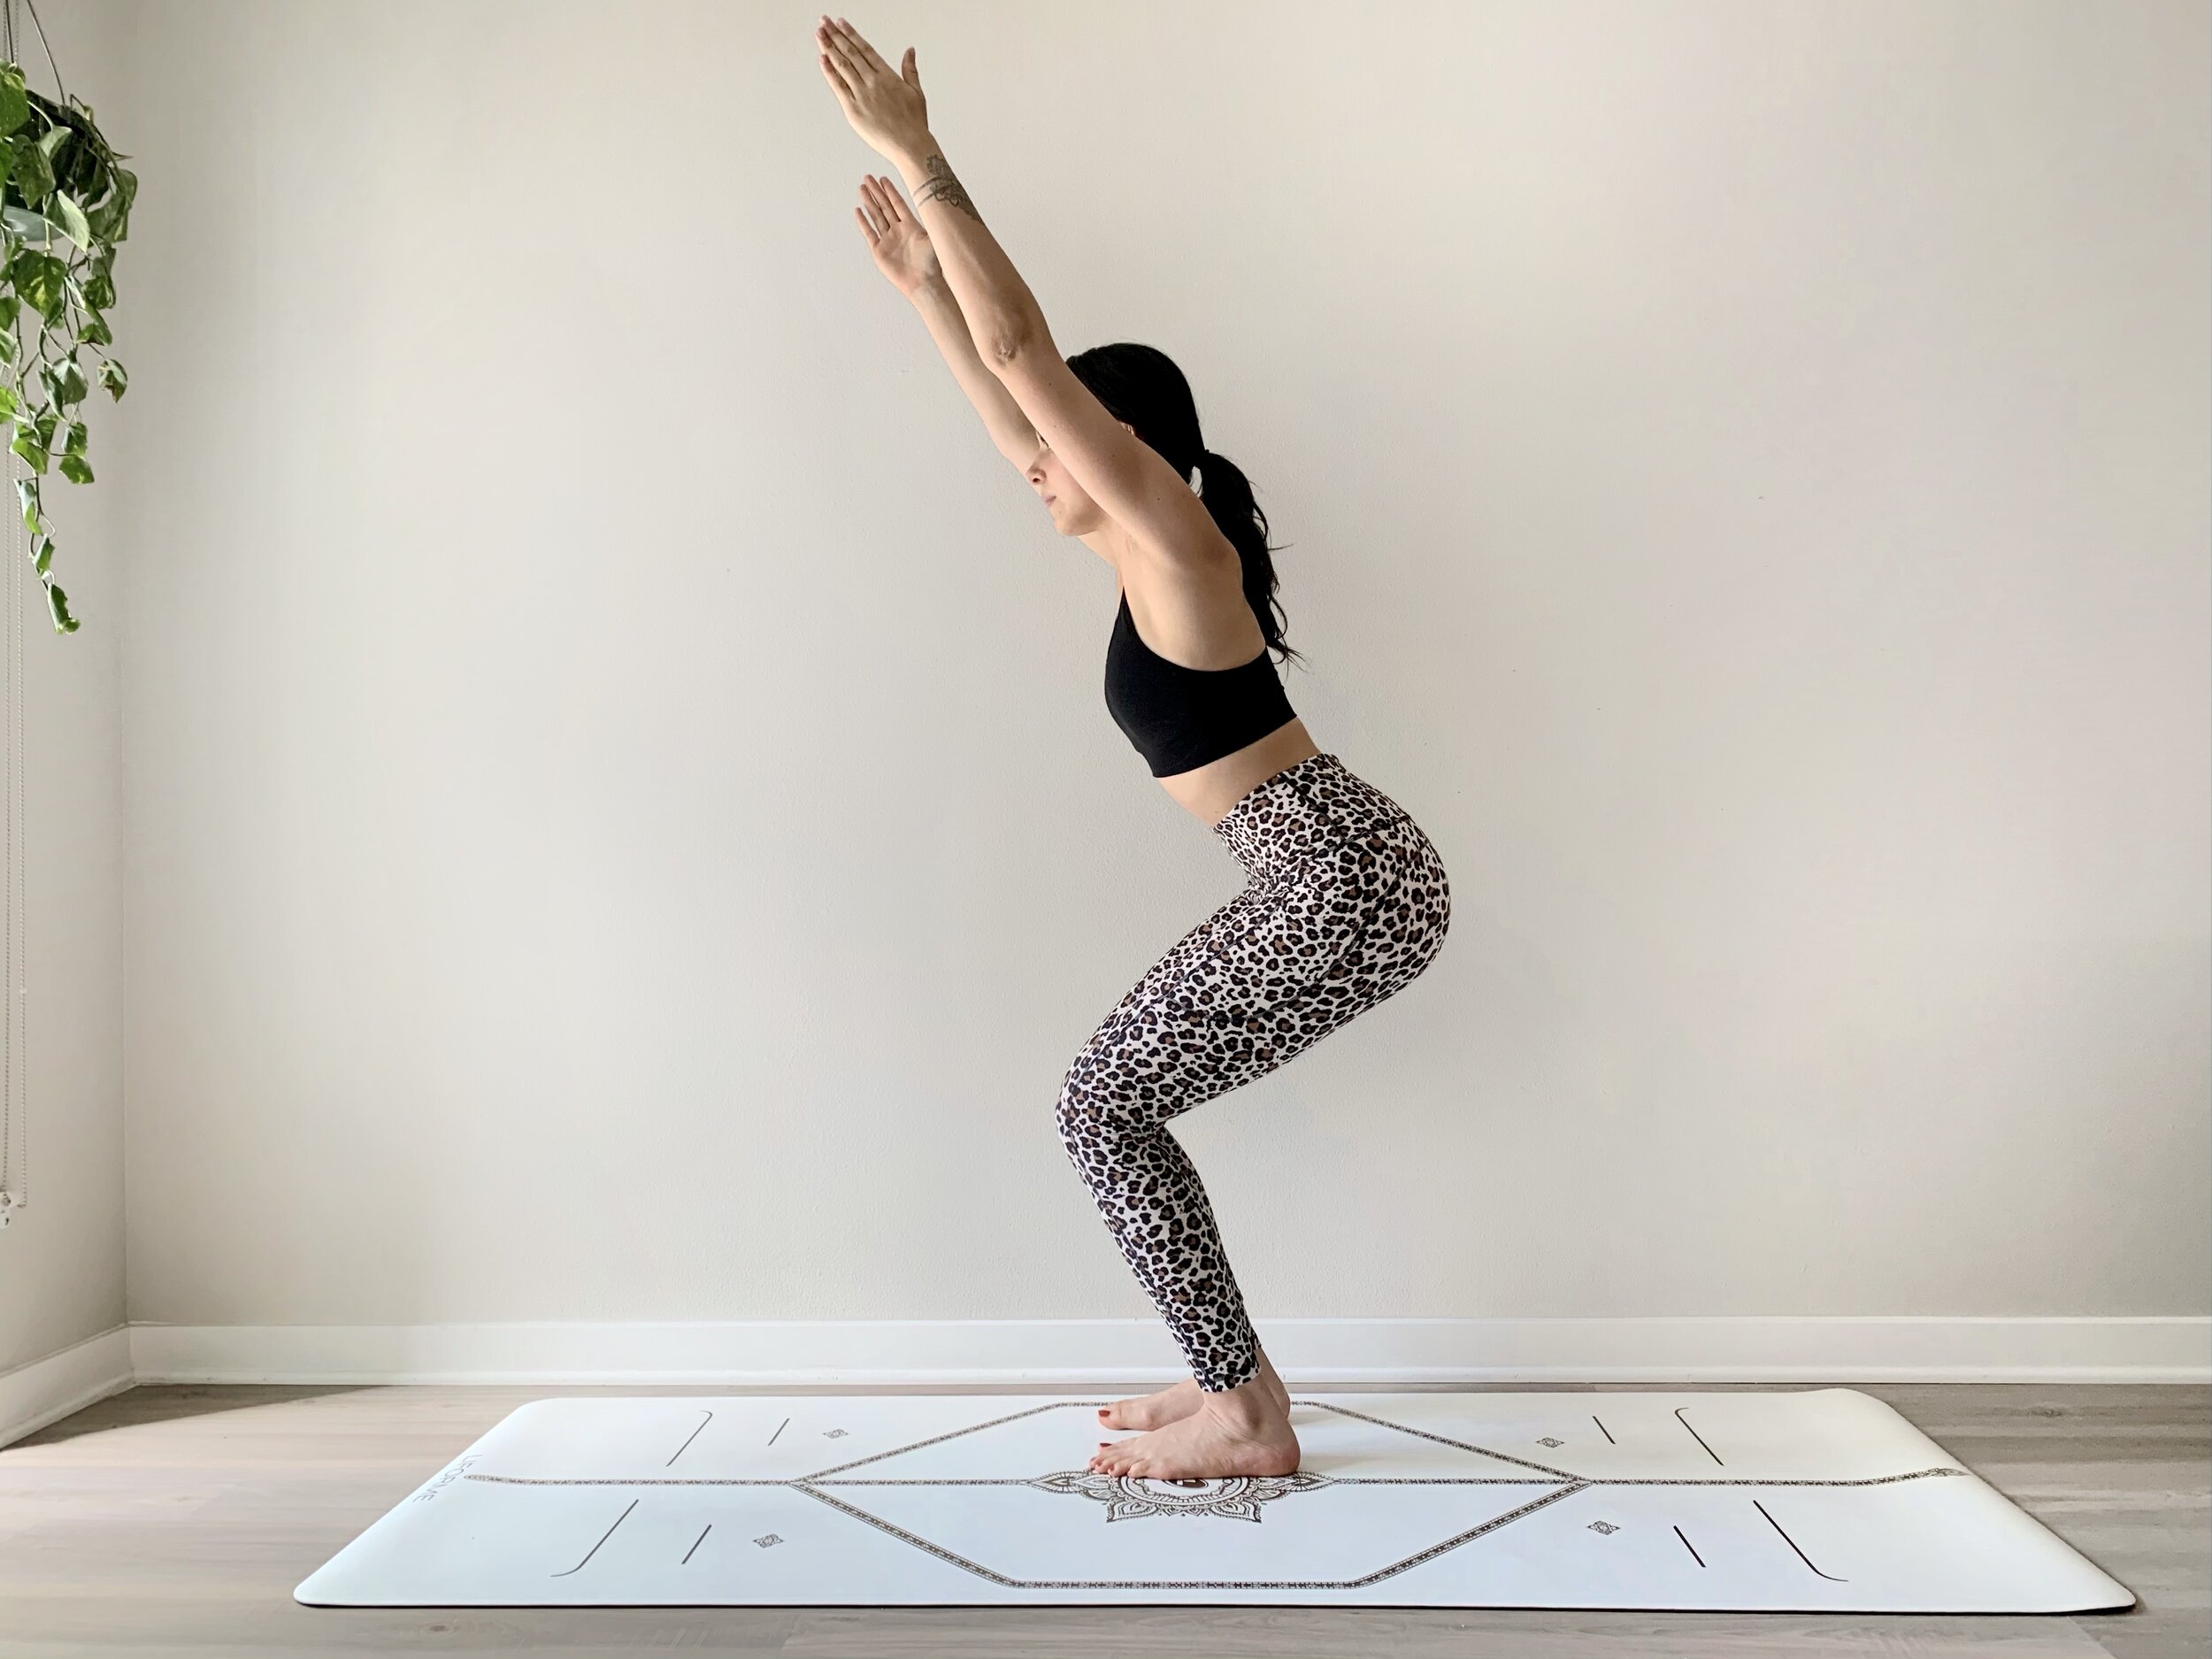
3. uTKATASANA (Chair Pose)

This standing pose, which is included in Sun Salutation B, helps to strengthen the thighs, open shoulders in flexion, tone the arms and mobilize the upper back.

How To Do It: Stand in Mountain Pose. As you inhale, extend the arms up overhead and reach your fingers toward the ceiling. As you exhale, bend the knees and sink the hips down and back toward the floor. Press the shins back to move a bit more weight into the heels. Allow the shoulder blades to spin out and up away towards the outer armpits (upward rotation). Spin the inner thighs back and down. Draw the upper arms back in line with the ears while softening the front ribs.

IMG_6778.jpg

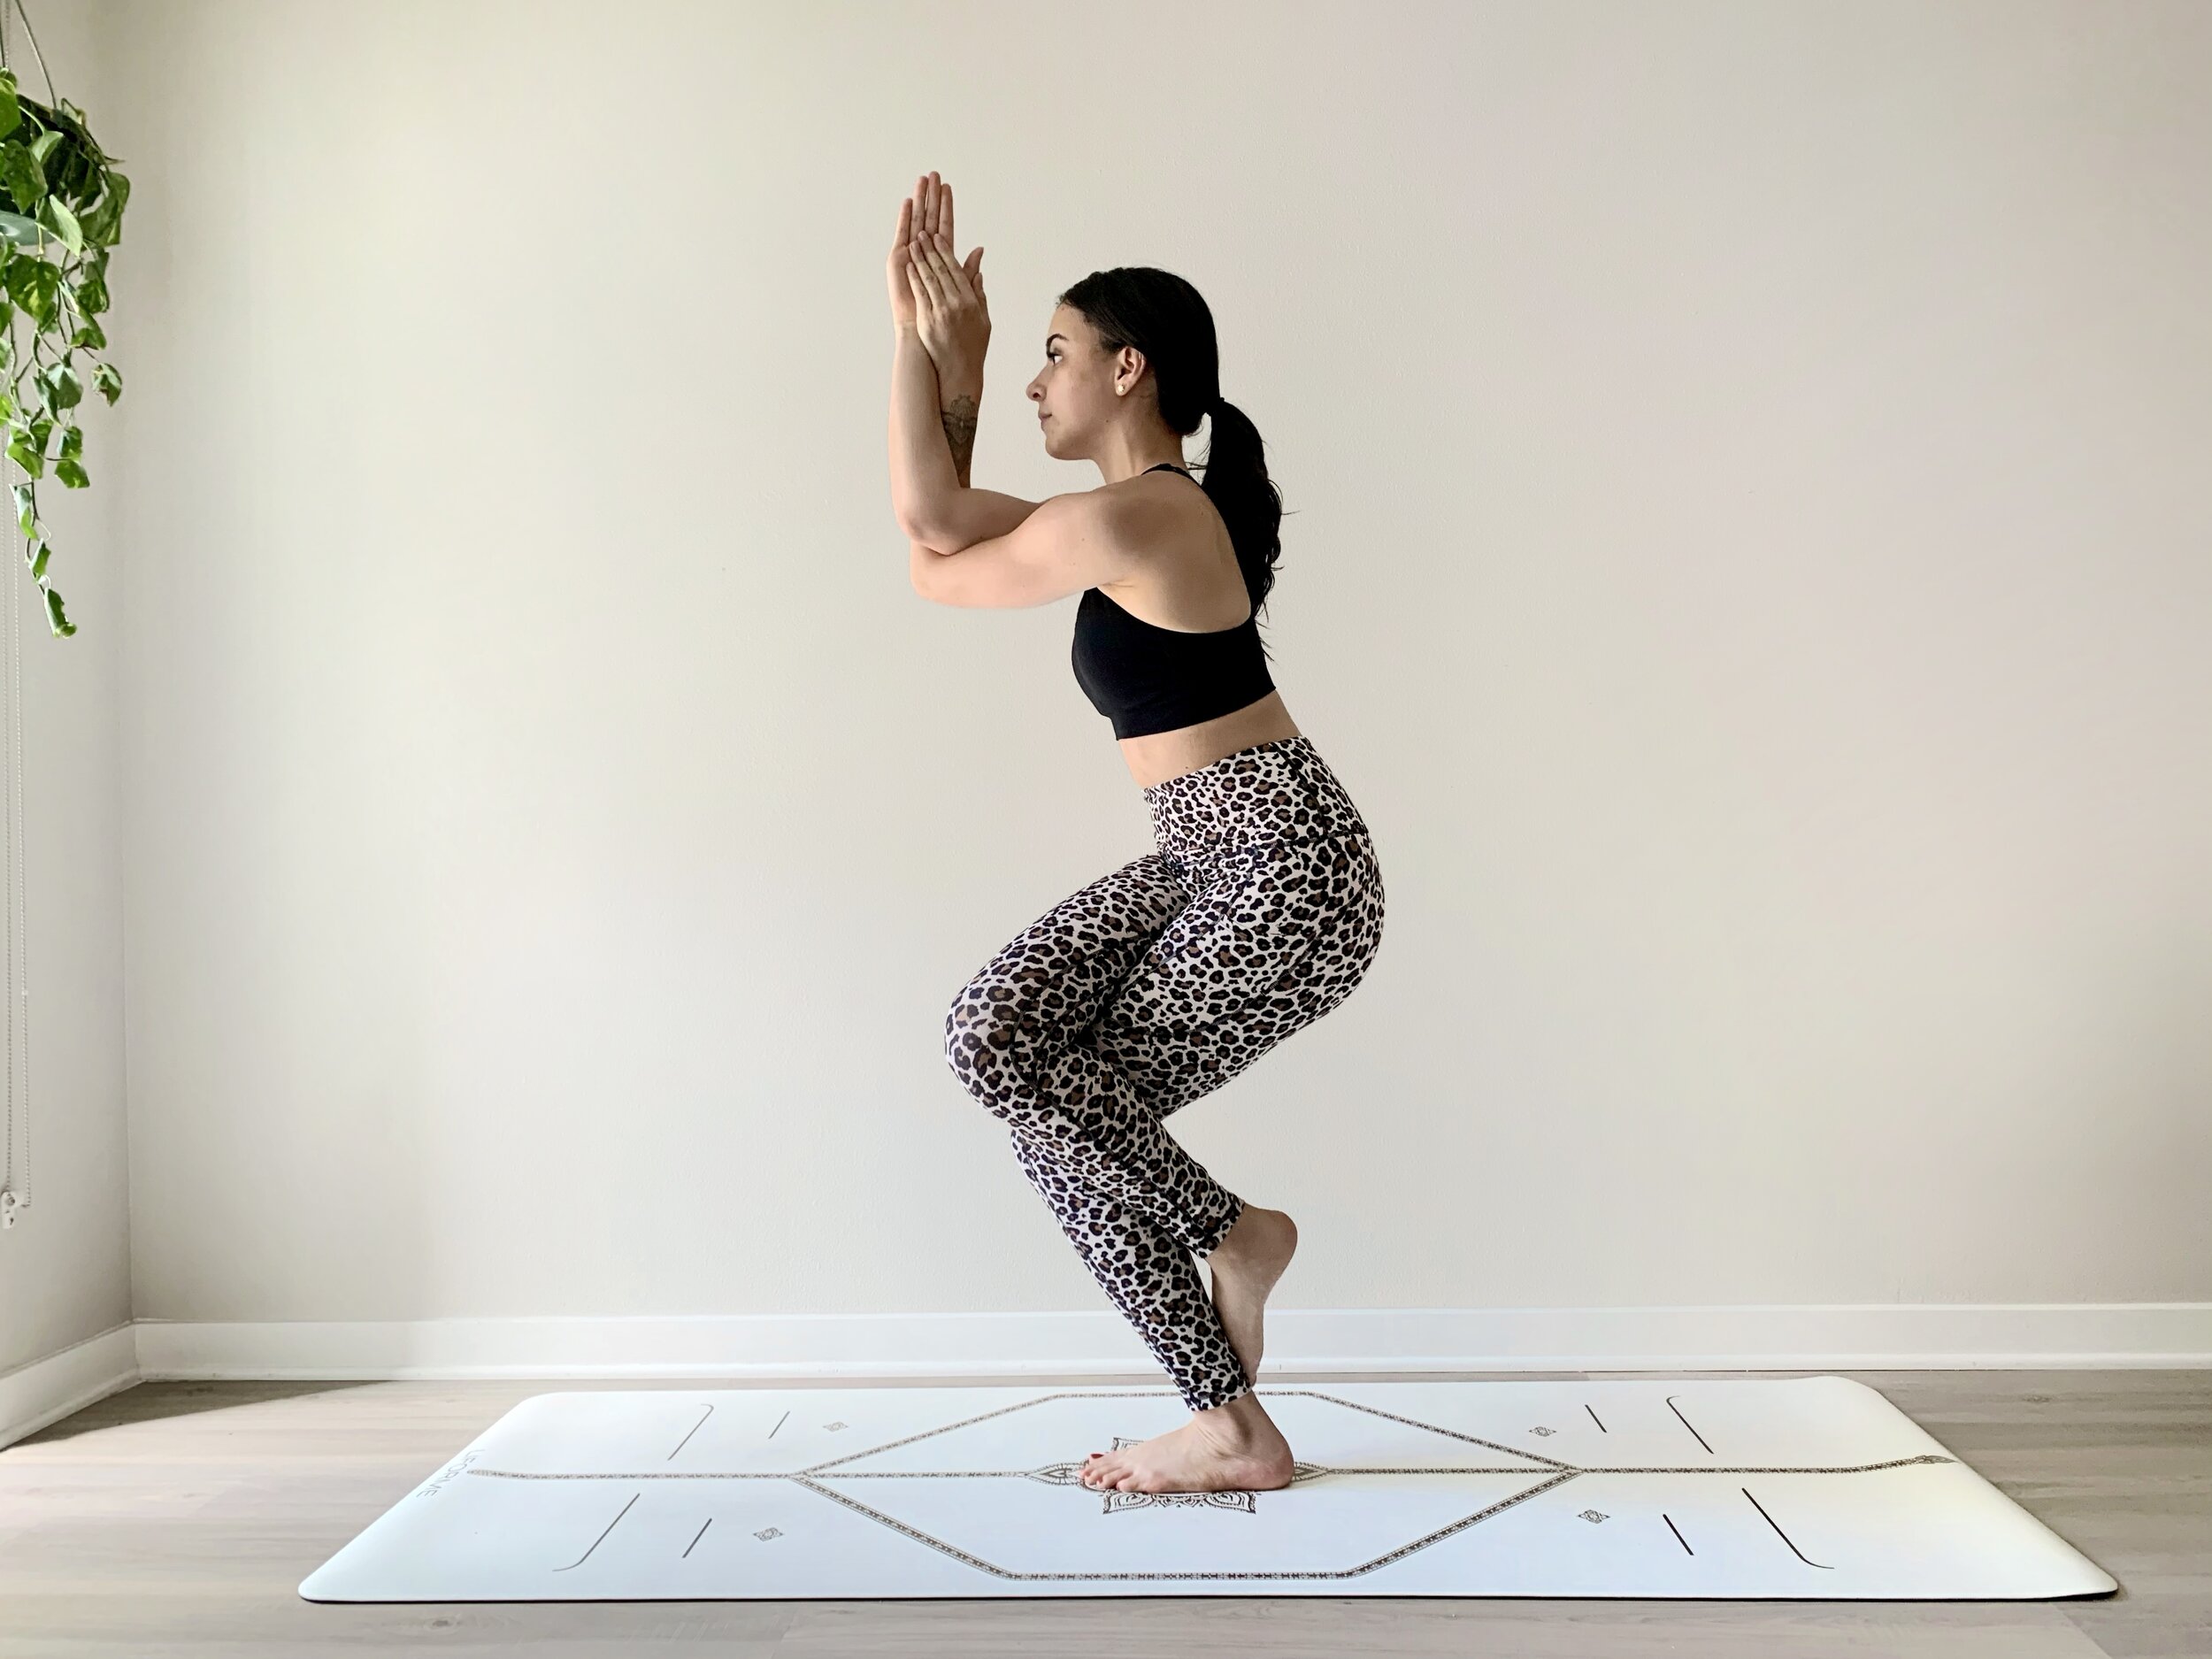
4. Garudasana (Eagle Pose)

This standing balance pose strengthens the ankles/thighs, tones the inner thighs, stretches the outer hips, opens the upper back and improves focus and balance. It also improves your core strength.

How To Do It: Stand in Mountain Pose with your knees slightly bent. Shift your weight into your left foot and cross your right thigh over your left. See if you can hook your right foot behind your left calf. Engage the inner thighs by squeezing them into the midline. Feel how this brings more stability to the pose. Next, cross your right elbow over your left (like you're giving yourself a hug) and bring the palms of your hands (or the backs of your hands) together. Lift the elbows up and away from the face to bring more space across the upper back. Life the the sternum and spread the collarbones. Sit deeper, descending the tailbone.

FullSizeRender 48.jpg

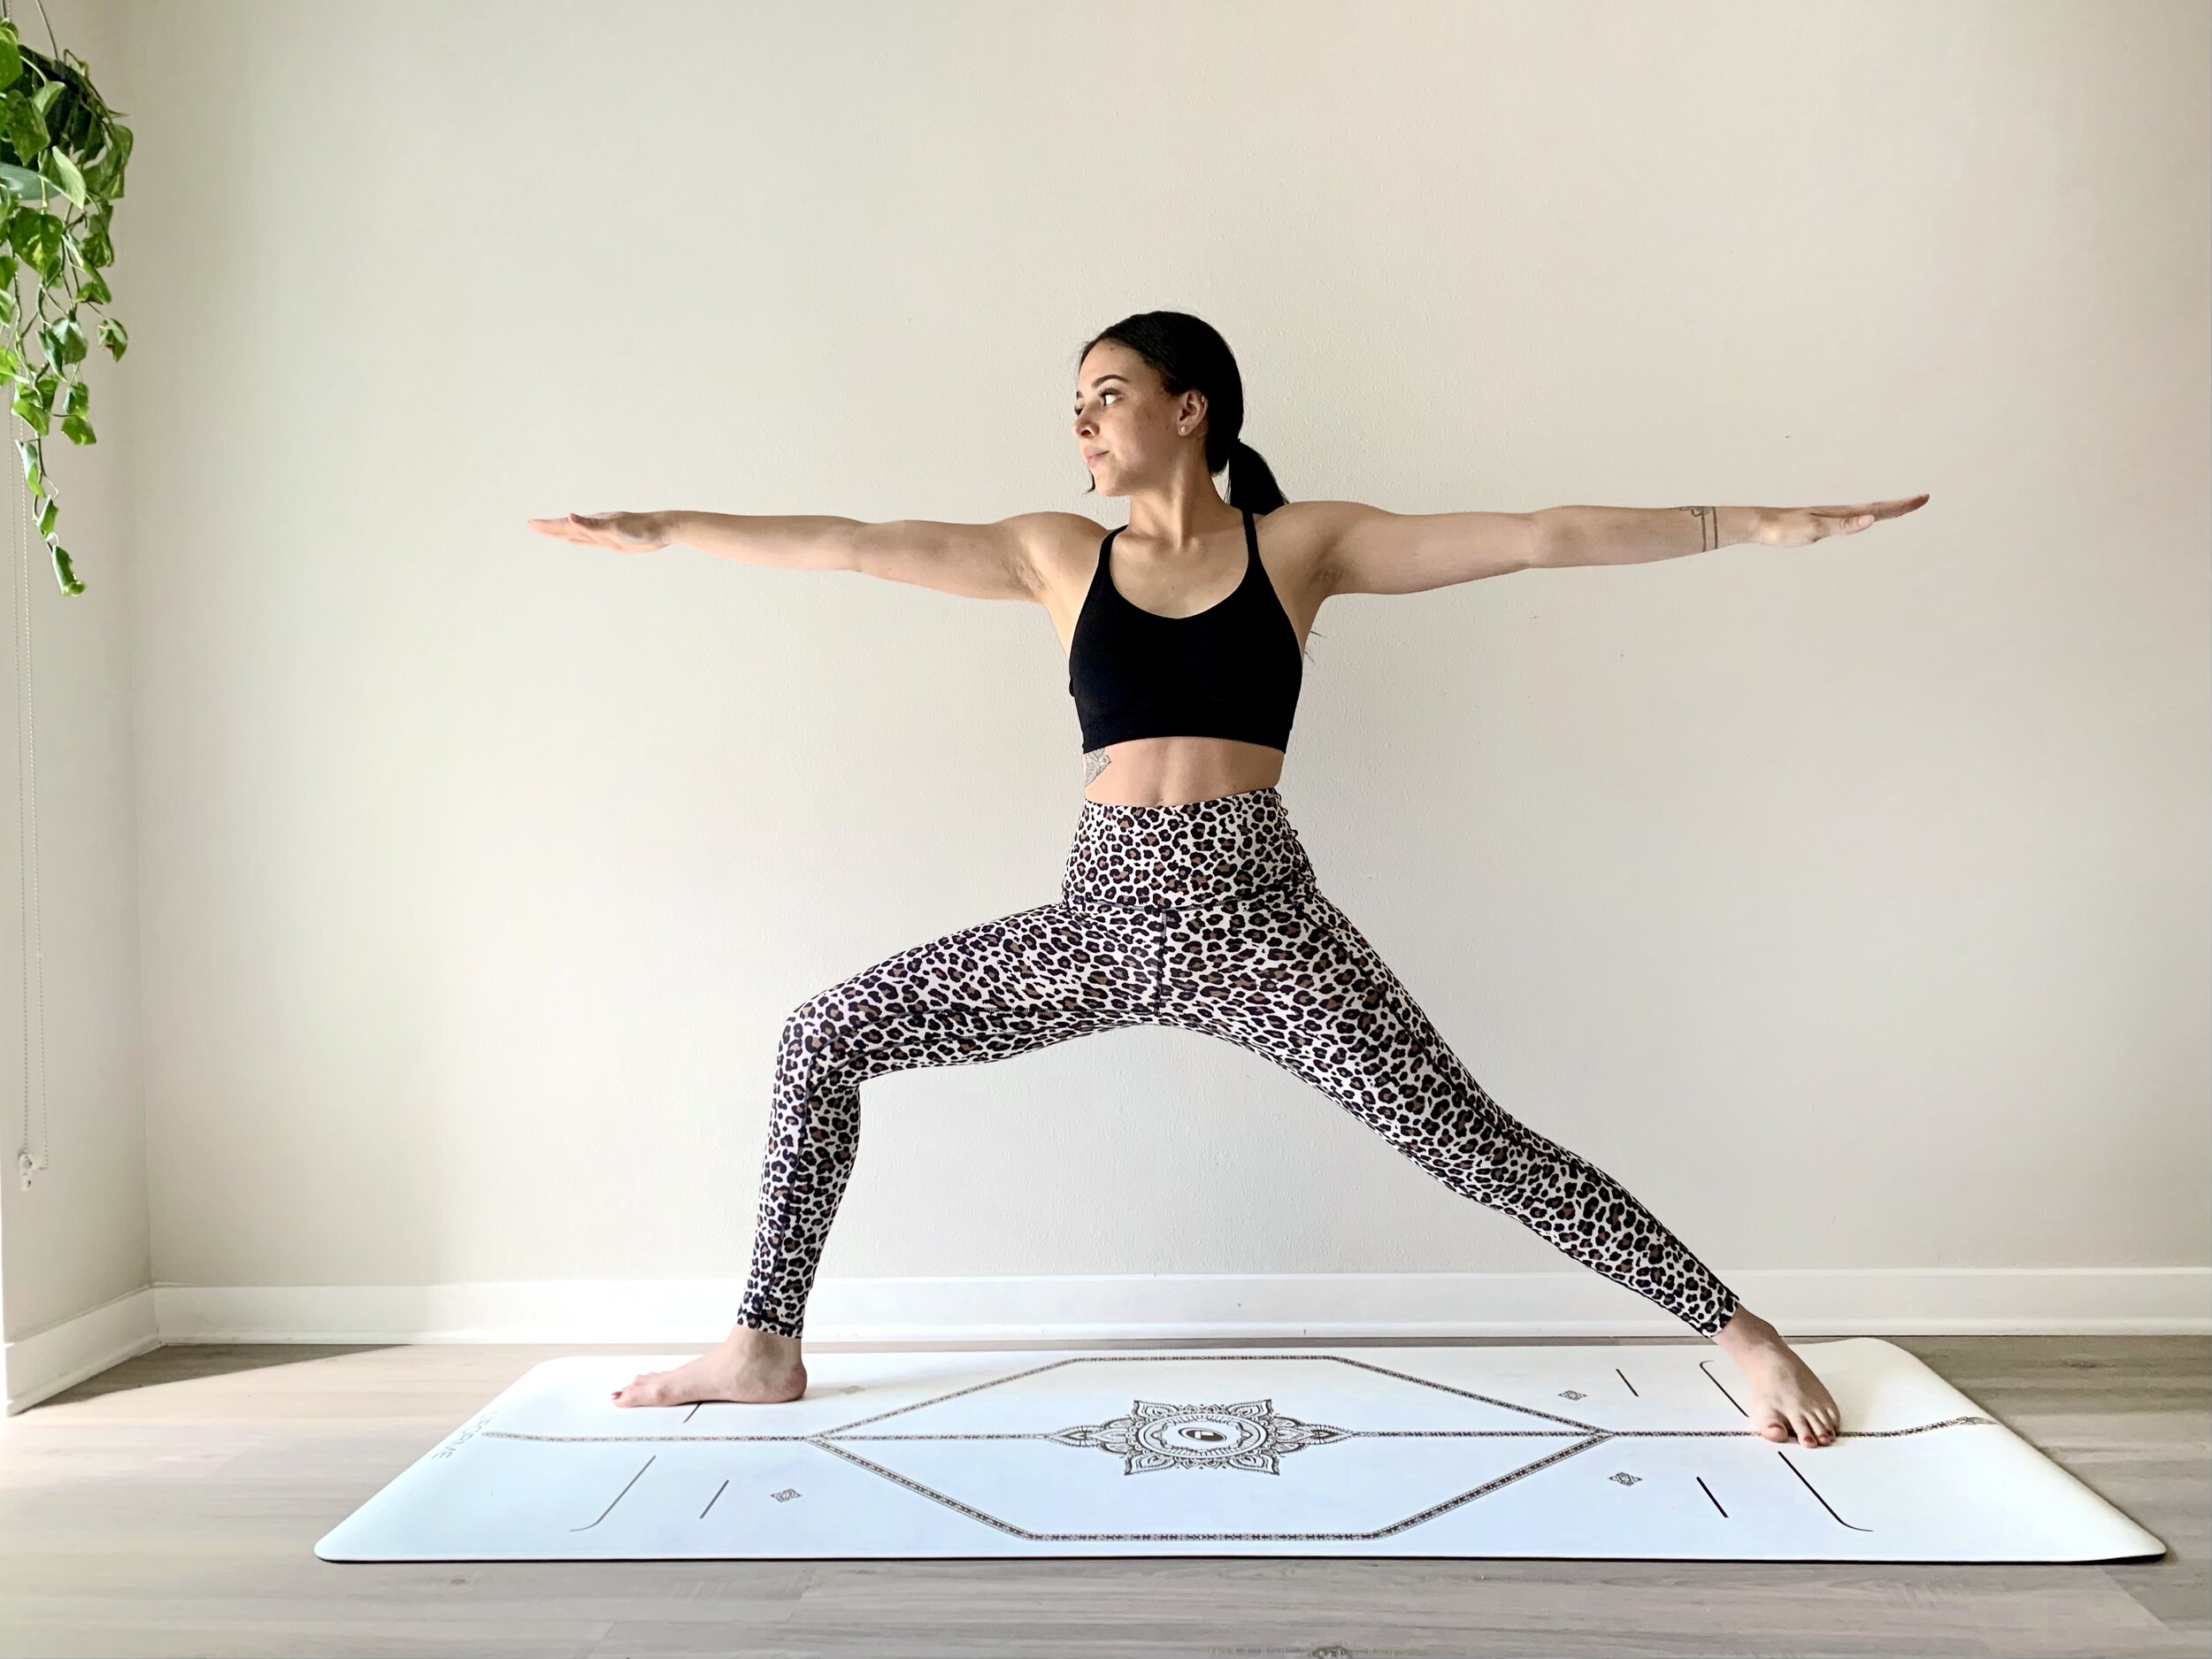
5. virabhadrasana II (Warrior II)

This classic standing warrior pose strengthens the shoulders, arms and legs and stretches the legs, chest and shoulders. Practicing Warrior II improves your stamina, endurance, balance and concentration.

How To Do It: Begin in Mountain Pose, step your left foot back so that it’s parallel to the back of the mat. Feel the inside of your thighs open towards the outside edge of your feet. Extend your arms out through the fingertips as you draw the shoulder blades together. Arms parallel to the floor. Let the top of the shoulders drop away from the ears. Gaze over your right middle finger. Ground down the outside edge of the back foot and draw up through the inside of the arch. Shoulders over hips, elbows roughly over knees. Head above tailbone.

IMG_6797.jpg

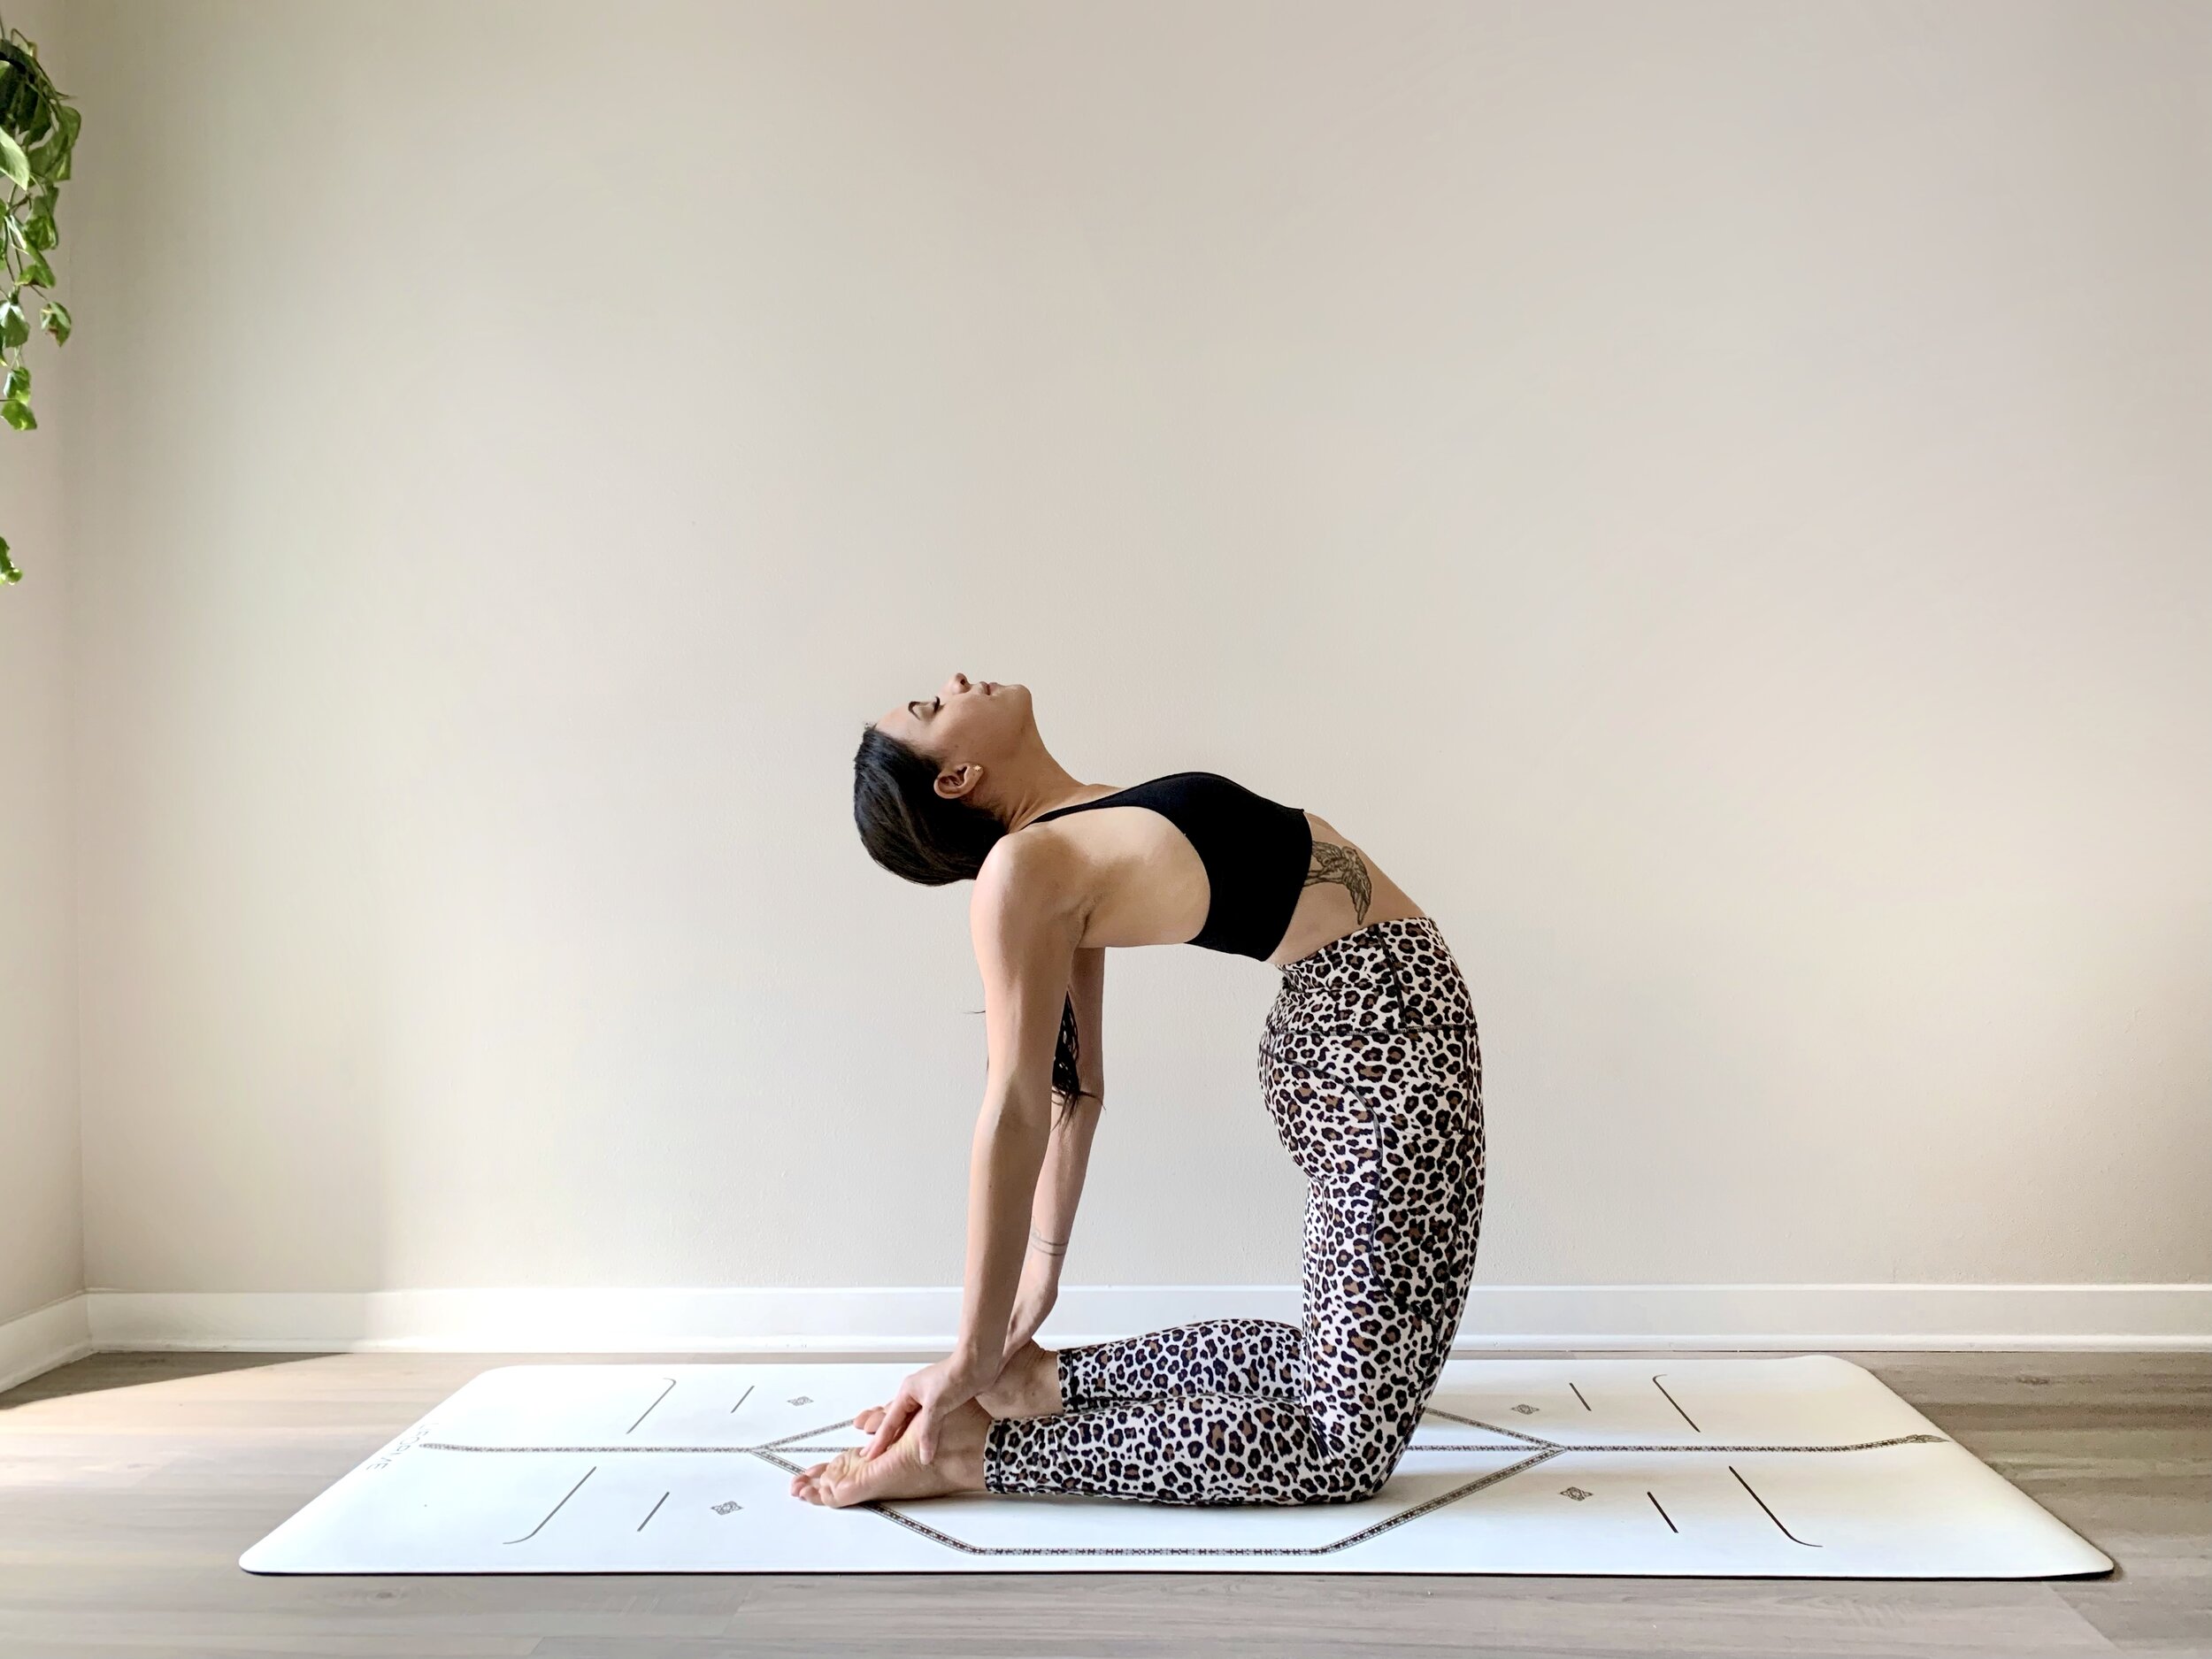
6. USTRASANA (CAMEL POSE)

This backbend improves focus and body posture and can help boost your energy and fight fatigue. Camel pose opens the entire frontside body and strengthens the back.

How To Do It: Sit in a kneeling position with your knees hip width distance apart. Bring your hands on your hips or to your low back. Gently squeeze the shoulder blades together and draw the elbows in toward your midline. Focus on lifting the sternum up toward the ceiling while you inhale and then press your hips forward to slowly bend backwards. As you exhale, slide your palms to your heels as you straighten your arms to come into the full variation.

FullSizeRender 49.jpg

7. PADMASANA (LOTUS POSE)

This cross-legged yoga pose is traditionally known to calm the mind and prepare you for deep meditation. Lotus pose stretches the knees, ankles and hips and strengthens the spine and upper back. Practice this pose at the beginning or end of your practice to help channel your thoughts in a single direction, thus improving concentration.

How To Do It: Sit on the floor with your legs extended. Bend your right knee and hug it to your chest. Next, bring your right ankle to the crease of your left hip so the sole of your right foot faces the sky. The top of your foot should rest on your hip crease. Then, bend your left knee. Cross your left ankle over the top of your right shin. The sole of your left foot should also face upwards, and the top of your foot and ankle should rest on your hip crease. Draw your knees as close together as possible. Press your groins toward the floor and sit up straight. Rest your hands on your knees with your palms facing up. Bring your hands into Gyan Mudra by creating a circle with each index finger and thumb, keeping the rest of the fingers extended. Soften your face and bring your gaze to your ‘third eye,’ the space between your eyebrows.

Practice online with me! Use this 30-minute class to improve your focus and concentration.

5 Ways Yoga Can Improve Your Mental Health

IMG_2997.JPG

October 10th is World Mental Health Day. Every year, this day is meant to raise awareness about mental health, combat stigma and encourage ways for people to receive support. Mental health affects millions of people in America alone, and it's time we start having an open and honest discussion about it.

For those who are familiar with my story, you already know what prompted me to start yoga in the first place. For those who may not be aware, during my teens and early twenties, I struggled with anxiety and depression. It was something that I unconsciously hid and felt ashamed about for a long time. It wasn’t until I discovered yoga and sought professional help, that I was able to heal and recover.

Yoga continues to teach me how to become more aware of my thought patterns, how to observe them without judgement and how to gracefully let them go. I have learned how to be mindful of the way I speak to myself, to separate myself from my thoughts and to live with much more presence and ease. For this, I am extremely grateful.

Yoga is truly life-changing. I know not only from personal experience, but from the findings of many scientists and researchers who have investigated how yoga affects individuals with mental health conditions. The results are promising, suggesting that yoga helps improve mental health issues, including anxiety, depression, post-traumatic stress disorder and many others.

Along with these findings are ground-breaking studies (which you’ll find referenced throughout this blog) which suggest that yoga has the ability to change the structure and function of the brain. These ‘neuroplastic’ changes also prove why and how yoga can benefit people who are struggling with their emotional health.

In this article I’m going to share with you 5 ways that yoga can drastically improve your overall health and welling.


1. Increases Relaxation

Yoga can increase relaxation by altering the stress response system, helping to ‘tame’ and quiet down the nervous system. In this way, the mental benefits of yoga happen with the reduction of stress by decreasing cortisol (stress hormone) levels in our body. A common theme in yoga is the process of ‘letting go’ — releasing deep holding patterns in the body and finding a state of balance to support healing. Longer-held postures such as those in Yin or Restorative yoga, encourages slowing the breath down, which allows us to shift away from the sympathetic nervous system’s fight-or-flight response, the place we react from when feeling overwhelmed and unable to cope with the many demands of our lives. Then, a space is created to move into the place of rest-and-digest, or the parasympathetic nervous system, which is responsible for activating the relaxation response. This decreases anxiety and produces a calm feeling in the body and mind. One study involved 24 women who characterized themselves as emotionally distressed. The results revealed the impressive effects of yoga for stress relief. Along with decreases in anxiety, depression and fatigue, the women also showed much lower cortisol levels, all after just 3 months of consistent yoga.

2. Promotes Mindfulness

Mindfulness means being present in the current moment, and it can be a surprisingly difficult state to achieve. The concept of focusing on the ‘now’ is central to yoga. Mindfulness can be developed and enhanced through various yogic techniques, such as meditation, awareness of the breath, our thoughts, feelings, bodily sensations and surrounding environment. It’s important to explore mindfulness and observe the thought patterns of your mind through a gentle, nurturing lens and a place of non-attachment and non-judgement. A mindfulness-based cognitive therapy (MBCT) study found that students who practiced mindfulness reduced their anxiety, excessive worry and negative thought patterns. Mindfulness training also improved their emotional well-being, professional development and resiliency to stress. 

3. Builds Self-Confidence

All yoga styles, practices and philosophies bring your scattered awareness from the external world to inside you. In this way, yoga makes you more aware of your existence and teaches you that you’re completely in yourself. This sense of internalization boosts the self-confidence of students, which may prevent many mental health issues. In a study to assess attention and self-esteem in girls using an integrated yoga module, low-income high school students reported improvement in attention and self-esteem. Practicing yoga enhanced their mental health and led to academic improvement. Empowering yoga poses such as Plank Pose, Tree Pose, Bridge Pose and Warrior Pose not only strengthen us physically, but mentally as well, building self-confidence and improving self-esteem.

4. Improves Concentration, Focus & Memory

Yoga is all about linking breath with motion and becoming fully present in mind and body. The practice itself is centered on concentration – focus on the breath, the alignment and the movement. Research shows that even a very short period of yoga practice can have immediate effects on the brain, as far as improving attention, memory and judgement. In a study published in the Journal of Physical Activity and Health, 20 young female students participated in 20 minutes of yoga followed by meditation and deep breathing, and then followed that with 20 minutes of aerobic exercise. The researchers carried out cognitive testing on the participants after each session to test their cerebral capabilities. The results showed that the cognitive scores were higher in the women that had participated in yoga, than those who did not. The tests highlighted that after just one 20 minute yoga session, participants were able to focus better, process information quickly, more accurately and also learn, hold and update pieces of information more effectively.

5. Enhances Mood & Emotional Wellbeing

Because yoga increases your ability to be present, you can recognize your emotions more clearly. You can sit with your emotions in a state of more openness and curiosity, which in turn increases emotional intelligence. In addition, a consistent yoga practice improves circulation in the endocrine glands, which enhances the functions of hormones that play a primary role in the physiology of depression. This results in a reduction in depression and improved overall mood. In one particular study, Scandinavian researchers measured brain waves before and after a 2 hour yoga class and found that alpha waves (relaxation) and theta waves (unconscious memory, dreams, emotions) increased significantly. These results indicate that the brain is deeply relaxed after yoga and that participants have better awareness of their subconscious and emotions.

The impact of yoga on mental health is diverse and expanding. Yoga is a unique mind-body practice that can be used to deepen your relationship with yourself and improve your mental health and overall wellbeing. Personally, I believe that mental health day should be every day. There shouldn’t be a single day that goes by where we aren’t checking in with ourselves and our mental state. Getting in the daily habit of tuning in to how you feel, can help you become more aware and mindful of your mental state. Yoga creates this space for you to be able to question, be curious, process the emotions you are experiencing and understand yourself a little better.

With one in four people affected by mental health disorders at some point in their lives, many people are viewing yoga practices and wellness retreats as effective strategies that can help protect and restore the mental health of individuals throughout the world. As yoga becomes more accepted and practiced to support mental health disorders, there’s a big possibility that more research will be published to guide those towards living more healthy and mindful lives. This is just the beginning.

Practice free yoga classes online with me, at the comfort of your own home.

*Editor’s Note: The information in this article is intended for your educational use only and is not a substitute for professional medical advice, diagnosis or treatment. Always seek the advice of your physician or other qualified health providers with any questions you may have regarding a medical condition and before undertaking any diet, supplement, fitness or other health programs.

How To Use Social Media Mindfully

IMG_4459 2.JPG

There’s no doubt that social media has transformed the way we consume and process information and the way we interact and communicate with each other. In many ways, this is a great thing — unlimited amount of information available at our fingertips, the ability to share our thoughts, ideas and opinions with people all over the world and keep in touch with others in a way we never have before. When I first started practicing yoga, social media played a huge part in helping me feel connected to the yoga community online, and it still does to this day. Social media is one of the main reasons why I started this blog and became passionate about sharing yoga online. Chances are, this article is reaching you via a social media channel, and I’m thankful for the opportunity this provides for sharing work that facilitates personal growth and elevates our awareness + consciousness.

Social media is intended to create and maintain connections, but it can also have an impact on our mental health, something that I have experienced myself and perhaps you have too. Research has found that people, specifically teens and young adults, who use social media heavily often experience higher levels of depression, social isolation, low self-esteem, anxiety, stress and even insomnia.

It may be unrealistic to think that we should stop all social media use completely. However, there are definitely ways to use it positively while minimizing the negative impact on our health. One way to do this is through practicing mindfulness. If you’ve been following here for a while, you know I love to share tips on how to find balance in life through mindful techniques. Mindfulness is defined as a practice of focusing one’s mind on the present moment, with acceptance and without judgement. By being mindful during our social media use, we can be more aware of how it affects us and practice better self-care. 

Over the past year of using social media more for my business, I've had to form a few new habits to prevent scrolling and online engagement from consuming my days. I recently just finished a 3-week social media break, and for the past couple of days I have been trying to be even more aware of my phone usage amount and habits. Being mindful of my scroll makes me feel a little better (and more productive!) at the end of the day.

Here are a few tips I've tried and tested before passing on to you. There’s also a FREE gift at the end of this page to support you on your journey to more mindful technology use. I hope these tools help!

FullSizeRender 41.jpg

1) Consider your intentions. 
Before you open any app, consider your intentions. What is your purpose for being online? Often times, we scroll through social media, or in general pick up our phones, as a reflex — we’re bored, so we pick up the phone. We’re in an awkward situation, we pick up the phone. Most of us unknowingly use social media as a form of escapism. Escapism, by definition, is a habitual diversion of the mind to purely imaginative activity or entertainment as an escape from reality or routine. I personally think a moderate amount of escapism is normal and perfectly healthy. The writer Shirly Jackson said, “No live organism can continue for long to exist sanely under conditions of absolute reality”. Where the issue with escapism and social media comes in, is if you find yourself consistently avoiding the present moment and “real world” by mindless scrolling. So the next time you’re about to go online, ask yourself “what am I hoping to gain from this experience?” Then ask yourself “what am I avoiding by doing this? Why do I want to avoid it?” Mentally list the benefits of not dealing with whatever it is now, versus the cons. And if you’re not sure of your intentions for being on social media, maybe you should consider staying offline for the time being. It’s more difficult to achieve satisfaction on social media if you’re not sure what you’re looking for. 

2) Turn off notifications.
Constant alerts and notifications can affect your concentration and focus, disturb your sleep and make you a slave to your phone. Social media platforms are specifically designed to bait and snag your attention, keep you online and have you obsessively checking your screen for updates. It’s ultimately how the companies make money. I recommend watching the documentary, The Social Dilemma, to learn more about how big tech companies have manipulated human psychology to influence how we behave. Much like a gambling compulsion or an addiction to alcohol or drugs, social media use can create psychological cravings. When you receive a like, a share or a favorable reaction to a post, it can trigger the release of dopamine in the brain, the same “reward” chemical that follows winning on a slot machine, taking a bite of chocolate or lighting up a cigarette. The more you’re rewarded, the more time you want to spend on social media, even if it becomes detrimental to other aspects of your life. Turning off notifications is one way you can intentionally take back control of your concentration and focus and be more mindful.

3) Be present. 
As you scroll through your feed, practice being present in the moment. Notice the feeling of your phone in your hand and the screen on your fingers. What is your posture like? How is your breathing? Check in with your body and your emotions. If you take it slow, you may notice that particular posts or people create more negative feelings than others (with that being said, don’t be afraid to unfollow accounts that don’t contribute to your health or well-being). When you do come across a post or account that triggers a negative emotion, sometimes it’s helpful to explore that a bit more. Ask yourself “what is it about this post that makes me feel this way?” Make a commitment to be present with yourself and your emotions without judgement. Although this mindful practice is difficult, it is worth the effort because it allows you to strengthen your ability to treat emotions as valid but fleeting, rather than being in resistance or letting them consume you.

Additionally, be present in your real-life social interactions and with your surroundings, rather than tuning out into a digital world during every available moment. Make sure to set aside no-phone time when you are with friends or family, on walks, commutes or at the dinner table. Enjoy being fully present with the people and things around you, as well as your own sensations and feelings. These small moments of togetherness and solitude are fertile with opportunity for self-reflection, presence and connection.

4) Don’t just scroll — interact & engage with others.
When we mindlessly scroll through our feeds, we lose sight of how it’s really impacting our emotions. Taking the time to interact with a post will give you a moment to notice your experience. Studies have also suggested that people gain more satisfaction and happiness out of social media when they use it as a tool for interaction by liking, commenting, sending messages, etc. Simply “lurking” or scrolling through your feed can lead to feelings of disconnection and loneliness. When I first started using Instagram as a way to share and keep track of my yoga journey, I would participate in monthly group yoga challenges. This was a way to not only hold myself accountable in my practice, but also to connect with other like-minded people from around the world. I immediately found peace and purpose in being a part of a supportive and uplifting community. Consider following accounts that share similar interests and passions with you. Make sure your feed is filled with posts that you genuinely enjoy seeing and would encourage you to regurlarly interact with.

5) Understand there is so much more.

Have you ever been scrolling through your feed, and started comparing yourself to what you see? It’s important to remember that someone’s profile is simply their highlight reel — not a realistic picture of their life. To compare your real life to someone else’s crafted digital persona is unfair and unrealistic, and it sets you up for disappointment. Keep in mind that nobody’s life is perfect, despite what their posts might have you believe. There is always more than what you see online.

If you find yourself constantly comparing yourself to what you see online, it might be time to take a step back and re-evaluate your intentions with social media. There are also certain platforms or apps you may find you prefer over others. Instagram is great for me, because I can connect with new people, continue to share my yoga practice and I really enjoy the creative outlet behind it. YouTube, Facebook and Pinterest are all great too. The main focus, however, is creating yoga classes and supporting my students. Instagram isn’t the be-all-end-all, just a tool to create a larger community.

It may also be helpful to take breaks from social media every so often for a few days, or even a few weeks. Remember, social media is supposed to be a positive experience! So if it doesn’t feel positive for you, try stepping away and focusing on what does make you happy. You might find that you feel more at peace and connected to the world around you. Social media can be a good thing when we use it consciously and responsibly. Whether we are scrolling, sipping a cup of tea or having a conversation, cultivating mindful presence with whatever it is we are doing, can only enrich our experiences and create a more fulfilling life.

I hope you found some of these tips helpful! Thank you so much for taking the time to read.

All my love,

Jess


9 Gentle Seated Yoga Poses For Beginners

IMG_4416.jpg

Most seated yoga postures are suitable for beginner students, as the majority are easily adapted to any level of strength or flexibility. Sitting on the floor also provides a position of stability, which facilitates opening the body.

I've put together 9 gentle seated poses that are most commonly used and vital for beginners. I've even arranged them in order of a sequence/flow so you could use this as a practice on it's own! Be present as you connect with your breath, watch your thoughts and observe the sensations that arise.


IMG_4437.JPG

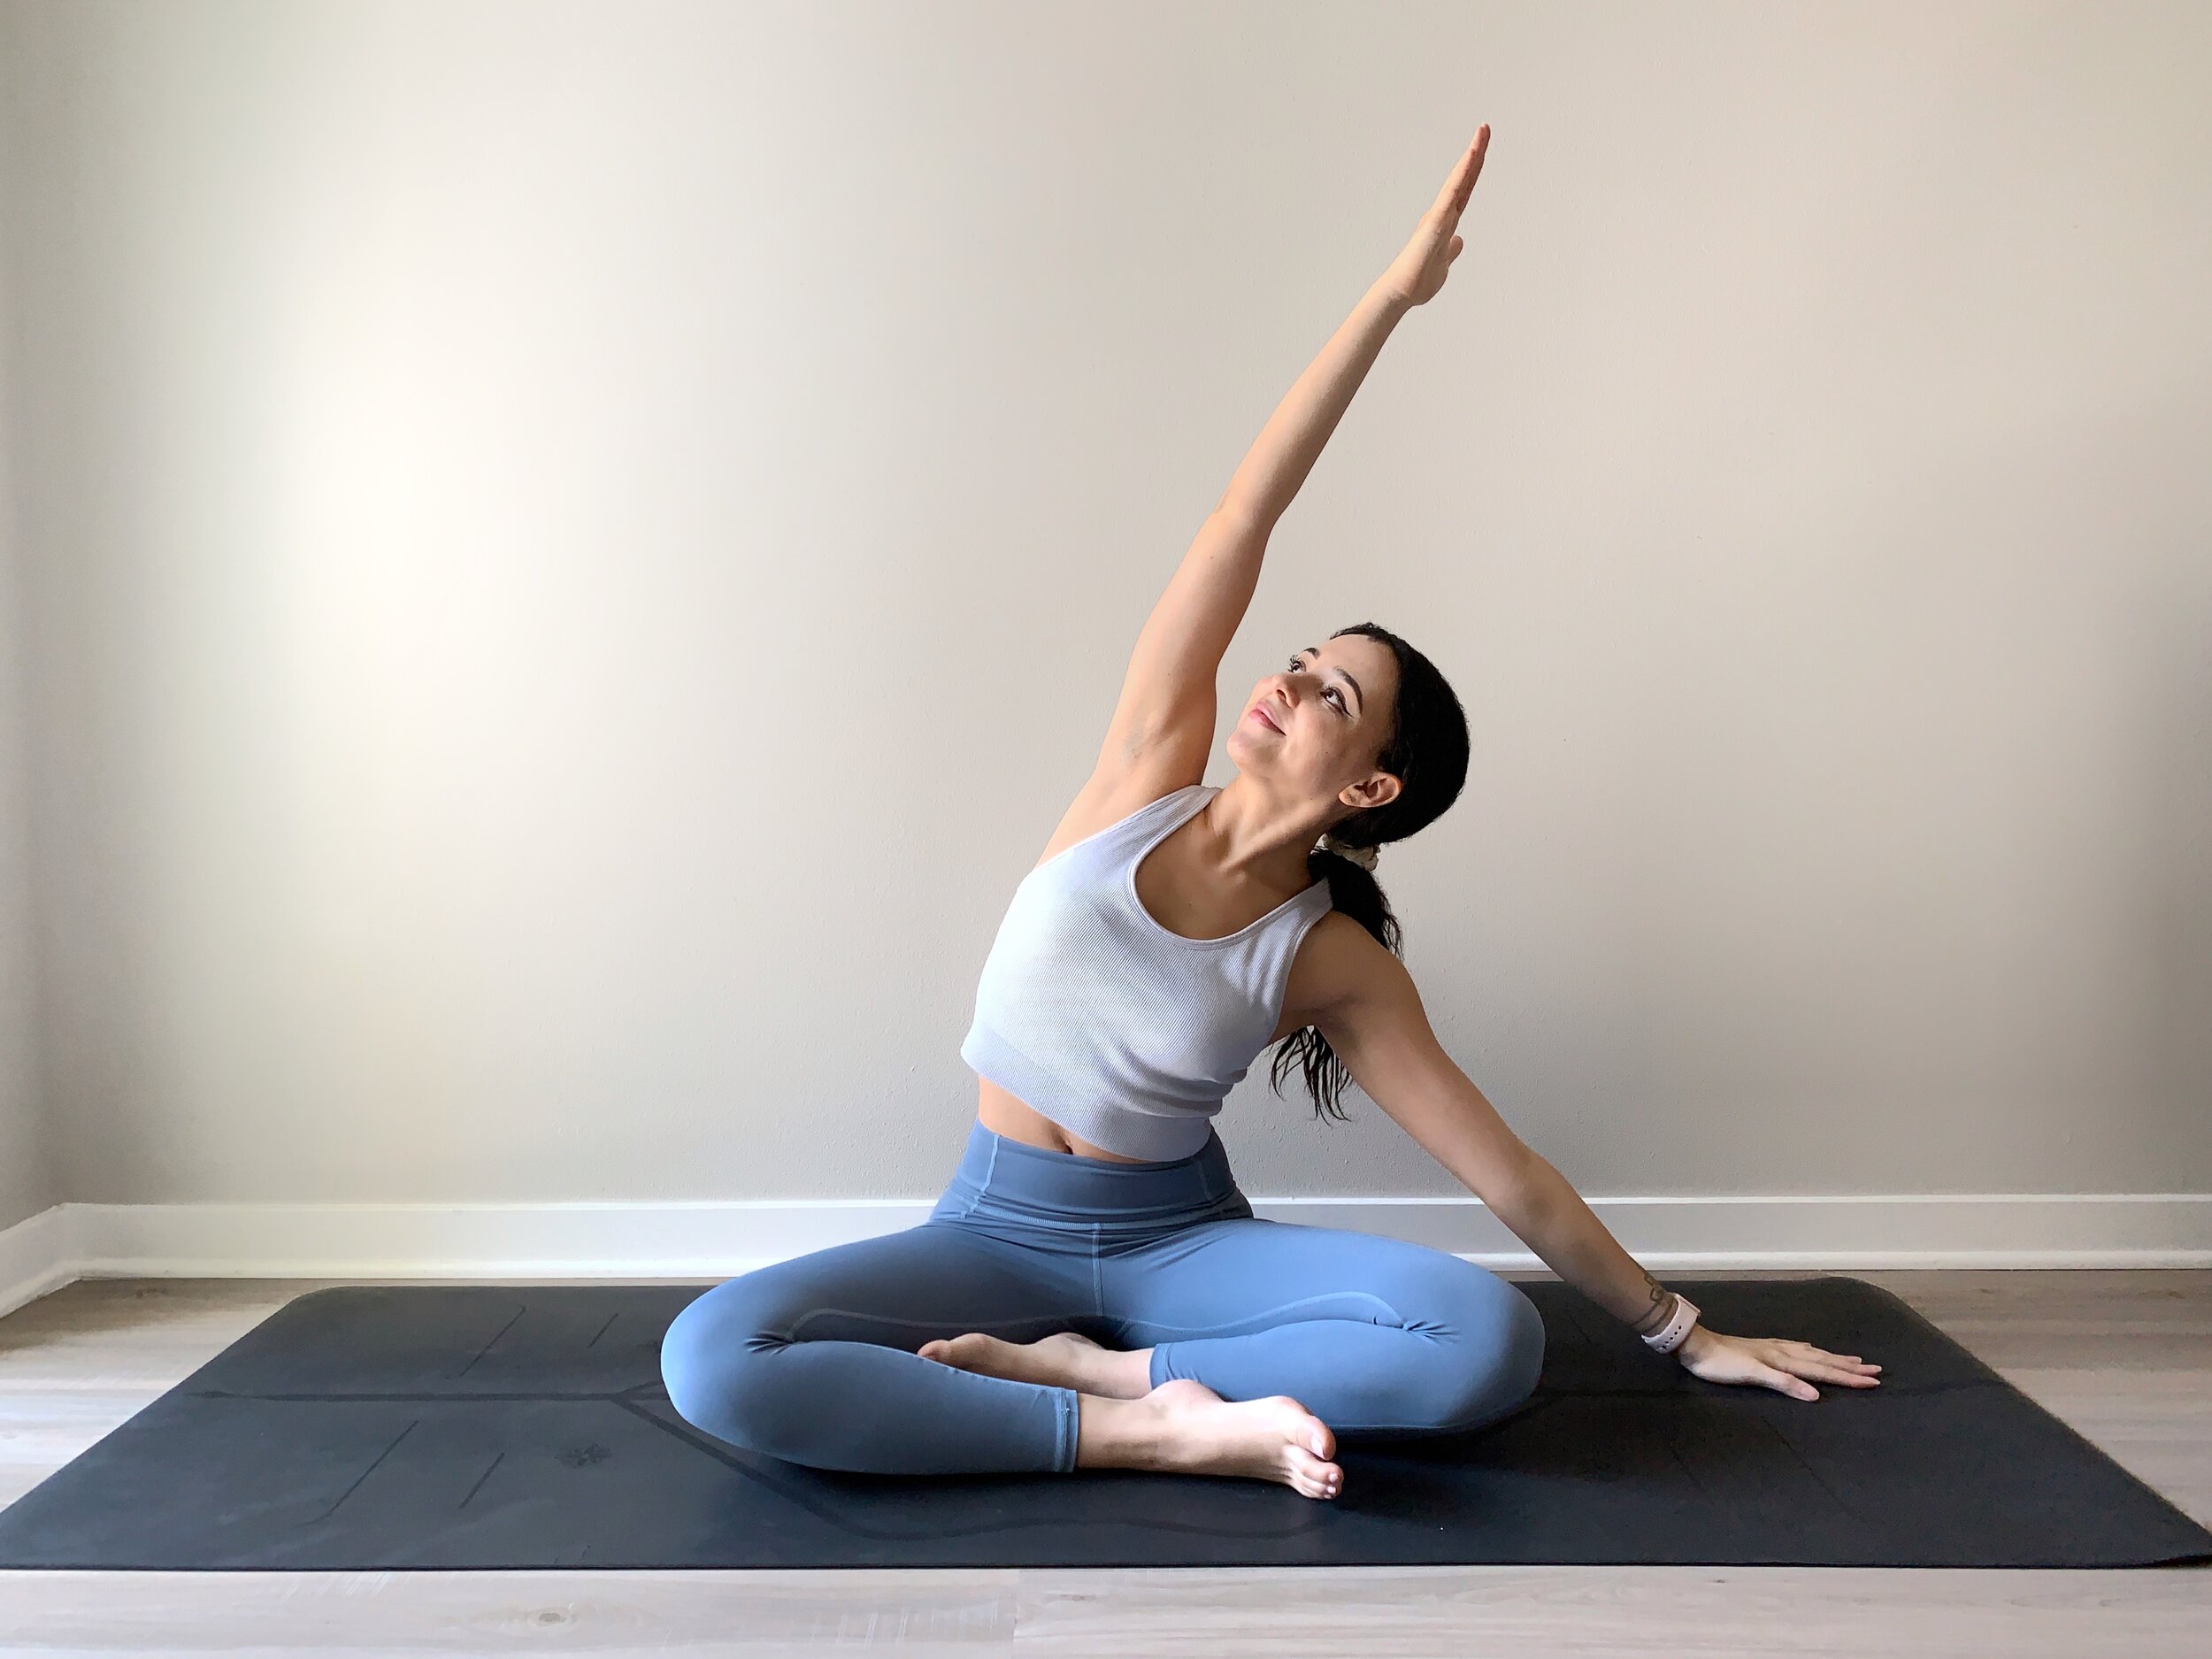
1.     Seated Side Bend (Parsva Sukhasana)

  • Start in Easy Pose, by sitting on the mat with your sit-bones on the ground. Cross your shins parallel to the mat and lengthen your spine by pushing your sit bones into the ground and creating length through the crown of your head.

  • Place your right hand on the floor with your elbow slightly bent or straight.

  • Inhale as you reach your left arm up and overhead. Exhale as you lean to the right side.

  • Hold the pose for 30 seconds to 1 minute, switch sides and repeat.

* Tip: Keep the hips grounded, and as you lean your torso to the right, pull your rib cage to the left.

IMG_4436.JPG

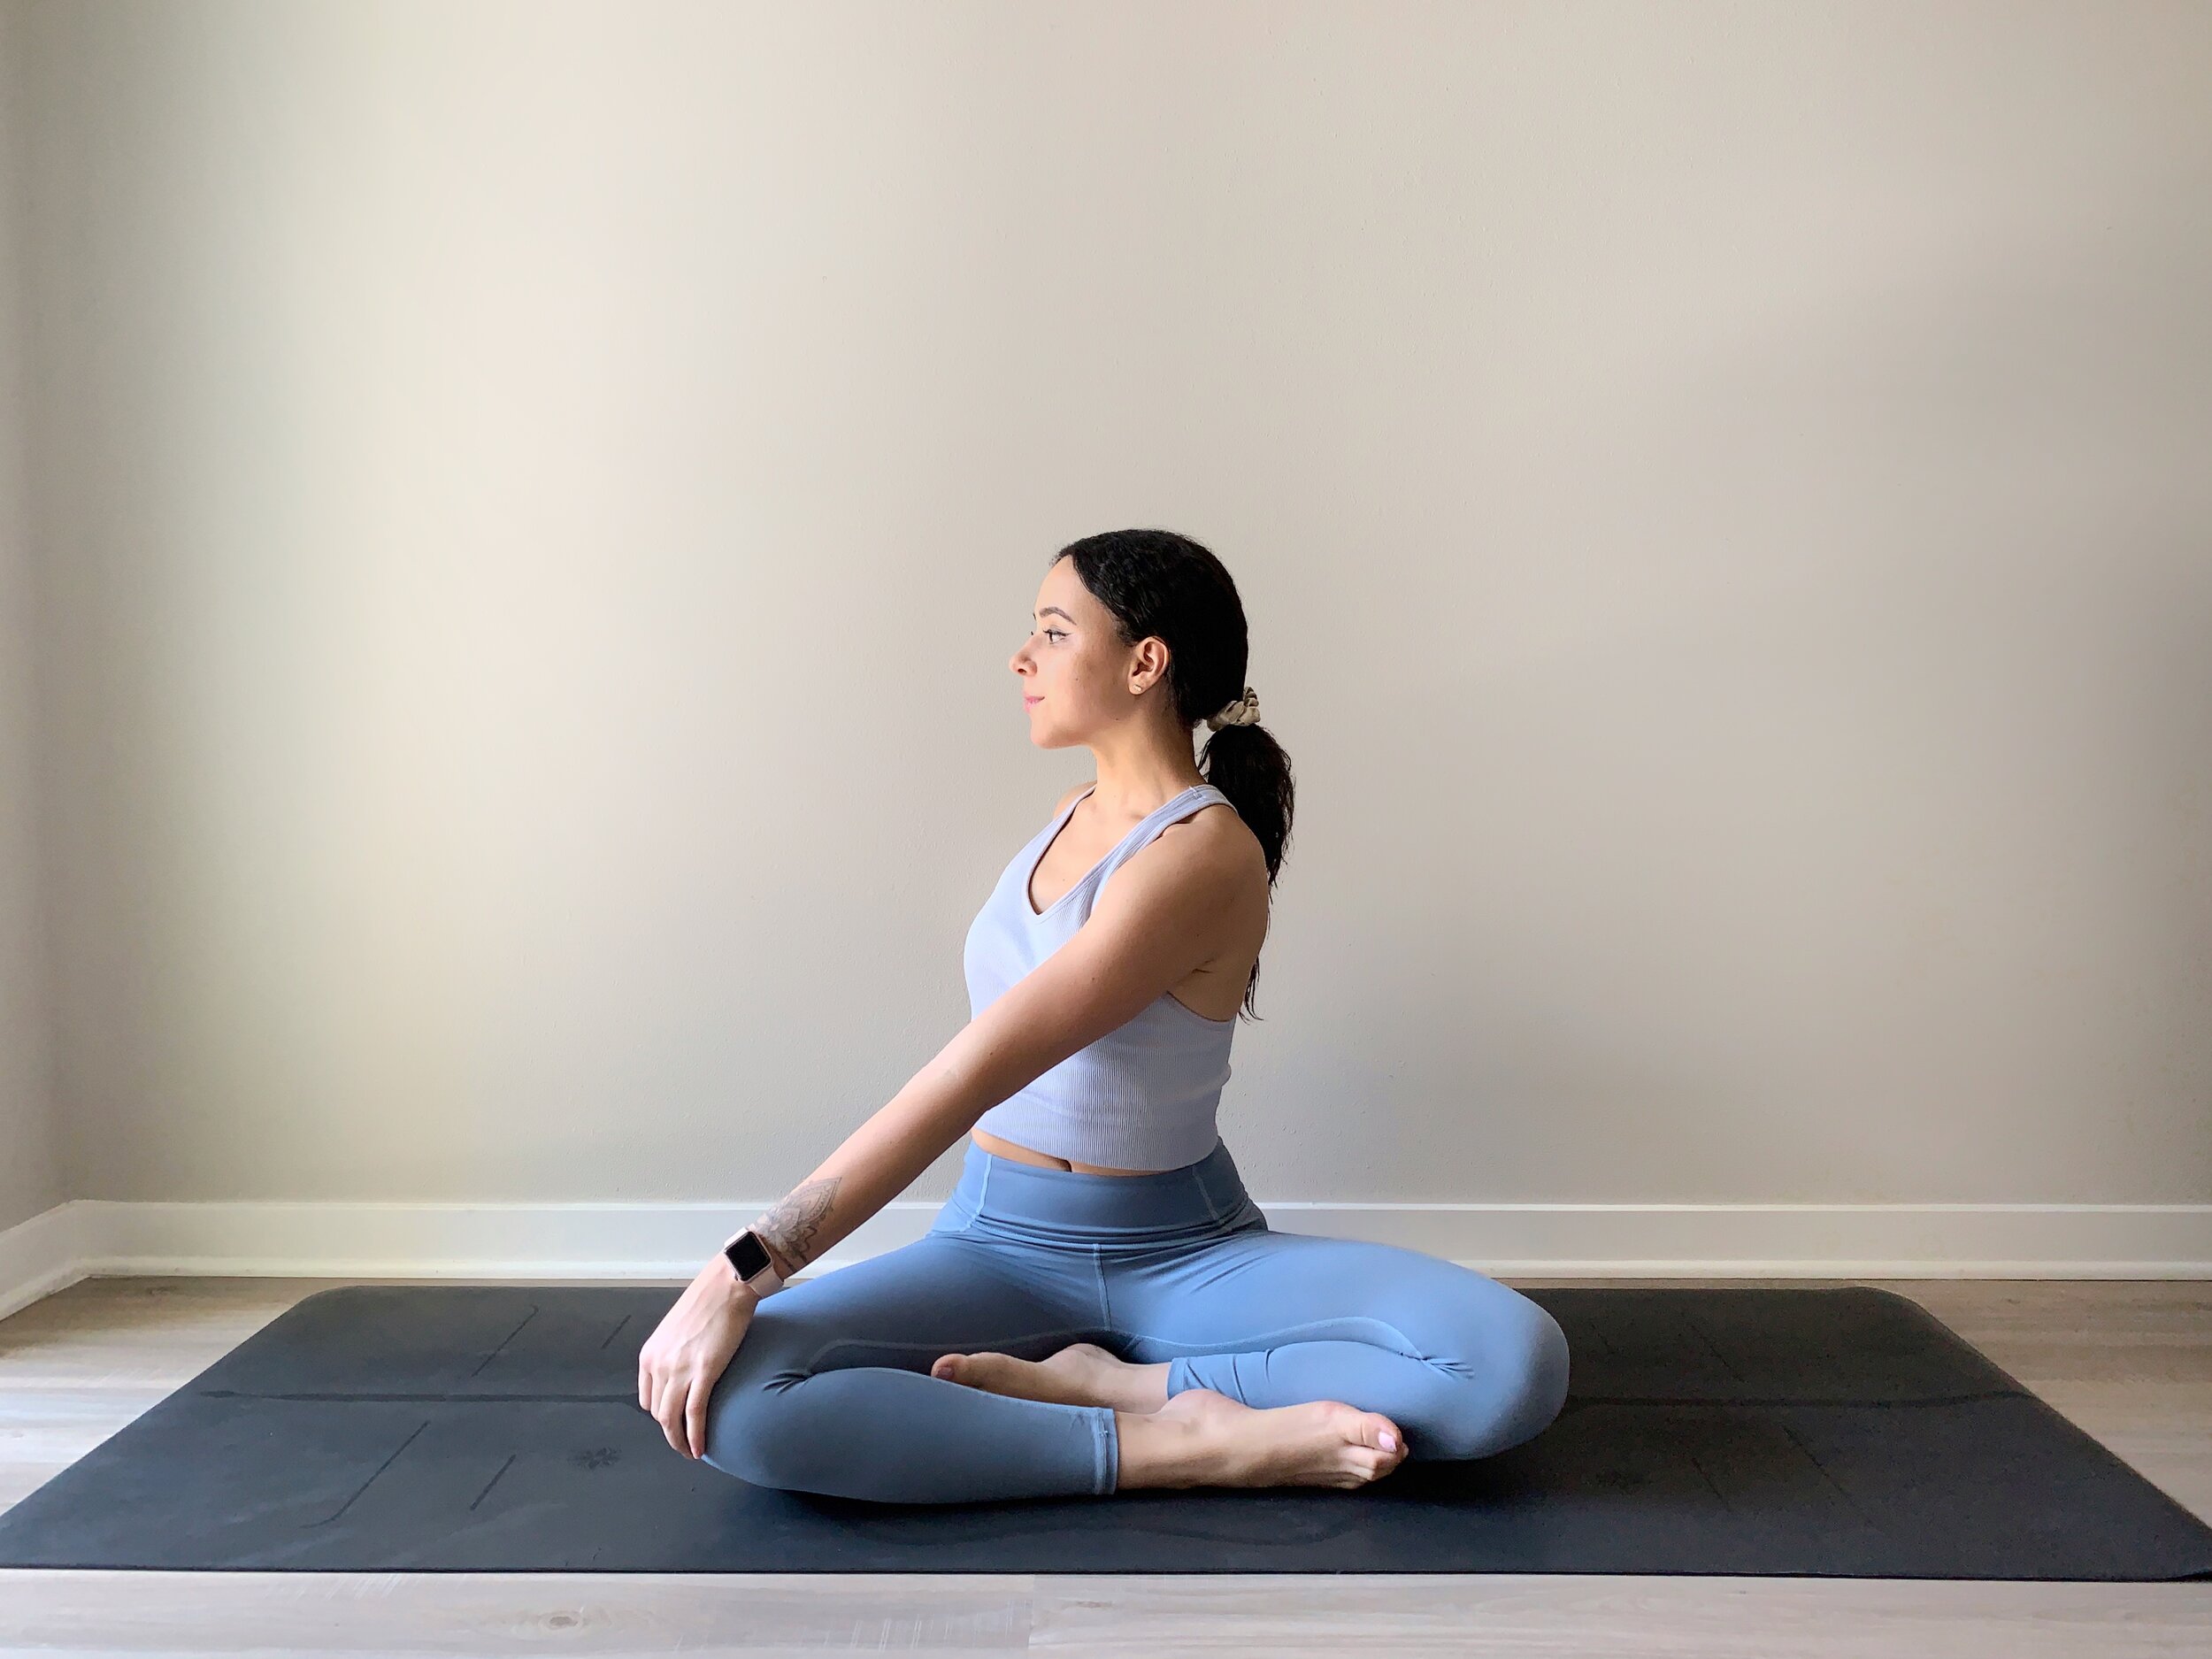
2.     Seated Spinal Twist (Parivrtta Sukhasana)

  • Start in Easy Pose with your back straight and arms relaxed. Inhale here.

  • As you exhale, place your right hand on the left knee and twist your torso to the left.

  • Keep your shoulders and neck relaxed, soften the belly and lift the sternum to lengthen the torso.

  • Hold the pose for 30 seconds to 1 minute, switch sides and repeat.

* Tip: Draw your tailbone toward the floor and keep the lower back long.

IMG_4435.JPG

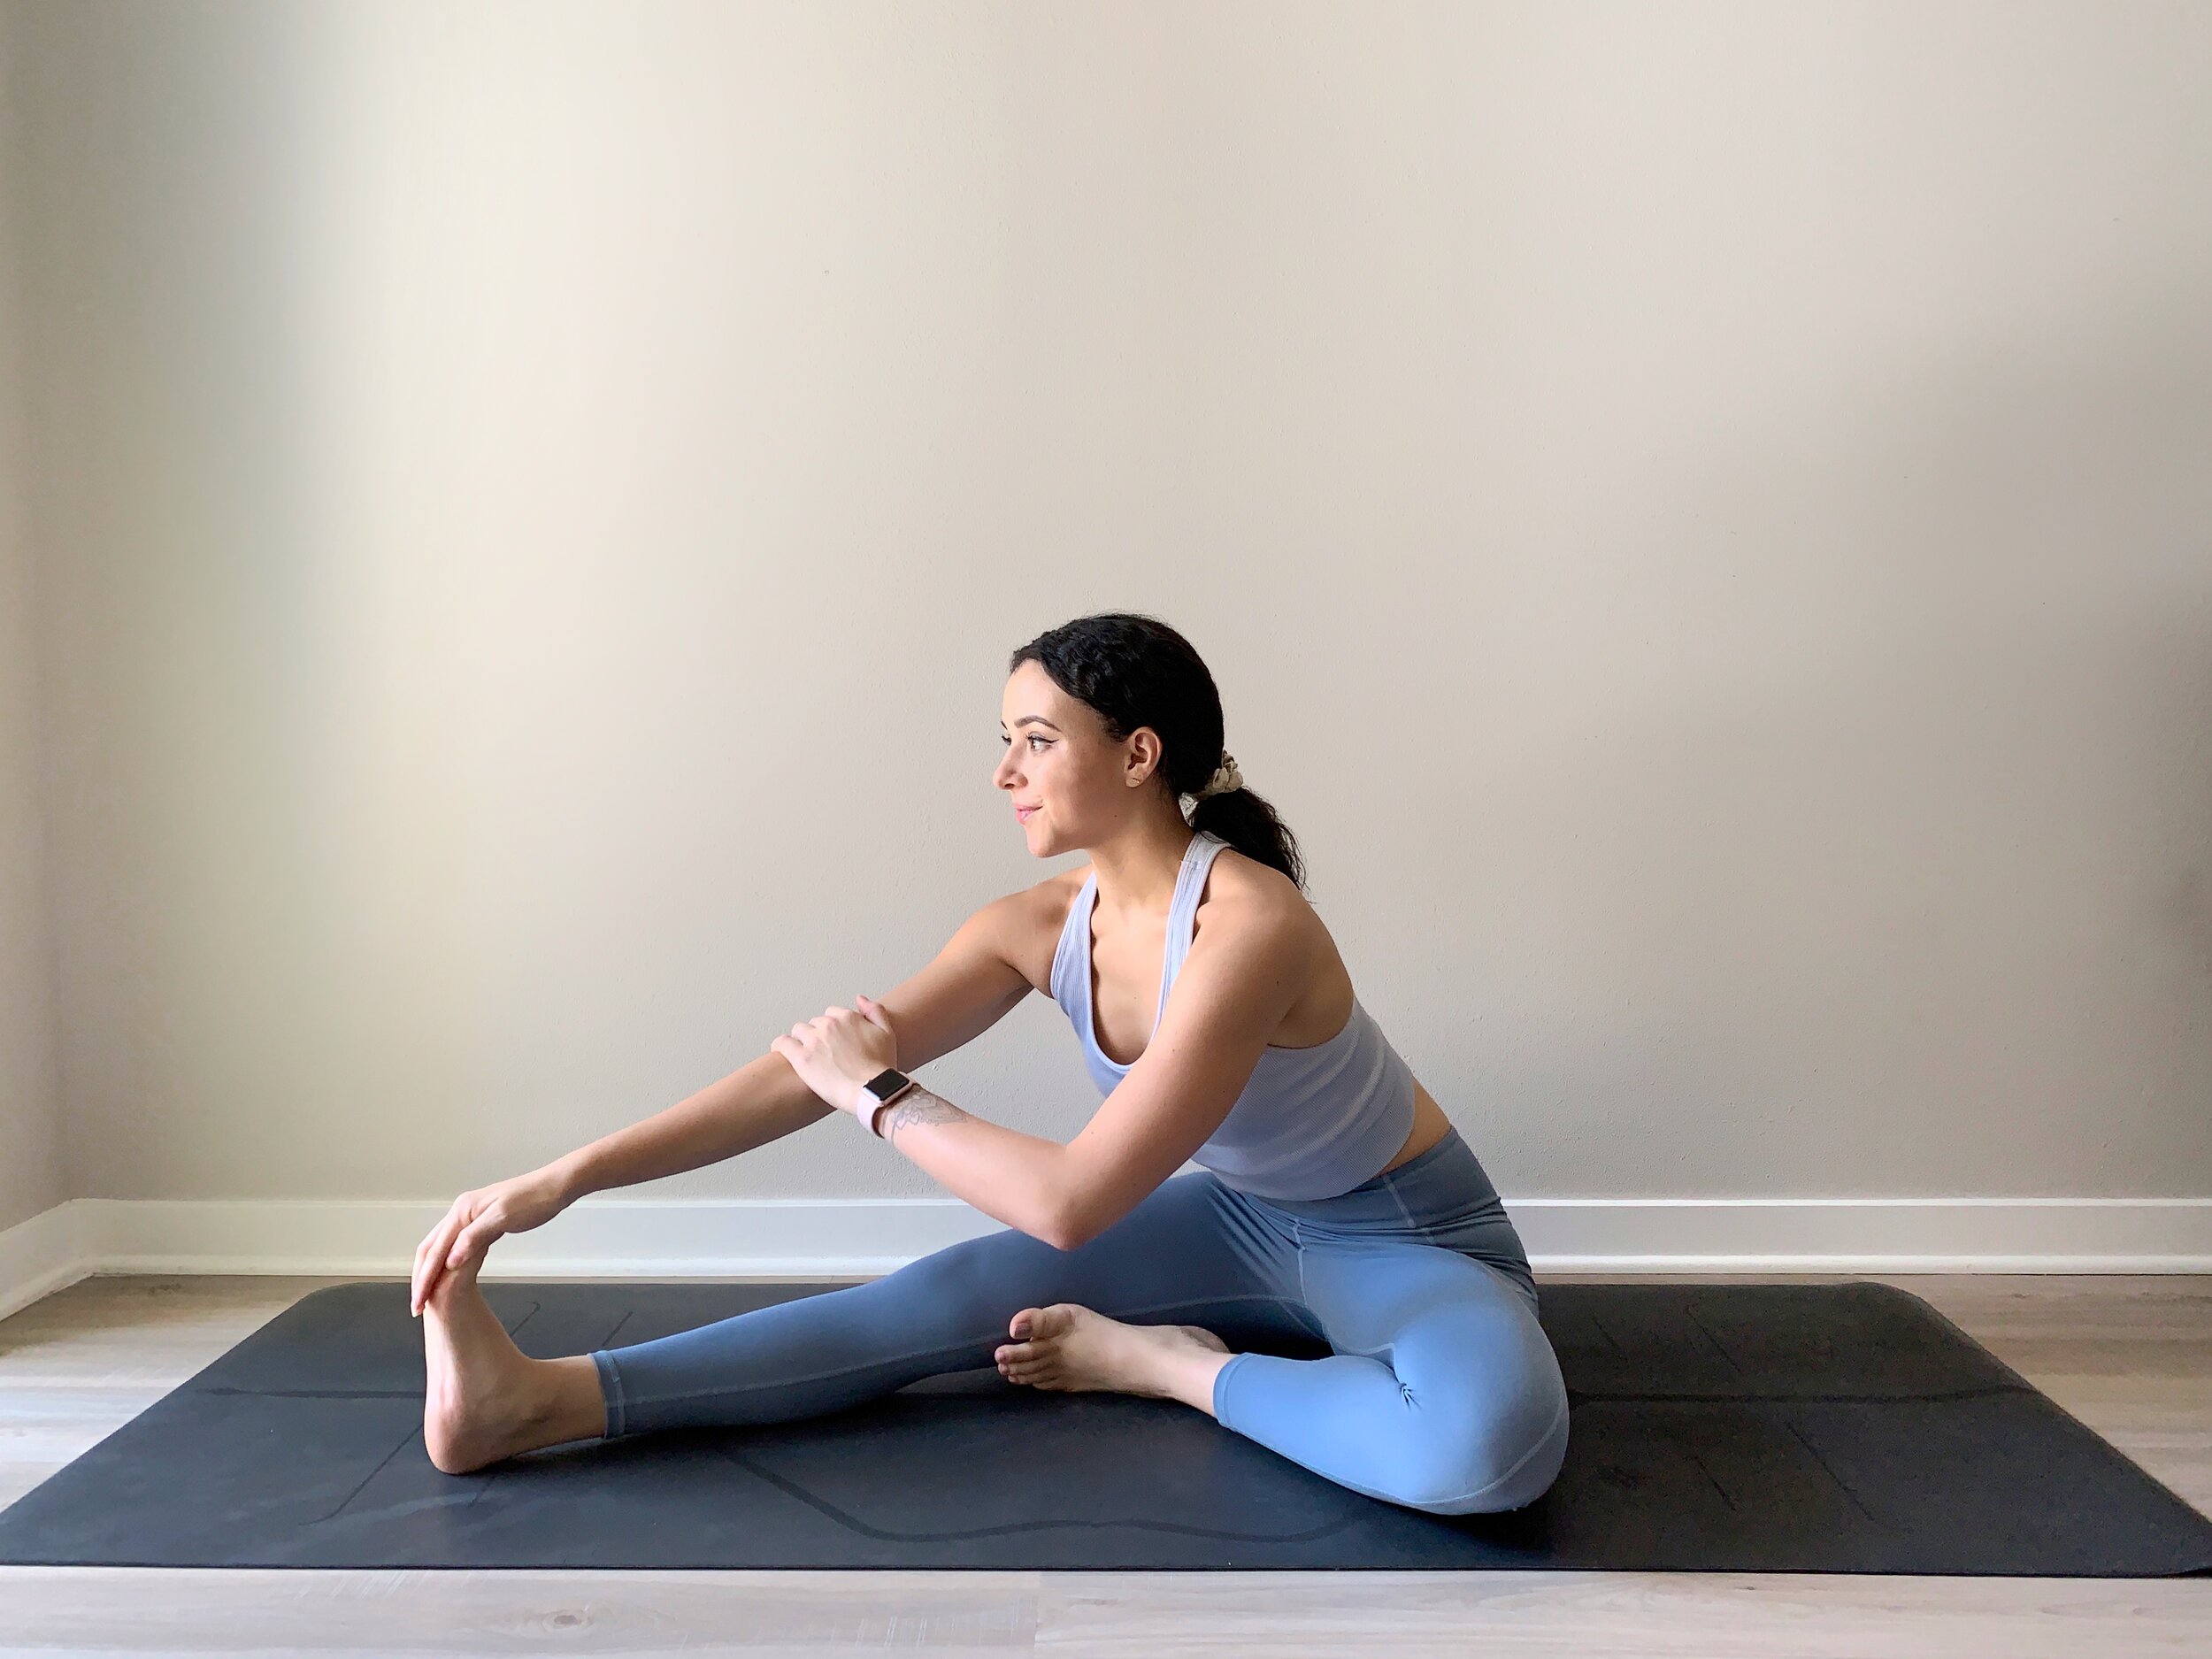
3.     Head To Knee Forward Bend Pose (Janu Sirsasana)

  • Sit on the floor with your feet together and your legs extended.

  • Bend your right knee and bring the sole of your right foot close to your left thigh.

  • Exhale as you hinge at the hips, slowly lower your torso and reach for your left foot.

  • Hold the pose for 30 seconds to 1 minute and then switch sides.

* Tip: Keep your spine long, lower and lengthen your torso until your chest and belly touch the thigh, and feel the stretch in the back of the extended leg. Lengthen through the spine as you inhale and, deepen the stretch as you exhale.

IMG_4433.JPG

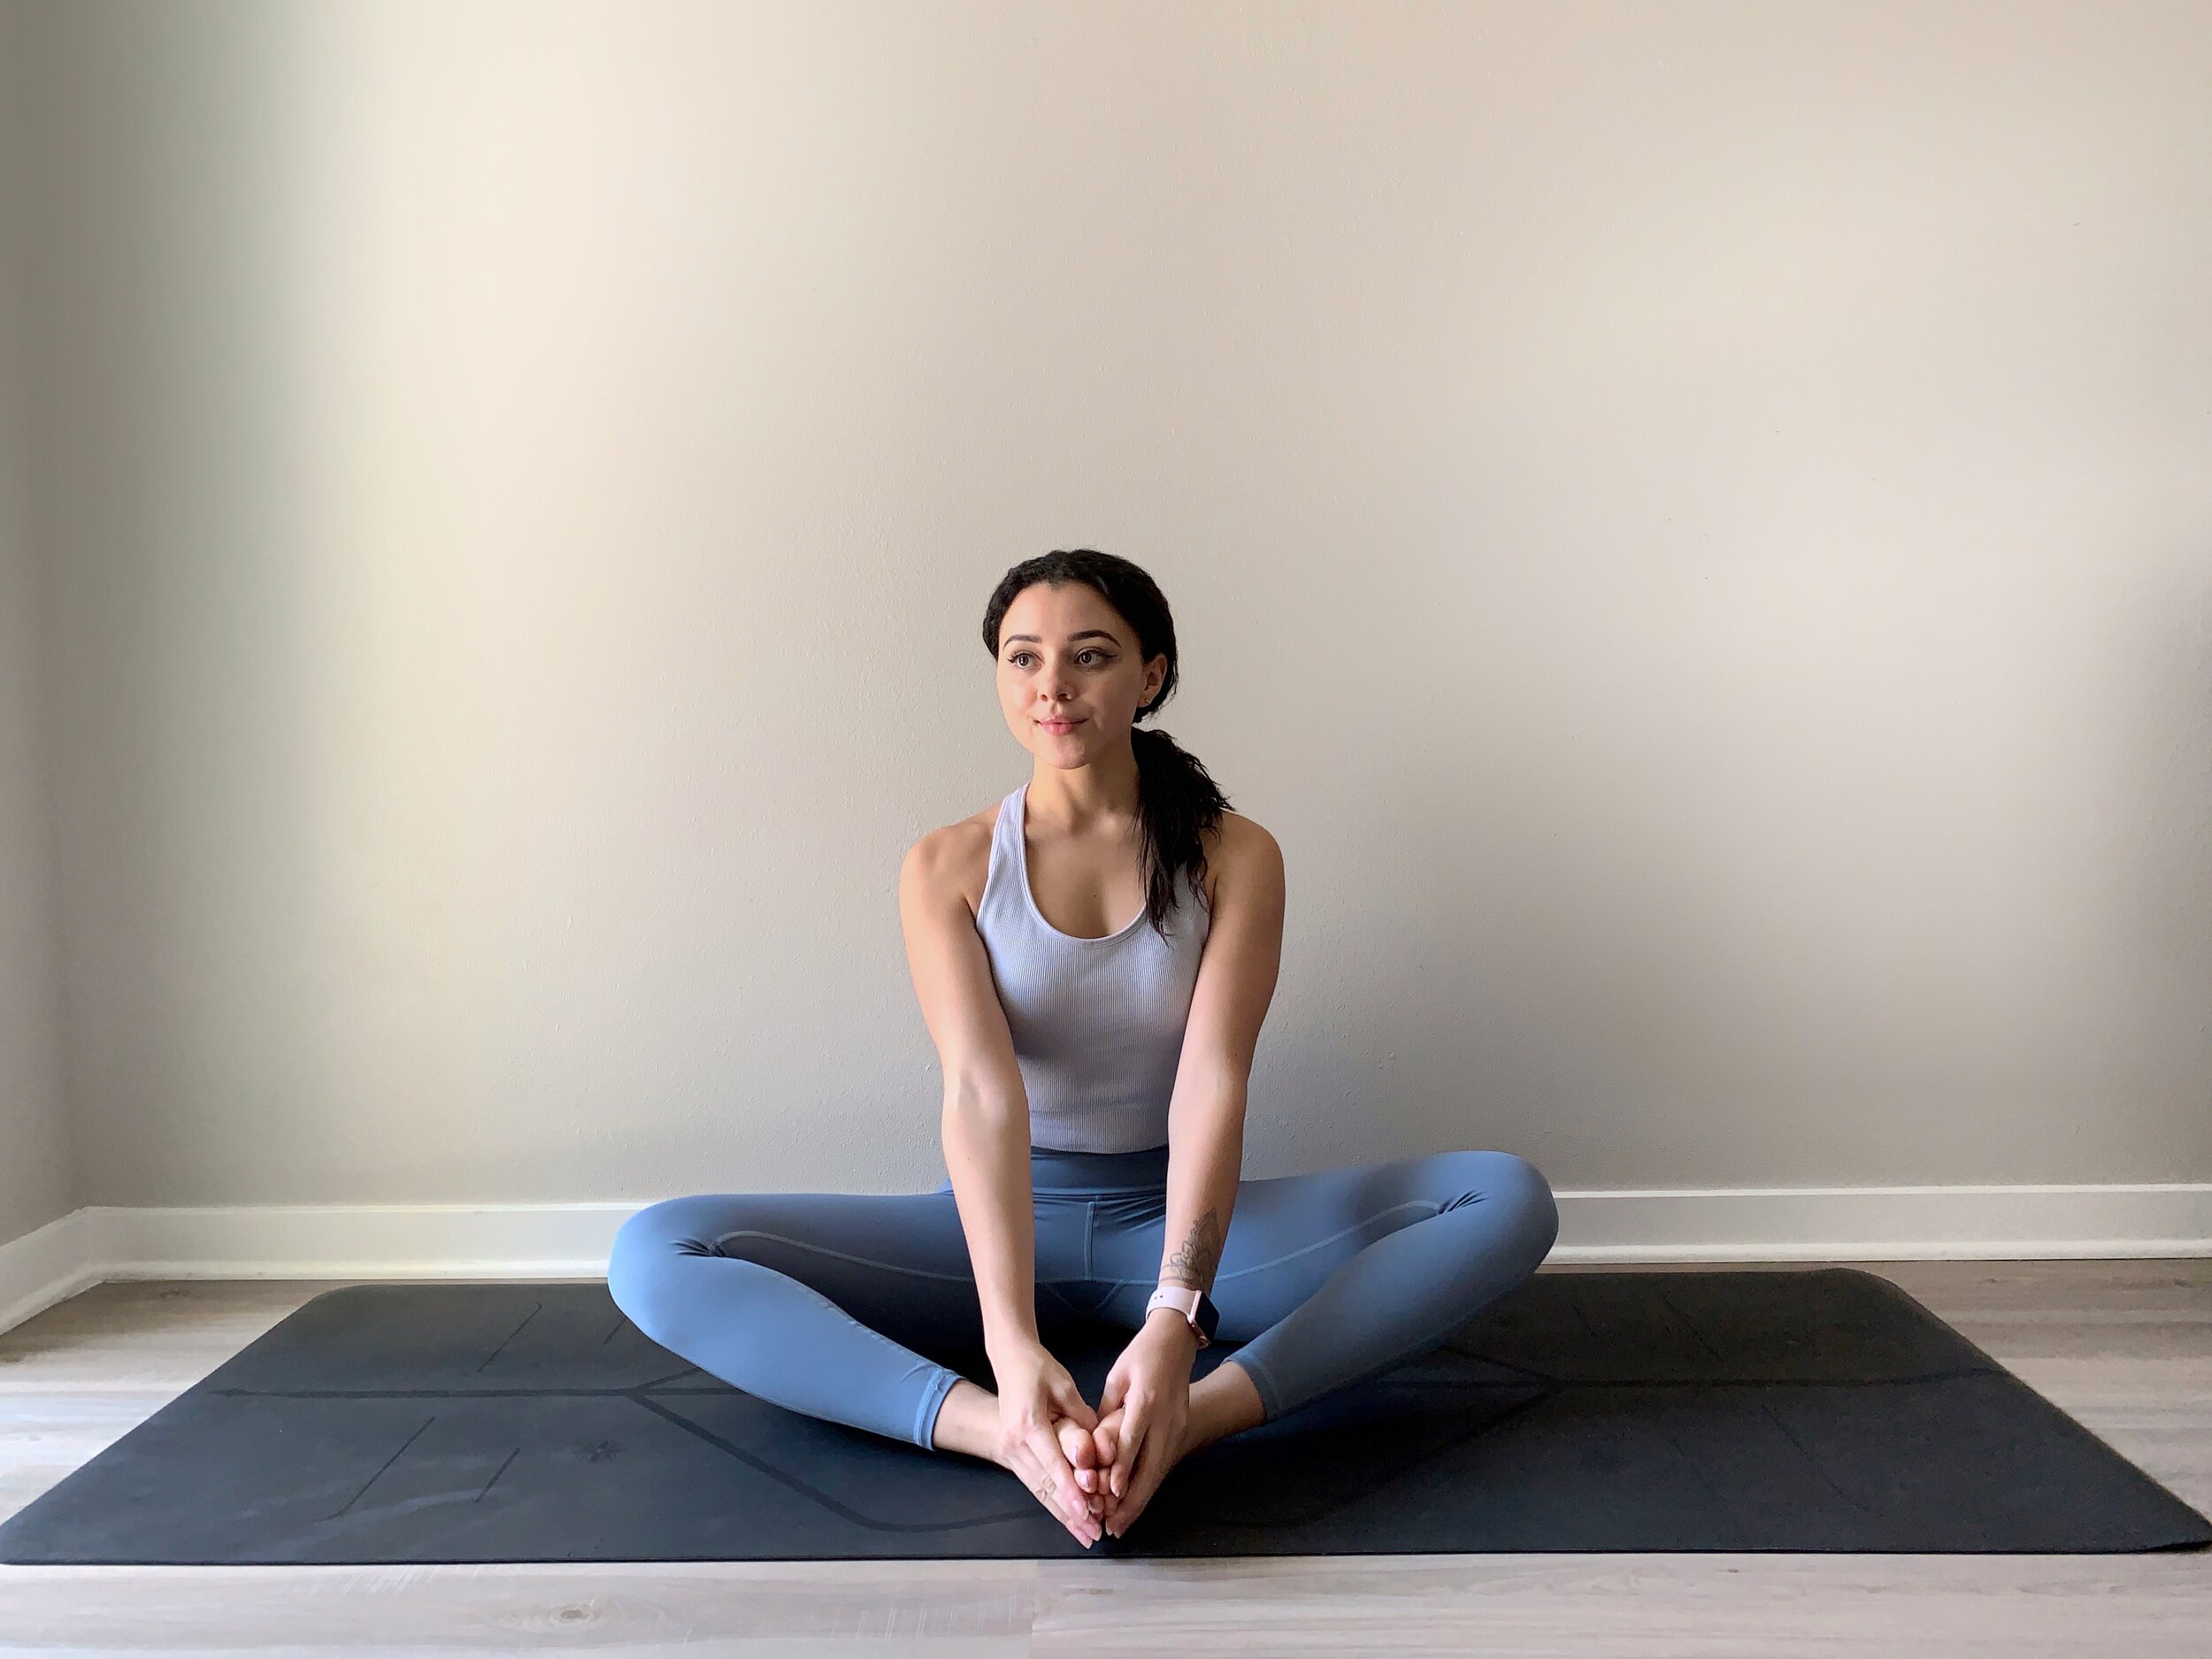
4.     Bound Angle Pose or Butterfly (Baddha Konasana)

  • Sit on the floor, bend your knees, press the soles of your feet together and drop your knees out to the sides.

  • Inhale to lengthen your torso, growing tall through the crown of your head. Grasp the tops of your feet with your hands, pressing the thumbs against the soles of your feet.

  • Hold the pose for 1 - 2 minutes.

* Tip: Bring your heels close to your pelvis, press the hips down, lengthen your spine, drop the shoulders down and back and open your chest. Option to fold forward for a passive stretch in the hips.

IMG_4432.JPG

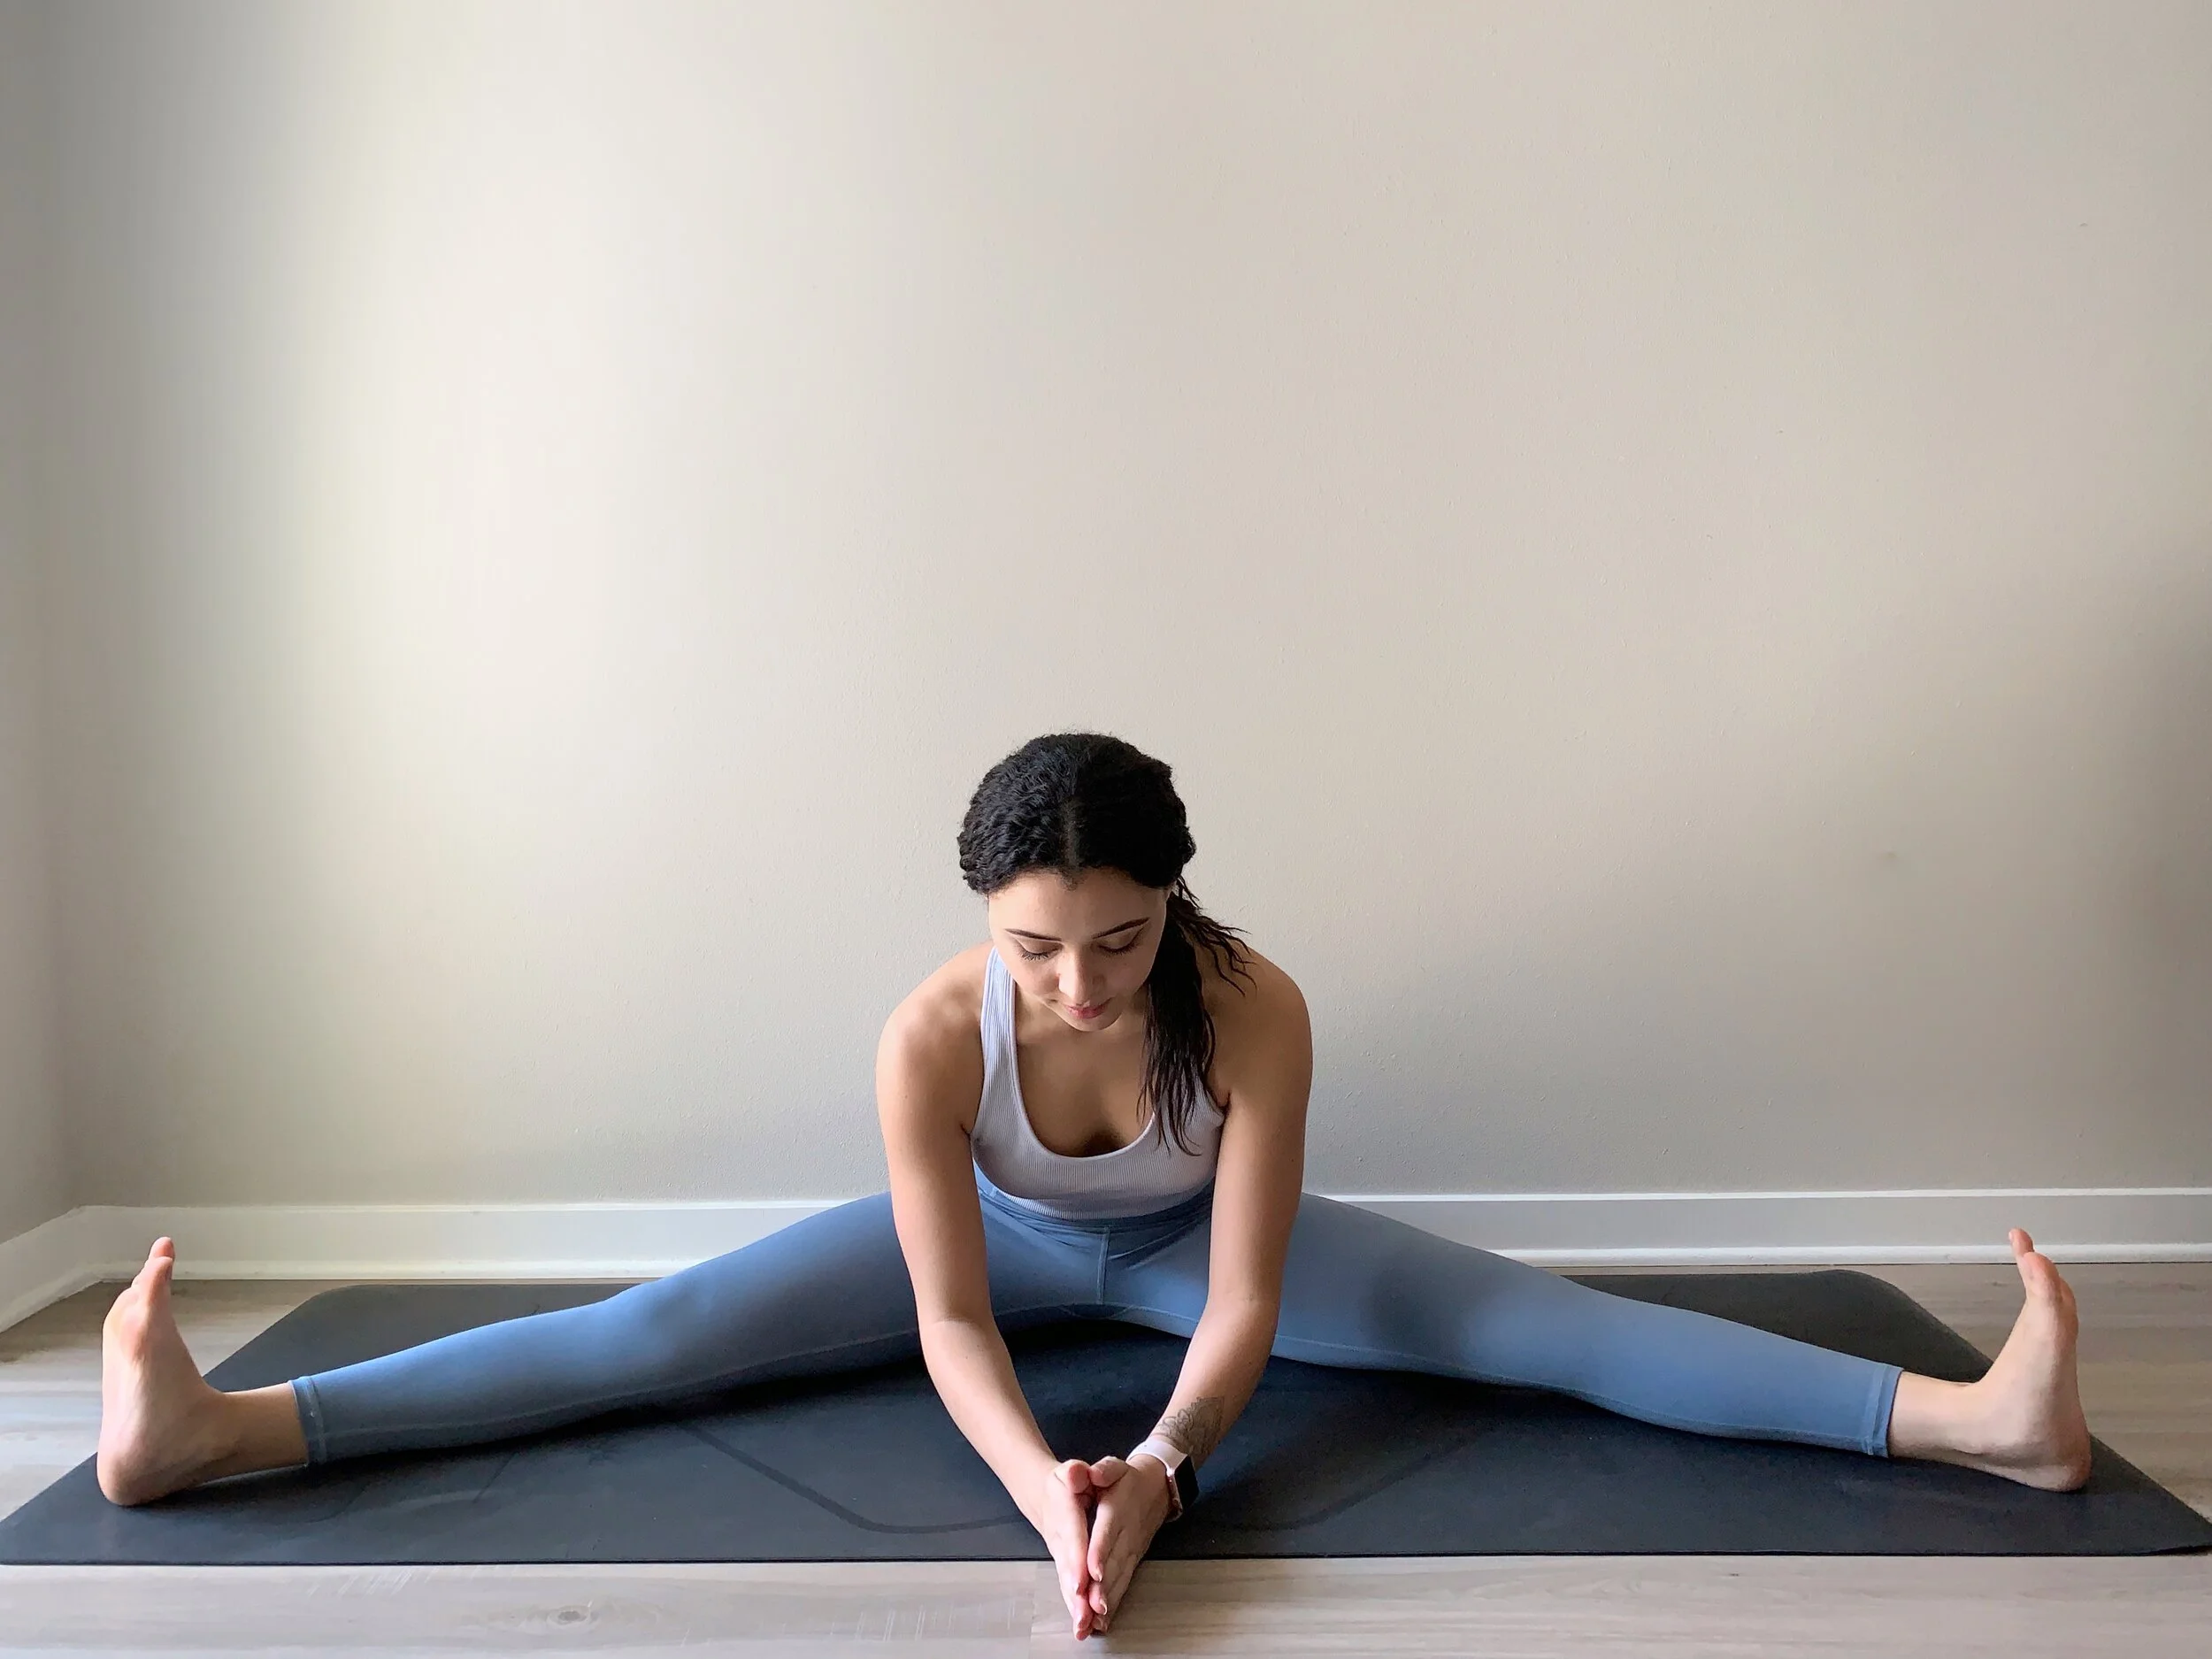
5.     Wide Legged Seated Forward Fold (Upavistha Konasana)

  • Begin seated in Staff Pose with a tall spine and your legs extended straight out in front of you.

  • Take your legs as wide as is comfortable, keeping the feet flexed and active so that the inner legs don’t collapse inwards.

  • Place your hands on the ground in front of you as you maintain length in the spine, keep your shoulders relaxed and your chest lifted. Inhale here.

  • As you exhale, slowly begin to walk your fingertips forward until you find an edge that feels appropriate for your body.

  • Hold the pose for 1 - 2 minutes.

* Tip: Keep the kneecaps pointing straight up toward the ceiling, with your heels rooting firmly into the ground. In your forward fold, if it feels comfortable, you can come down onto your forearms, or take your torso down onto the ground between your legs.

6.    Half Lord Of The Fishes - Version A (Ardha Matsyendrasana A)

  • Begin in Easy Pose, extend the right leg straight out in front of you, bend the left leg (or cross the left leg over the right), placing the left foot flat on the floor close to the right knee.

  • Place the left hand directly behind you. Wrap the right arm around the left knee and pull the knee in towards your chest. Press down through your hips and up through the crown of your head to lengthen the spine.

  • Hold the pose for 30 seconds to 1 minute and then switch sides.

* Tip: As you inhale press the hips down and reach the crown up to lengthen the spine. As you exhale use the arms to gently deepen the twist. Relax the shoulders down and press the chest open.

7.     Reclined Pigeon Pose (Supta Kapotasana)

  • Lie on your back with your knees bent and feet on the floor. Cross your left ankle over your right thigh with an inhale. 

  • Thread your left arm through your legs and interlace your hands behind your right thigh. Draw your thigh toward you with an exhale. Relax the shoulders and arms. Flex your feet.

  • Hold the pose for 30 seconds to 1 minute and then switch sides.

* Tip: Make sure you keep both hips pressed into the ground and distribute the weight evenly between both sides.

IMG_4423.JPG

8.     Reclined Cow - Face Pose (Supta Gomukhasana)

  • Lie on your back with your knees bent.

  • Stack your left knee over your right knee, winging your feet out to the sides slightly. Gently lift your right foot up off of the ground.

  • Take hold of the outer edge of your right foot with your left hand and the outer edge of your left foot with your right hand.

  • Gently press your knees away from chest and relax shoulders to the floor.

  • Hold the pose for 30 seconds to 1 minute and then switch sides.

* Tip: The more you bend your elbows towards the ground and flex your feet, the deeper you will get into the pose.

IMG_4438.JPG

9.     Final Resting Pose (Savasana)

  • Lie down flat on your back face up, separating your legs and letting the fleet splay apart. Place your arms alongside your body, palms facing up.

  • Close your eyes and relax. Release any tension from your body.

  • Take a couple of big deep breaths, lengthening your spine as you exhale.

  • Stay here for at least 2 minutes.

* Tip: Mentally scan your body from head to toe to help release any last bit of tension.


Practice with me in a 30-minute guided yoga class!

Introduction to Ayurveda

c6c95b8a77e56482fd3b4858a83ce8cd.jpg

WHAT IS AYURVEDA?

Ayurveda (pronounced ah-yoor-vay-dah) 

Ayurveda is a natural system of medicine which originated in India over 5,000 years ago and is the oldest continuously practiced health-care system in the world. The term Ayurveda is derived from the Sanskrit words ayur (life) and veda (science or knowledge), thus translating to knowledge of life. It is also commonly referred to as “Yoga’s sister science.”

Ayurveda takes a holistic, preventative and therapeutic approach to wellness + good health. One of the reasons why it is so unique compared to other holistic paths is because it addresses all aspects of one’s being: the physical, mental, emotional and spiritual body. It also places a large emphasis on preventive care. Prevention has always been the first and major goal of Ayurveda. Whereas modern day medicine uses temporary fixes for health problems, Ayurveda focuses on discovering the root of the problem and healing one from the inside out.

Ayurveda looks at each person as an individual, made up of the 5 elements of nature: space, air, fire, water and earth. These elements combine to create the doshas – the mind/body constitution of the person. Some people are more airy, spacy and ungrounded, creative, thin build (Vata dosha), some are more fiery and intense, sharp, medium build (Pitta dosha), and others are more earthy, sweet and content, more robust, and heavy build (Kapha dosha).

 
IMG_2240.JPG
 

Side note: Ayurveda in no way tries to box people into categories (which is one of the reasons why I’ve heard it turns people off from it) rather it provides us with an opportunity to learn more about ourselves and how our environment and lifestyle choices affect our body + mind. We can then choose (rather than live life blindly or in ignorance) what actions to take that will make us happy, healthy and content. *Suffering as they say is inevitable, but avoidable! 

While we are all a combination of these elements and specific doshas, one or two usually predominate. There is a combination of doshas we are born with, called our constitution, Ayurvedic body type, or prakriti. We also have a state of balance, vikriti, which represents the doshas that are elevated within our body at a given time. If the doshas accumulate beyond healthy limits (those determined by one’s constitution), they can create an imbalance in our health.

Ayurveda treats imbalances by changing habits of lifestyle such as the food we eat, the hours we work, how much we sleep, what sort of exercise we do, etc., we can begin to bring balance to our lives. Disease is also viewed as doshic, so by treating the area of imbalance we can help to mitigate disease.

Ayurveda’s goal is designed to promote human happiness, health and creative growth. It allows the healthy to maintain good health, and the dis-eased to regain their health. Most importantly, it recognizes that we are an active participant in our own path to healing and so it asks the patient to take their health and healing into their own hands. This process can be very empowering and life transforming!

I discovered Ayurveda shortly after beginning my yoga journey. I had a friend/mentor at the time who was an Ayurvedic practitioner and she introduced me to some of the ancient teachings. At the time I was battling hormonal imbalances — cystic acne, migraines and painful menstrual cycles. After learning more about my specific constitution, I was able to bring my health back into balance through a combination of herbs, diet and exercise change and other self-care practices. During both of my yoga teacher trainings, I’ve been able to delve deeper into the philosophy and science of Ayurveda. These teachings resonate with me deeply and now I’m so grateful to be able to have a better understanding of my own body and mind.

Essentially with Ayurveda, we find ways to “move” through the changes of life with ease and more awareness. I think it’s important to meet yourself where you are at and encourage yourself to commit to changing some of these old patterns to help promote longer lasting results. Because we are all different, Ayurveda’s treatments are specialized individually according to one’s constitution. It carries the idea that ”one man’s food, is another man’s poison.”

I encourage you to do your own research, if interested in learning more about Ayurveda, or your specific dosha, seek advice from an experienced Ayurvedic practitioner.

Pitta Season: 7 Tips to Stay Cool During Summer

AA1F8594-8526-4080-AA16-F33C1220EAA5.jpg

Summer, according to Ayurveda is dominated by Pitta dosha- which is made up of the elements of fire + water. This dosha is responsible for controlling digestion, metabolism and energy production. The primary function of Pitta (heat) is transformation. 

A fundamental principle of Ayurveda is that our daily habits, routines and food choices should change with the seasons. Seasonal living involves consciously making an effort to live in harmony with the cycles of nature and adjusting our lifestyles to accommodate the arrival of each new season.

How does Pitta manifest in the physical body?

We may experience excess heat manifesting in skin irritations (eczema flare ups, rashes, skin burning or reddening easily, redness or inflammation of the eyes, infections of the skin, etc), excess sweating or feeling of being hot, upset digestion (diarrhea or loose stools), inflammation of the joints (swollen and inflamed), etc. 

How does Pitta manifest in the mind?

Excess heat may manifest in anger, feeling easily irritated or frustrated, jealousy, resentment, criticism, judgement, etc. 

Read more: Introduction to Ayurveda

The Principle of opposites

In Ayurveda, like increases like while the opposite finds a state of equilibrium. So in the summer season dominated by heat, light and intensity, it’s important to counteract these Pitta qualities through lifestyle patterns that are cool, heavy and relaxing.

General Recommendations For Balancing Pitta Season

As someone who has a generous amount of Pitta in my own constitution, and knowing my tendencies to heat up during the warmest of seasons (especially now since moving to the desert in Phoenix), I’ve recently engaged in lots of heat reducing practices as part of my self-care regime to stay cool and collected. 

Here are some tips to beat the heat and stay balanced this summer:

1) Morning Routine

Wake up early, ideally between 5-7am. Early rising is a healthy rhythm to embrace in the summer. Scrape your tongue and drink plenty of water (even better if it’s cool/room temperature with lime or mint) to flush your digestive system before any food.

Before showering, massage the skin with a small amount of cooling oil, like sunflower, olive or grape-seed oil, to help ground the nervous system. Spray your face with rose water. Essential oils like geranium, lavender, lemongrass and sandalwood can be diffused or used topically to calm and bring Pitta into balance.

When it comes to your summer wardrobe, wear light clothing with cooling colors such as blue, purple and white. Wearing dark colors such as black on a hot summer day can actually aggravate Pitta and draw heat towards you. You can even take this a step further by decorating your living space with cool colors.

2) Mindfulness

Before jumping into the day, take time for introspective activities. This can be exercise, yoga, meditation (good time to practice mantras relating to letting go, softening, relaxing, etc.), walking in nature, breathing exercises, journaling or intention setting. It’s crucial to rest and relax to offset the intensity of the season.

It’s also important to watch your thoughts during the summer season because excess Pitta in the mind can bring anger, aggravation and overly critical thoughts. Being conscious of your emotional and mental state during this hot season may help you find internal balance. Encourage a calm mentality to find patience, tolerance and positivity in order to better enjoy your summertime. After all, everything starts in the mind!

3) Movement  

The best time to exercise is before 10am (10 - 2pm are hours during which Pitta is the highest). Try to keep your exercise moderate and avoid pushing yourself too hard. Ayurveda suggests to exercise at about 50–70% of your capacity. Try to exercise in a way that gives you energy and doesn’t leave you feeling exhausted or depleted. Exercise/activities that are too heating in nature may cause burn-out. Try to exercise indoors when possible, so that the body doesn’t overheat. Shower, swim or take a cooling bath after a heated activity.

Nature is always healing, and there is still benefit to enjoying the sun. Summer is an ideal time to be active in nature. Take time off to relax, visit the beach or lake and try swimming, kayaking, paddle boarding, surfing or sailing. When you do go outside be sure to protect your eyes and face from the sunlight.

4) Yoga

Try more cooling yoga practices like Yin, restorative or non-heated vinyasa. Chill out with twists (wrings out excess heat from the solar plexus where heat is generally stored) and practice in a sweet, gentle way as to not aggravate Pitta dosha. When we practice intensely, competitively, or critically we become more intense, competitive and critical of ourselves and others. When we integrate slow, calming, gentle, soft movements and mindset for our practice, we practice embodying those qualities into all aspects of our lives.


5) Diet Habits

Try to make lunch your biggest meal and aim to eat between 11-2pm. Ayurveda suggests that when the sun is at its strongest (midday) then our digestive fire (our agni) is also at its strongest, and that whatever mother nature is doing, we probably are too in some way, as we are a part of the environment as well.   

Your diet during the summer should consist of fruits and vegetables that help pacify Pitta. One of the best times to consume raw foods is during the summer, since metabolism is high and it can actually be soothing for the digestive system. Favor hydrating foods that are sweet or bitter in taste, such as cherries, apples, melons, kale, zucchini, cucumbers and chard. This is also the season for sweets, so feel free to enjoy ice cream, yogurt and other treats! The best grains for summer are barley, basmati rice and wheat. Summertime legumes include garbanzo beans, mung beans and split peas.

Eat meals in smaller quantities and in a peaceful environment. Avoid foods that are pungent, salty and sour. Spicy foods such as chilies and cayenne pepper should be avoided, along with red meats, fried foods and alcohol. If you can’t survive without a summer beer, just remember that moderation is key. Remember to stay hydrated with water throughout the day.

6) Midday/Evening Routine

Take a short walk, or at least 100 steps after eating to encourage healthy digestion.

On especially hot days, if you feel sluggish, worn down or dead in the afternoon, take a short nap to rest the mind (under 30 minutes).

Create a grounding night-time routine to prepare for bed. Some good practices you can adopt are applying oil to the scalp and the soles of the feet to calm the nervous system. Go to sleep around 10pm, as this will ensure 6–8 hours of sleep.

7) Healing herbs

Herbs are highly medicinal and balancing for both body and mind. Taking herbs at the same time each day and on an empty stomach and will enhance their medicinal effect. Herbs such as aloe vera juice (bitter and cooling), gaduchi, turmeric, neem and burdock for example support healthy liver function, reduces inflammation, heals irritated skin and membranes. 

Drinking tea made from herbs that are cooling, sweet and bitter can help reduce excess Pitta. Herbs such as nettle, oat straw, fennel, rose, hibiscus, spearmint and peppermint, can be enjoyed at room temperature or even slightly cooler during warmer days.

*Speak with an herbalist or Ayurvedic Practitioner for more info on dosage and using herbs for specific health conditions.

By changing your inner landscape to flow with the change to summer season, you can find harmony and balance within yourself. I hope you find these practices helpful!

Stay cool!

All my love,

Jess


Disclaimer: This article was written for educational purposes only and is based on the tradition of Ayurveda. It is not intended to treat, diagnose, prescribe or heal any health condition or to replace standard medical treatment or advice.

What Is Yin Yoga?

FullSizeRender 3.jpg

Yin Yoga is a passive type of yoga geared toward maintaining the health and fluidity of the joints and balancing the body's energies. Yin Yoga is often called the yoga of the joints because unlike other styles of yoga, the emphasis is not on the muscles but on the deep connective tissue. Connective tissue is made up of fascia, ligaments and tendons which surround and form your joints.

The poses in Yin Yoga are held for an extended amount of time. Beginners can hold poses for up to one minute, but more advanced practitioners can hold poses usually 2-5 minutes, sometimes longer. It applies moderate stress to the connective tissues, improves the range of motion in your joints and also strengthens them. Although your muscles will also be stretched, that is not the focus of the practice. It is best to practice yin yoga while your muscles are cold and not warmed up, even if that sounds counterintuitive. The reason we do this is so that we can send the "stress" and the "stretch" to the connective tissues. If the muscles are warm they will steal the focus away from the joints. You can use as many props as you need to in Yin Yoga. Blocks, bolsters and straps are all great ways to support your body to make sure you are respecting your edge and not going too far.

Four main principles when practicing Yin yoga:

  1. Find an appropriate edge: Move slowly and gently into the pose, and look for an appropriate amount of intensity, never stretch so far as to cause pain.

  2. Stillness: consciously try to release into the pose, and to remain still, without shifting position.

  3. Hold the position: begin by holding for 1-3 minutes gradually progressing to 5 minutes or more.

  4. Come out of the pose gently and slowly.


In this blog post, I will cover the history, philosophy and benefits of Yin Yoga and include a video to a full 1-hour Yin Yoga class on my Youtube Channel.

Yin Yoga History and Philosophy

There are two basic types of yoga, yin and yang. Yang Yoga works our muscles and Yin Yoga works our ligaments, joints and bones. In today’s yoga culture we mainly focus on the yang. In Vinyasa, Hatha, Power, Ashtanga, etc. the main focus is our muscles. But, in order to have a balanced practice and to avoid injury, we should also be practicing Yin Yoga.

Yin Yoga is thought by some to be the oldest form of Hatha Yoga. The roots of Yin Yoga are in India and China. Ancient yoga practitioners sat in poses similar to Yin poses during their meditation. In addition to this, thousands of years ago Kung Fu practitioners were taught to hold poses for an extended amount of time while practicing various breathing techniques.

Yin Yoga takes a more meditative approach, going much deeper than the physical focal points of Yang-related practice. It is proven that as you age, your joints become less flexible. So Yin Yoga makes sure the health and flexibility are maintained.

Yin yoga poses are also designed to improve the flow of qi (or chi) the subtle energy that, according to Chinese medicine, runs through the meridian pathways of the body. It is suggested that these meridians are created by our connective tissue and that the improved flow of qi improves organ health, immunity and emotional wellbeing.

Yin Yoga in the Western World

Yin Yoga was brought to the Western world in the 1970s by Paul Grilley. His original form of Yin Yoga was called Daoist Yoga, after changing the practice to help the body energetically it became what we know of as Yin Yoga today.

Paul Grilley’s book, Yin Yoga: Principles and Practice, is a great introduction to Yin Yoga if you want to learn more about the philosophy, concepts and postures, would highly recommend this book.

Sarah Powers was a student of Paul Grilley and helped him refine the practice. She is the one how ultimately came up with the name “Yin Yoga.”

Yin Yoga Benefits

There are many contraindications (including pregnancy) for yoga poses, which is why consulting your doctor before practicing yoga is essential. You should also have a certified yoga teacher to learn and practice under. 

Yin Yoga benefits are wide-ranging from the physical to the more subtle, energetic. It can be extremely helpful in having a balanced yoga practice.

Yin Yoga…

  • Increases circulation and improves flexibility

  • Calms and balances the mind + body

  • Reduces stress and anxiety 

  • Releases fascia

  • Encourages deeper relaxation

  • Improves joint mobility

  • Brings balance to the organs through meridian stimulation

  • Hydrates tissues and muscles

  • Detoxifies

  • Reduces degeneration of tissues

  • Balances prana

My History with Yin

I first experienced a Yin Yoga class in my 200-hr teacher training in Charlotte. It was a requirement for students to attend a certain amount of classes offered at the studio. The Yin class was in the evening and because I had already taken a Vinyasa class that morning, I decided to try something different.

After that first class I was hooked. It was so different from what I had ever practiced before. I remember walking out of that class feeling completely blissed out, calm and balanced. It was exactly what my mind and body needed and I could tell immediately that this was something that was missing from my yoga practice.

After just one time of practicing, I could feel the Yin Yoga benefits. But once I started a regular practice, those benefits increased dramatically. The biggest benefit I feel physically is the release of tension knots in my upper back and shoulders and mentally, Yin gives me the space to slow down.

My love for Yin only grew over the years. Eventually I decided that I wanted to continue learning and studying yoga. I ended up traveling to Goa, India for a month to complete a 300-hr Vinyasa and Yin Yoga teacher training. While I was there I became a certified Yin Yoga Teacher.

10 Yin Yoga Poses and their Specific Benefits

Pontoon: release hip flexors, quads and abdomen

FullSizeRender 5.jpg

Reclined Butterfly: stimulates abdominal organs, stretches the inner thighs, groins and knees and helps relieve the symptoms of stress, mild depression, menstruation and menopause.

FullSizeRender 14.jpg

Supported Fish: expands the chest and can relieve neck and shoulder tension

FullSizeRender 15.jpg

Caterpillar: stresses the ligaments along the back of the spine while compressing the stomach organs, which helps aid digestion

FullSizeRender 12.jpg

Sphinx or Seal: helps to open the front of the body, activates the ligaments along the spine and compresses the lower spine, sacrum and region of the kidneys and the adrenal glands

FullSizeRender 18.jpg

Child’s Pose: aids digestion, reduces stress

IMG_0498.jpg

Sleeping Swan: creates external rotation in the front leg, and targets the quads and hip flexors

IMG_0503.jpg

Deer Pose: helps to rotate hips, aids digestion, helpful during menopause and pregnancy, can be beneficial for those with high blood pressure and asthma

FullSizeRender 16.jpg

Saddle: targets the quadriceps and maybe a mild stimulation of the abdominals especially with the arms above the head

FullSizeRender 10.jpg

Corpse Pose: balances the nervous system by moving away from anxiety and hyper-stimulation to this state of relaxation where digestion, the immune system and other essential systems are restored and enhanced

FullSizeRender 13.jpg

Yin Yoga Video

This is a 60-Minute Yin Yoga practice including all of the postures listed above.

Props needed: two blocks. Optional: one blanket & one bolster.

There will be modifications and variations offered so that all levels can practice! I hope you enjoy.

Namaste,

Jessica

How To Embrace Mindfulness On Your Yoga Mat

Adjustments.jpeg

With the rise of advanced technology around social apps, live streams and video platforms, more and more people are starting to turn to online yoga. And there are many reasons why…

Read: Yoga At Home Vs. Yoga At A Studio

The main two being: it saves time and money. When practicing yoga at home, you set your own class time and you don’t have to worry about traveling and making it to the studio on time. You can practice at any time of day or night, depending on your schedule. This allows for more flexibility and gives you complete control over your practice. Practicing at home also tends to be cheaper than buying a membership to a studio. Thanks to platforms like YouTube, you can find many free videos and classes. For these two simple reasons, practicing yoga at home is a convenient choice for many.

However, the biggest disadvantage most people fine with practicing yoga at home is that it’s easier to become distracted or unmotivated. Without a class structure or teacher to hold you accountable, dedicating yourself to a home practice might be difficult.

Whether you are practicing yoga at home or at a studio, it’s important to learn how to develop a sense of mindfulness maintaining a moment-by-moment awareness of our thoughts, feelings, bodily sensations, and surrounding environment, through a gentle, nurturing lens. This allows us to stay focused in the present moment and avoid distractions.

Here are 7 useful tips to help you embrace mindfulness on your yoga mat:

  1. Remove distractions.

    If you must have your cellphone with you, cover it with something and place it at the back of your mat. If having your phone nearby isn’t a necessity, then keep all your personal belongings in a cubby, locker or outside of the yoga room. If you are practicing at home, turn your cellphone on silent or completely off to avoid being interrupted. Your practice area should only contain your mat and props needed for practice.

  2. tap into your own experience.

    Set up your practice space and before class starts either come to a seated position for some quiet meditation, or simply lie on the mat with your eyes closed. Although it’s great to practice with friends, it can take away from your own preparation for practice to be outwardly focused. In the first few moments, try to tune into how you feel. This is not to judge your experience or set unrealistic goals for yourself, but simply to begin the process of noticing and increasing your awareness.

  3. Set An intention.

    An intention, or Sankalpa, is simply a quality or virtue that you want to cultivate more of in your practice or in your life. This is best done at the beginning of your practice. An example could be, “I will give my focus to my breath throughout the practice”. You could even come up with a mantra or positive affirmation such as “I am peaceful” or “I am centered.” Setting an intention can be broad and rather general, or it can be very specific. When you notice your mind beginning to stray, return to your pose by reciting your intention in your head. This is one way we can live a more intentional life; we are starting to take our yoga "off the mat" and turning our practice into one of mindfulness.

  4. Resist the urge to compete.

    If you are practicing at a studio, this can be hard if the students around you are practicing advanced variations of the poses being presented. Do your best to stay connected to what makes the most sense for you in every pose. If you are practicing yoga at home, you may find yourself comparing your own practice to your teachers’ or the persons’ on the screen. Remember that comparison isn’t a healthy habit to have. Over time it can have a negative impact on your self-esteem and even start to affect your mental wellbeing. However it is fairly common, so if at times you find yourself falling into the comparison trap, don’t feel bad or judge yourself. Simply come back to your own practice and focus on what feels good to you.

  5. Be aware of emotions that come up — accept & then let go.

    Our practice can be a trigger to other emotions. It could be the teacher’s voice, something he or she brings up, your perceived level of ability to do a particular pose, or the person next to you and the sound of their breath. An important aspect of mindfulness involves acceptance, meaning that we pay attention to our thoughts and emotions without judging them—without believing, for instance, that there is a “right” or “wrong” way to think or feel. Use your practice as a chance to play with the idea of accepting and letting go of these emotions. Rather than rehashing the past or imagining the future, tap into your present experience by bringing awareness to your breath and physical practice.

  6. Pay attention to your body.

    Notice when your body is telling you it needs to rest or modify and honor it. Just as competing with others can pull us out of our own experience, forcing our body into certain poses and pushing beyond our physical limits will bring us out of awareness and into our heads. Stay connected to your breath and notice when you need to stop and take a break. If the breath starts to become uneasy or staggered or you feel any type of pain, come into Child’s Pose and take a moment to tune back in and rest.

  7. Take time for Savasana.

    Allow your body to come to a complete state of relaxation and let the mind do what it does. Some students will feel the urge to skip Savasana, but I truly believe this is one of the most important parts of the practice. After all, it is the end of the practice that sets the tone for how you will feel as you leave your practice. When you come into Savasana, it goes without saying that the idea is to physically relax. But, just as in meditation, if you find your mind wandering, let it do its thing.

    I hope these few tips provided you with fresh insight and inspiration to bring more mindfulness to your yoga mat!

    How do you stay mindful, present and aware in your yoga practice?

    Practice with me online!

I hope to meet you on the mat!

With love & gratitude,

Jess